Hearty Chicken Pot Pie: Flaky Perfection, Every Time
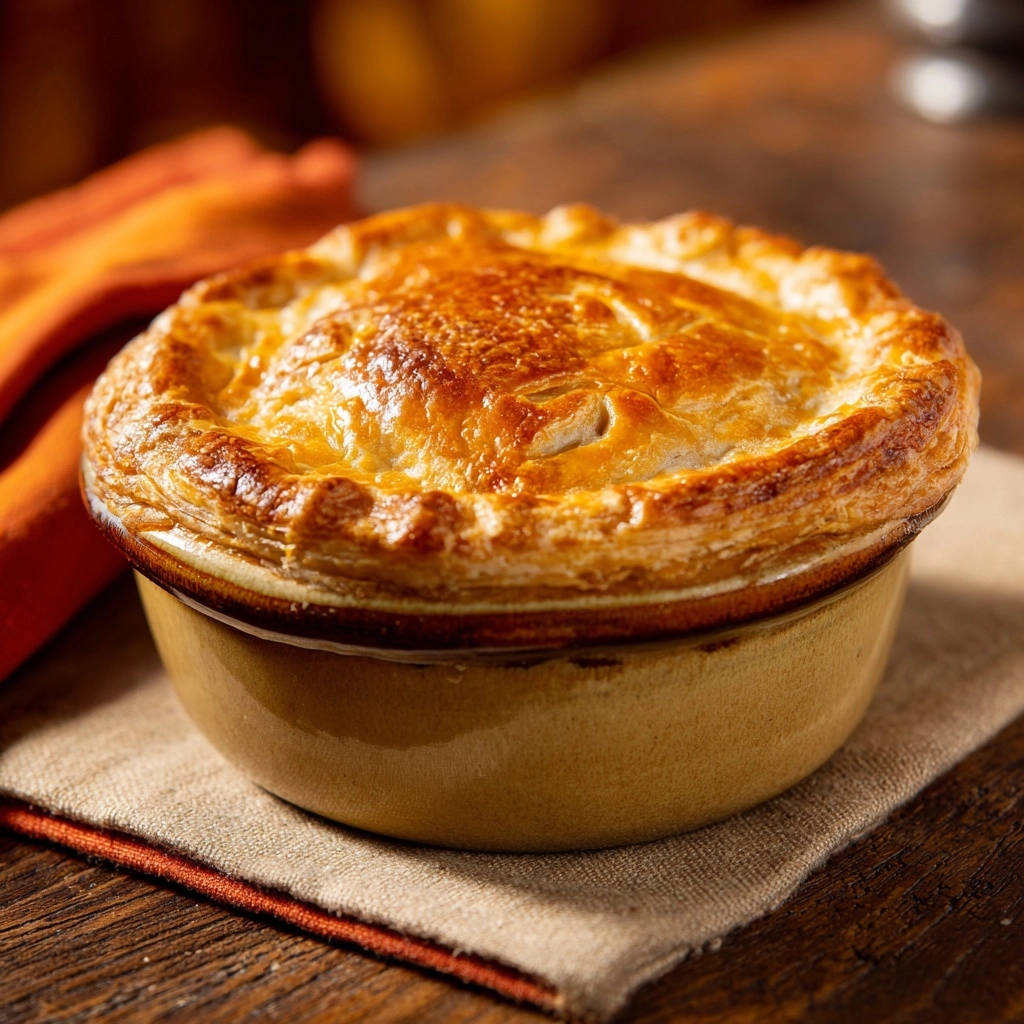
There’s a special kind of comfort that only a truly magnificent pot pie can deliver, but I’ve heard the sighs of frustration over flat, uninspired crusts too many times. I’ve cracked the code to achieving that gorgeous, puffed-up, golden top that transforms a simple meal into an impressive culinary triumph. This Hearty Chicken Pot Pie recipe isn’t just about a delicious filling; it’s about guaranteed flaky perfection that will make you feel like a kitchen wizard.
Why This Hearty Chicken Pot Pie Will Be Your New Favorite
The Guaranteed Golden, Puffed-Up Crust (Every Single Time!)
The secret to a show-stopping pot pie lies in its crown. This recipe prioritizes techniques to ensure your puff pastry rises dramatically and bakes to a deep golden hue, preventing the common disappointment of a soggy or flat topping.
You’ll learn simple yet effective steps to achieve that enviable flaky texture, making every spoonful an experience of comforting richness paired with delicate crispness.
Comfort in Every Individual Serving
There’s an undeniable charm to serving individual pot pies. Each ramekin offers a personalized, cozy experience, perfect for intimate dinners or when you want to make everyone feel extra special.
The portion-controlled servings are also fantastic for meal prepping, allowing you to enjoy this delightful comfort food throughout the week with ease.
Simple Steps, Impressive Results
Despite its elegant presentation and gourmet taste, this Hearty Chicken Pot Pie recipe is surprisingly straightforward. We break down each stage into manageable, easy-to-follow instructions.
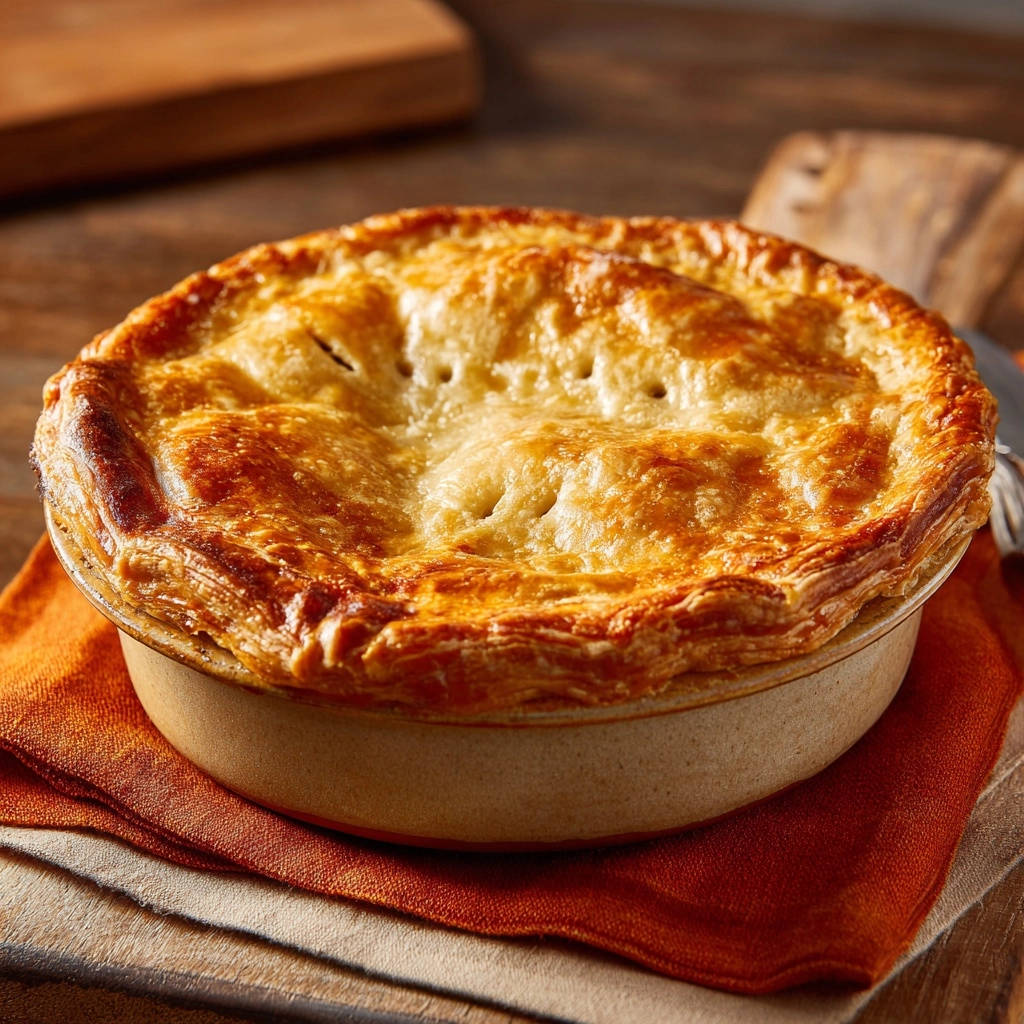
You don’t need to be an expert baker to create a dish that looks and tastes like it came straight from a five-star kitchen.
Gather Your Essentials: What You’ll Need for the Filling
The Savory Chicken & Veggie Medley
We start with shredded cooked chicken, making this an ideal recipe for using up leftovers or a rotisserie chicken for ultimate convenience. This ensures a tender, juicy protein base.
Diced yellow onion and carrots create a classic aromatic foundation, softening to release their sweet flavors. Frozen peas and corn blend add vibrant color, a touch of sweetness, and essential nutrients, rounding out the savory filling with a delightful texture.
Crafting the Creamy, Flavorful Sauce
Unsalted butter forms the base of our luxurious gravy, providing richness and a medium for sautéing the aromatics. All-purpose flour is key to creating a roux, which expertly thickens the sauce to that perfect, velvety consistency.
Chicken broth and milk combine to create a deeply flavored and creamy liquid for the filling. Dried thyme infuses the sauce with a warm, earthy essence, while salt and black pepper are crucial for balancing and enhancing all the incredible flavors.
The Star: Golden Puff Pastry
Good quality frozen puff pastry is our secret weapon for achieving that spectacular, airy crust without the effort of making it from scratch. Thawed puff pastry is incredibly versatile and puffs beautifully when baked correctly.
Its delicate layers are what give our pot pie that signature flaky texture, transforming a simple topping into a culinary masterpiece.
The Magic Touch: Egg Wash
A simple beaten large egg creates the essential egg wash. This isn’t just for aesthetics; it’s crucial for achieving that deep, irresistible golden-brown color and a beautiful, professional-looking sheen on your baked crust.
It also helps the pastry crisp up and provides a slight barrier, preventing the top from becoming too soft.
Kitchen Companions: Essential Tools for Pot Pie Success
Having the right tools on hand makes the cooking process smooth and enjoyable.
Your Trusty Ramekin
An individual oven-safe ramekin, approximately 10 to 12 oz capacity, is ideal for these personal pot pies. Its size ensures even cooking of both the filling and the pastry, and it presents beautifully straight from the oven.
Basic Prep Tools
Small Saucepan: Perfect for sautéing the vegetables and crafting the creamy filling.
Cutting Board and Knife: Essential for dicing your onions and carrots accurately.
If you enjoy the flaky crust and creamy filling here, try this creamy mushroom and chicken pot pie for a savory twist.
Whisk: Crucial for smoothly incorporating the flour into the butter and gradually whisking in the liquids to create a lump-free gravy.
Baking Sheet: Provides a stable surface for the ramekin in the oven, catches any potential drips, and promotes even heat distribution for the crust.
Your Step-by-Step Journey to Hearty Chicken Pot Pie Perfection
-
Prepping Your Workspace:
Preheat your oven to a precise 400 degrees Fahrenheit (200 degrees Celsius) to ensure it’s piping hot and ready for baking. A hot oven is key for puff pastry to rise correctly.
-
Building the Flavorful Filling Base:
In your small saucepan or directly in an oven-safe ramekin if it’s stovetop safe, melt the unsalted butter over medium heat.
Add the diced yellow onion and carrots, cooking them until they become tender and slightly translucent, which should take about 5 to 7 minutes. This step develops the sweet, aromatic base for your savory filling.
-
Adding the Stars:
Stir in the frozen peas and corn blend, along with your shredded cooked chicken. Mix well to combine all ingredients evenly.
Continue to cook for another 2 minutes, allowing the vegetables to thaw and the chicken to warm through, integrating all the flavors.
-
The Flour Thickener:
Sprinkle the all-purpose flour evenly over the chicken and vegetable mixture in the pan. This will begin the process of thickening our gravy.
Stir thoroughly and cook for 1 minute, ensuring the flour fully absorbs the butter and coats all the ingredients. This crucial step cooks out the raw flour taste and creates a proper roux for a smooth, rich sauce.
-
Creating the Creamy Gravy:
Gradually whisk in the chicken broth and milk, adding a little at a time while stirring constantly. This prevents lumps and helps the sauce come together smoothly.
Continue to stir until the mixture thickens to a lovely gravy consistency, coating the back of a spoon. Finally, stir in the dried thyme, salt, and black pepper to taste, adjusting the seasoning to achieve perfect balance.
-
Transferring to Ramekin (If Needed):
If you prepared the filling in a saucepan, carefully transfer the hot mixture now into an individual oven-safe ramekin (approximately 10 to 12 oz capacity).
Ensure the ramekin is adequately filled, leaving about a quarter-inch space from the top for the pastry to expand beautifully.
-
Crafting Your Puff Pastry Crown:
Unroll the thawed puff pastry sheet onto a lightly floured surface to prevent sticking. Working with thawed but still cold pastry is key for clean cuts.
Using a sharp knife or a cookie cutter, cut out a circle or square of pastry that is slightly larger than the top opening of your ramekin. This allows for a good seal around the edges.
-
Sealing the Deal:
To ensure a strong seal and promote that beautiful puff, lightly moisten the rim of the ramekin with a little water using your fingertip or a pastry brush.
Carefully place the puff pastry circle or square over the filling, gently pressing it down to firmly seal it to the moistened rim. Trim any excess pastry that hangs over the edge for a neat, professional finish.
-
The “Puff” Secret Revealed:
This is a critical step for achieving the signature high puff: using a small, sharp knife, cut 2 to 3 small slits directly in the center of the pastry.
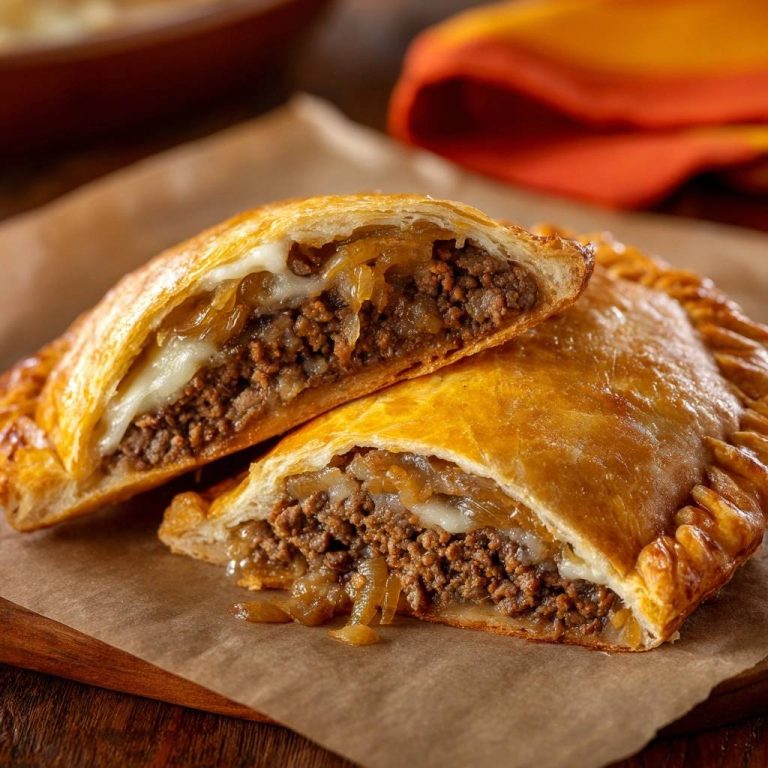
For a more personal touch, these individual chicken pot pies deliver that same flaky crust in single servings.
These vents are essential escape routes, allowing steam to release during baking. This prevents a soggy crust and ensures a magnificent, even rise.
Then, generously brush the entire surface of the puff pastry with the beaten egg wash. This wash is vital not just for imparting a deep golden color and a beautiful, glossy sheen, but also for contributing to a crispier finish.
-
Baking to Golden Grandeur:
Place the ramekin on a sturdy baking sheet. This ensures stability, catches any potential drips, and helps promote even heat distribution for a consistent bake.
Bake for 20 to 25 minutes, or until the pastry is deeply golden brown, magnificently puffed, and completely cooked through. If you notice the crust browning too quickly, you can loosely tent it with aluminum foil during the last few minutes, but generally, the direct heat helps it puff up most effectively.
-
The Moment of Truth: Resting and Serving:
Carefully remove your Hearty Chicken Pot Pie from the hot oven. The filling will be extremely hot.
Let it rest for a crucial few minutes before serving. This allows the incredibly hot filling to set slightly and cool down to a more enjoyable temperature, preventing accidental burns and ensuring the flavors meld perfectly.
Unlocking the Golden Secret: Achieving That Signature Puffed Crust
A truly spectacular Hearty Chicken Pot Pie hinges on that glorious, puffed-up crust. Here’s a deeper dive into the ‘why’ behind our methods:
Why Moistening the Rim Matters: A small amount of water on the ramekin’s rim acts as a natural adhesive. It helps the puff pastry adhere firmly, creating a tight seal. This initial seal traps steam, which then drives the dramatic lift and separation of the pastry layers, leading to that signature puff.
The Crucial Role of Steam Vents: The 2-3 small slits you cut in the pastry top are more than just decorative. They are critical steam vents. As the pot pie bakes, steam builds up from the hot, moist filling. Without these vents, the steam would either escape haphazardly, resulting in an uneven puff, or worse, create a soggy, dense crust.
Egg Wash: Beyond Just Color: While egg wash undeniably creates that deep golden hue and glossy finish, its benefits extend further. It helps seal the surface of the pastry, locking in moisture while baking, and contributes to a crispier, more appealing top layer, significantly enhancing the overall texture of the pot pie.
Temperature is Key: Ensuring your oven is fully preheated to the specified temperature (400°F/200°C) is non-negotiable for puff pastry. The high initial heat creates a sudden burst of steam within the pastry layers, which forces them apart rapidly and dramatically. This “thermal shock” is what causes puff pastry to rise so beautifully and quickly.
Beyond the Classic: Creative Twists for Your Pot Pie
Protein Swaps and Additions
While chicken is a classic, feel free to experiment. Leftover roasted turkey is an excellent substitute, especially after holidays. For a heartier alternative, consider tender pieces of cooked roast beef or even ground meat.
For a vegetarian option, use hearty chickpeas, cooked lentils, or crumbled plant-based chicken alternatives, ensuring they are seasoned well to absorb the rich gravy flavors.
Seasonal Vegetable Explorations
Beyond peas and corn, the filling is a canvas for your favorite vegetables. Sautéed mushrooms add an earthy depth, while fresh spinach wilts beautifully into the creamy sauce.
Diced sweet potatoes or butternut squash can introduce a lovely sweetness and texture, particularly in the autumn months.
Crust Alternatives
If puff pastry isn’t your preference, consider other delicious toppings. A traditional pie crust, either store-bought or homemade, offers a different kind of flaky texture. Biscuit dough, cut into rounds and placed on top, creates a wonderfully soft, scone-like finish.
For those avoiding gluten, many excellent gluten-free puff pastry brands are now available, ensuring everyone can enjoy this comfort classic.
Dietary Adaptations (Dairy-Free, Gluten-Free)
Making this pot pie dairy-free is simple: use a plant-based butter and unsweetened plant-based milk (like almond or oat milk) in the filling. The gravy will still thicken beautifully.
Great Sides for Chicken Pot Pie
A hearty chicken pot pie with its flaky crust and creamy filling calls for sides that offer a contrasting texture and brightness.
- A creamy poppy seed coleslaw adds a cool, crunchy contrast to the warm, rich pot pie.
- If you prefer a tangier bite, this Southern style coleslaw brings a sharp vinegar kick that cuts through the pot pie’s richness.
For a gluten-free version, replace the all-purpose flour with a 1:1 gluten-free flour blend and opt for gluten-free puff pastry. Ensure your chicken broth is also certified gluten-free.
Perfect Pairings: What to Serve Alongside Your Pot Pie
While this Hearty Chicken Pot Pie is a meal in itself, pairing it with a simple side can elevate the dining experience. Consider a fresh, crisp green salad with a light vinaigrette to cut through the richness of the creamy filling and provide a refreshing contrast.
Crusty bread is perfect for soaking up any extra gravy. Alternatively, a side of perfectly cooked crispy baked asparagus can also make an excellent, wholesome companion, adding a touch of vibrant green and a healthy crunch.
Plan Ahead: Make-Ahead & Storage Tips for Busy Cooks
Prepping Components in Advance
The chicken and vegetable filling can be made entirely ahead of time. Prepare it up to the point of thickening the gravy, then cool it completely and store it in an airtight container in the refrigerator for up to 2-3 days.
When ready to bake, simply spoon the chilled filling into your ramekins, top with fresh puff pastry, and proceed with baking.
Storing Leftovers Safely
Baked Hearty Chicken Pot Pie leftovers should be cooled completely before being stored in an airtight container in the refrigerator. They will remain delicious for up to 3-4 days.
Keep the individual servings separate if possible to maintain quality.
Reheating for Optimal Enjoyment
To reheat individual pot pies and preserve that coveted crispy crust, the oven is your best friend. Preheat your oven to 300°F (150°C), place the pot pie on a baking sheet, and heat for 15-20 minutes, or until warmed through and the crust is crisp again.
An air fryer also works wonderfully for reheating, delivering a remarkably crispy crust in about 8-10 minutes at 325°F (160°C).
Pot Pie Pitfalls? Common Problems & Quick Fixes
Crust Not Puffing or Browning
Solution: Double-check your oven temperature; it needs to be sufficiently hot. Ensure your puff pastry is properly thawed but still cold, not warm and sticky. Make sure you’ve cut those essential steam vents, and don’t skip the generous egg wash for that rich golden color.
Soggy Bottom
Solution: While less common with puff pastry tops, a soggy filling can affect overall texture. Ensure your filling isn’t excessively watery. If using a standard pie crust for the bottom, a quick pre-bake can help prevent sogginess.
Filling Too Thin or Thick
Solution: If the filling is too thin, create a quick slurry with a teaspoon of cornstarch mixed with a tablespoon of cold water, then whisk it into the simmering filling until thickened. If it’s too thick, simply whisk in a splash more chicken broth or milk until it reaches your desired consistency.
Pot Pie is Too Salty or Bland
Solution: If it’s too salty, a dash of vinegar or lemon juice can sometimes help balance it, or adding a small amount of unsalted chicken broth. If bland, don’t be afraid to adjust seasoning with a bit more salt, pepper, or dried thyme before adding the pastry. A pinch of garlic powder or onion powder can also boost flavor.
Your Pot Pie Questions Answered: Expert Insights
Can I use homemade puff pastry instead of frozen?
Absolutely! If you have the time and skill, homemade puff pastry will deliver an even richer flavor and texture. Just ensure it’s properly chilled and handled according to your recipe’s instructions before using it as a topping for your Hearty Chicken Pot Pie.
What if I don’t have individual ramekins?
You can certainly make a larger Hearty Chicken Pot Pie in an 8×8 inch baking dish or a 9-inch pie plate. Simply adjust the puff pastry size to cover the entire top. You will need to increase the baking time slightly, typically by 10-15 minutes, but always watch for that deeply golden brown and beautifully puffed crust.
Can I freeze the assembled pot pie before baking?
Yes, you can! Assemble the pot pie in its ramekin, but do not bake. Cover it tightly first with plastic wrap, then with aluminum foil, and freeze for up to 2-3 months. When ready to bake, remove the plastic wrap, but keep the foil. Bake from frozen, adding about 15-20 minutes to the original baking time, removing the foil for the last 10 minutes to allow for browning. For another way to easily prepare chicken for dishes like this, consider checking out our recipe for Golden Slow Cooker Lemon Herb Chicken.
How do I make this vegetarian?
To make a delicious vegetarian pot pie, simply omit the shredded chicken and use vegetable broth instead of chicken broth in the filling. You can replace the chicken with additional hearty vegetables like diced potatoes, sautéed mushrooms, cauliflower florets, or even cooked lentils or chickpeas for added protein and texture. Ensure your vegetarian additions are cooked tender-crisp before adding them to the sauce.
Ready to Create Your Own Hearty Chicken Pot Pie Masterpiece?
Now that you’re armed with the secrets to a truly spectacular Hearty Chicken Pot Pie, it’s time to gather your ingredients and get cooking. Say goodbye to flat, sad crusts and hello to golden, puffed perfection every single time. This ultimate comfort food is waiting for you to bring it to life!
We encourage you to share your culinary creations with us! Snap a photo of your magnificent Hearty Chicken Pot Pie and tag us on social media. Happy baking, and enjoy the ultimate cozy meal!
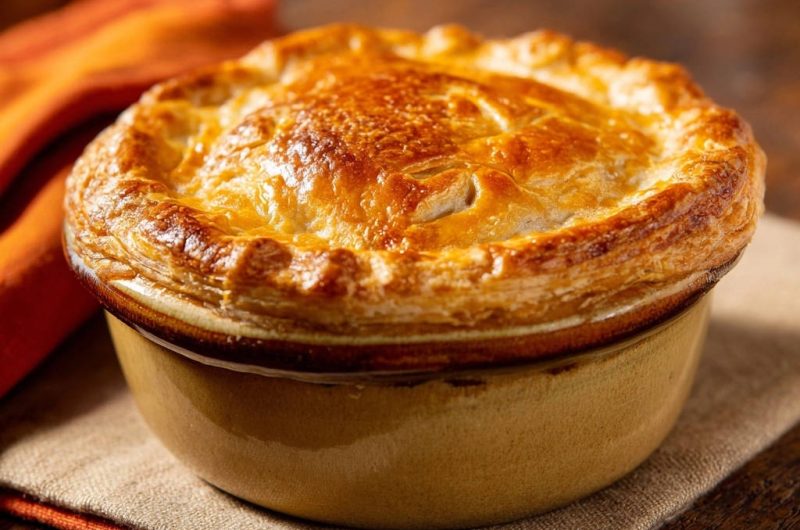
Chicken Pot Pie
Course: Main CourseCuisine: AmericanDifficulty: easy1
serving15
minutes40
minutes650
kcal60
minutesSay goodbye to flat crusts and hello to a show-stopping meal! This recipe ensures a gorgeous, puffed-up golden crust every time on your comforting chicken pot pie. Featuring tender chicken and vegetables in a creamy gravy, topped with flaky puff pastry for an irresistible dish.
Ingredients
1 tablespoon unsalted butter
1/4 cup diced yellow onion
1/4 cup diced carrots
1/4 cup frozen peas and corn blend
1/4 cup shredded cooked chicken
1 tablespoon all-purpose flour
1/2 cup chicken broth
1/4 cup milk
1/4 teaspoon dried thyme
Salt and black pepper to taste
1 sheet frozen puff pastry, thawed
1 large egg, beaten
Directions
- Preheat oven to 400 degrees Fahrenheit (200 degrees Celsius).
- In a small saucepan or oven-safe ramekin over medium heat, melt the butter. Add the diced onion and carrots, cooking until softened, about 5 to 7 minutes.
- Stir in the frozen peas and corn blend, and the shredded cooked chicken. Cook for 2 minutes.
- Sprinkle the flour over the vegetable and chicken mixture. Stir well and cook for 1 minute, allowing the flour to absorb the butter and coat the ingredients.
- Gradually whisk in the chicken broth and milk, stirring constantly until the mixture thickens to a gravy consistency. Stir in the dried thyme, salt, and black pepper.
- If using a saucepan, transfer the filling to an individual oven-safe ramekin (approximately 10 to 12 oz capacity).
- Unroll the thawed puff pastry sheet onto a lightly floured surface. Using a knife or cookie cutter slightly larger than the top of your ramekin, cut out a circle or square of pastry.
- To ensure a golden, puffed top: Lightly moisten the rim of the ramekin with a little water. Place the puff pastry circle or square over the filling, pressing gently to seal it to the rim. Trim any excess pastry.
- This is key for achieving the puff: Cut 2 to 3 small slits in the center of the pastry to allow steam to escape. Then, brush the entire surface of the puff pastry generously with the beaten egg wash. The egg wash is vital for that deep golden color and a beautiful sheen.
- Place the ramekin on a baking sheet to catch any potential drips and ensure even cooking.
- Bake for 20 to 25 minutes, or until the pastry is deeply golden brown and beautifully puffed. If it’s browning too quickly, you can loosely tent it with foil during the last few minutes, but generally, the direct heat helps it puff.
- Carefully remove from the oven and let it rest for a few minutes before serving.
Notes
- The egg wash and steam vents are crucial for a perfectly golden and puffed pastry crust. Resting after baking is recommended.