Red Velvet Cake with Chocolate Frosting
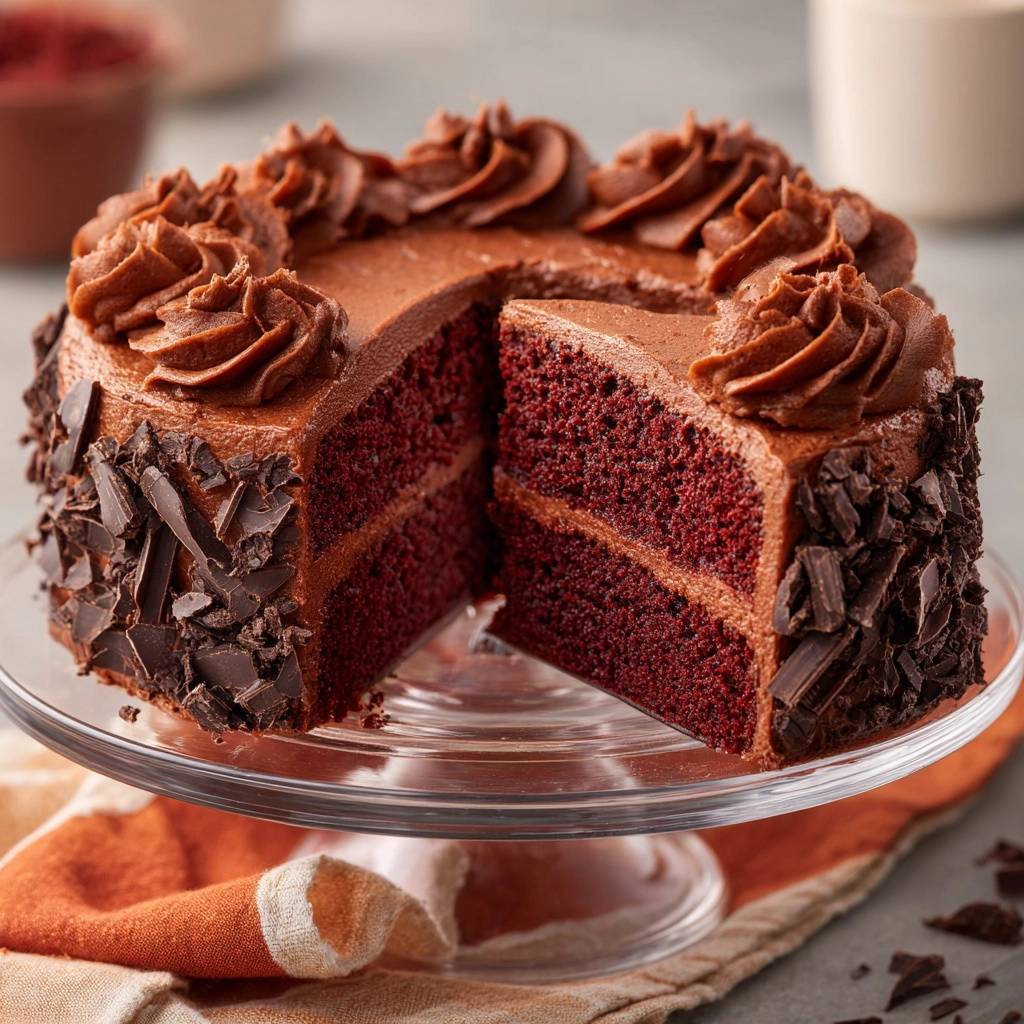
Why This Moist Red Velvet Cake Stands Out
Ever bitten into a red velvet cake that’s dry as cardboard? You’re not alone. Most home bakers struggle with that crumbly texture because traditional butter-based recipes lose moisture in the oven. However, this red velvet cake with chocolate frosting changes everything with an oil-buttermilk mixing method that traps every bit of tenderness.
That’s why it’s perfect for holidays or any celebration. You get that signature red hue and cocoa tang without the dryness. In addition, the science behind it ensures a moist red velvet cake every time, saving you from baking fails.
The secret lies in the vinegar-baking soda fizz. It creates steam pockets right at the end, lifting the batter for ultimate crumb softness. Trust me, one slice and you’ll crave this moist red velvet cake with chocolate frosting forever.
Key Ingredients for Moist Red Velvet Cake
Cake flour delivers the tender crumb you want. Unlike all-purpose flour, it has less protein, so gluten doesn’t toughen up. Therefore, grab that for your red velvet cake with chocolate frosting.
Unsweetened cocoa powder adds authentic flavor without overpowering the red color. Just two tablespoons give that subtle chocolate edge. Meanwhile, vegetable oil keeps everything moist since it stays liquid during baking.
Buttermilk brings acidity for lift and tang. Room temperature ensures smooth mixing. For red food coloring, gel holds color better than liquid, but either works. White vinegar activates the baking soda magic.
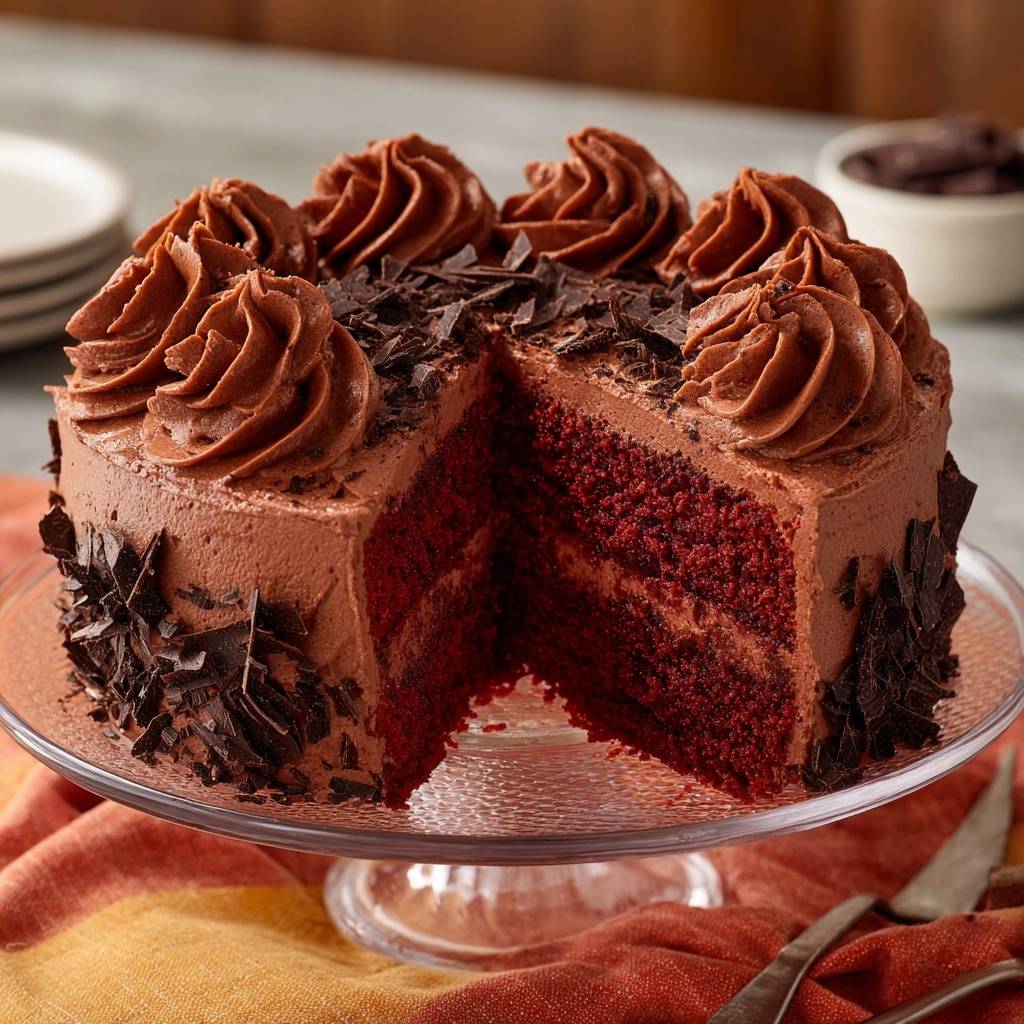
Cake Components That Prevent Dryness
Granulated sugar tenderizes while sweetening. Eggs at room temp provide structure without curdling the batter. Baking soda and salt balance the rise and flavor. In addition, room-temp ingredients emulsify perfectly, locking in moisture from the start.
Chocolate Frosting Building Blocks
Softened unsalted butter creams smoothly without saltiness overpowering. The 4-to-3/4 powdered sugar-to-cocoa ratio creates silkiness. Whole milk adds creaminess, while vanilla and salt enhance depth. Dark chocolate shavings garnish with crunch contrast.
Science of Moist Red Velvet Cake Crumb
Oil and buttermilk emulsify to trap moisture deep in the batter. This prevents the dryness you see in butter recipes, where water evaporates. However, by alternating dry and wet ingredients, you avoid overdeveloping gluten, keeping the crumb tender.
The baking soda-vinegar reaction is key. It releases CO2 gas post-mixing, forming steam pockets for lift. Therefore, this moist red velvet cake stays soft for days. Traditional methods can’t match it.
Don’t overmix, or gluten tightens and squeezes out moisture. Quick folds preserve airiness. That’s the science making your red velvet cake with chocolate frosting foolproof.
If you enjoy working with chocolate, the rich texture of this flourless dark chocolate torte is a natural next step.
Why Oil Beats Butter Here
Oil remains liquid at room temperature, retaining 100% moisture through baking. Butter, however, loses water content, leading to dry cake. Studies from baking chemists confirm oil yields superior tenderness in chiffon-style cakes like this.
Vinegar Reaction for Lift
Baking soda plus vinegar forms sodium acetate and CO2 fizz instantly. This aerates the batter after mixing, creating lift without deflating. Stir and fold quickly, or the reaction weakens, flattening your moist red velvet cake.
Essential Tools for Red Velvet Cake Success
An electric mixer creams oil and sugar evenly for pale, airy results. Use two 9-inch round pans lined with parchment for easy release. Wire racks cool layers flat, preventing soggy bottoms from trapped steam.
A piping bag shapes rosettes perfectly. Microplane shaves chocolate fine for garnish. In addition, a digital scale measures flour accurately, avoiding dense cakes from packed cups.
Prep Phase: Oven and Pan Setup
Preheat to 350 degrees F first. Grease pans, dust with flour, then line bottoms with parchment. This combo ensures moist layers release cleanly without sticking.
Scrape bowl sides during mixing to incorporate everything. Room-temp ingredients blend smoothly, preventing lumps. You’re set for batter success now.
Mixing Batter for Ultimate Moisture
Whisk cake flour, cocoa, baking soda, and salt together. Beat oil and sugar on medium until pale and combined, about 2 minutes. The mixture lightens and smells sweet, signaling emulsion start.
Add eggs one by one, beating well. Mix in vanilla and food coloring for even red hue. Then, on low speed, add dry ingredients in three parts, alternating with buttermilk in two, starting and ending with dry.
Beat just until combined, scraping as needed. Overmixing develops gluten, toughening the crumb. Your batter should look thick and velvety now.
Folding in Vinegar Fizz
Stir baking soda into vinegar; it fizzes vigorously. Fold quickly into batter with a spatula. Pour evenly into pans. Batter rises slightly from steam pockets, ready for oven tenderness.
If you are vigilant about oven temperature for this cake, the same care helps the chocolate sauce stay gooey in this hot fudge chocolate pudding cake.
Baking and Cooling Moist Layers
Bake 25 to 30 minutes until a toothpick comes out clean. Centers spring back lightly. Cool in pans 10 minutes, then invert onto wire racks.
Full rack cooling prevents condensation, which dries edges. Level tops if domed for even stacking. Pro tip: tent with foil if tops brown too fast.
Whipping Rich Chocolate Frosting
Beat softened butter until creamy, about 2 minutes. Gradually add powdered sugar and cocoa on low to avoid dust clouds, then milk, vanilla, and salt. Increase to high for 3 minutes until fluffy and spreadable.
It yields about 4 cups. Texture should hold peaks but spread easily. If too thick, add milk one tablespoon at a time.
Assembling Red Velvet Cake with Chocolate Frosting
Place one layer on a plate, spread 1 cup frosting. Top with second layer. Apply thin crumb coat, chill 10 minutes, then frost top and sides fully.
Pipe rosettes if desired. Press chocolate shavings on sides and top. Chill 30 minutes to set. Slice with a hot knife for clean, moist pieces. Store covered at room temp up to 3 days.
Avoiding Dry Red Velvet Cake Pitfalls
Overmixing builds gluten, making cake tough. Measure flour by spooning lightly, not scooping. Use room-temp ingredients to avoid curdling. Overbaking dries it out, so check early.
Tent foil over browning spots. Accurate oven temp matters; use an thermometer. These fixes keep your red velvet cake with chocolate frosting moist.
Overmixing and Gluten Traps
Stop when flour streaks vanish. Batter looks glossy, not sloppy. Excess beating tightens proteins, expelling moisture. Gentle handling preserves tenderness.
Baking Time Mismatches
Oven hotspots brown unevenly; rotate halfway. At high altitude, reduce baking soda slightly. Doneness shows in edges pulling away, not just toothpick.
More Recipes to Enjoy
If you’re pulling together a dessert or brunch table around this red velvet cake, these two recipes share similar comforting notes and bring their own textures to the mix.
- For a savory, earthy contrast to the sweet chocolate frosting, try these Southern Biscuits and Mushroom Gravy – the creamy gravy and flaky biscuit offer a hearty counterpoint.
- A buttery Cinnamon Streusel Coffee Cake makes a natural companion, with its spiced crumb topping and soft crumb that echoes the cake’s tender texture.
Flavor Twists on Red Velvet Cake
Add chipotle to cocoa for smoky heat. Stir espresso into frosting milk for depth. Swirl cream cheese into batter layers. Berry compote fills between layers nicely.
For vegan, mix milk with vinegar for buttermilk. These keep the moist core intact while boosting flavor.
Perfect Pairings for Chocolate Frosted Cake
Coffee cuts richness perfectly. Black tea balances sweetness. Cold milk refreshes each bite. Serve with fresh berries, whipped cream, or toasted nuts.
For holidays, plate with mint leaves. Simple sides let the moist red velvet cake shine.
Make-Ahead Guide for Red Velvet Cake
Bake and frost up to 2 days ahead, store covered at room temp. Freeze unfrosted layers wrapped tightly for 3 months; thaw overnight in fridge.
Frosting keeps in fridge 1 week; rewhip before use. Brush layers with simple syrup if needed to rehydrate. Perfect for celebrations.
Troubleshooting Red Velvet Cake Issues
Why Is My Cake Dry?
Dryness hits from overmixing, wrong flour, or overbaking. Cake flour and oil-buttermilk method prevent it here. If it happens, you likely overdeveloped gluten or baked too long. Check toothpick early next time, cool properly on racks, and measure flour lightly. Store airtight to retain moisture up to 3 days.
Frosting Not Fluffy Enough?
Butter wasn’t soft enough, or you added sugar too fast. Start with creamy butter, incorporate powdered sugar gradually on low, then whip high with milk. If grainy, sift cocoa first. Cold milk thickens it; warm slightly for better blend. Yields fluffy frosting that pipes perfectly.
Color Not Vibrant Red?
Liquid coloring fades more than gel. Use 2 tablespoons gel for bold hue without altering batter. Add it with wet ingredients for even distribution. Too much cocoa dulls it, so stick to recipe. Fresh coloring gives truest red in your moist red velvet cake with chocolate frosting.
Layers Sinking in Middle?
Oven door opened too soon, or weak vinegar fizz. Wait until 25 minutes for checks. Stir soda-vinegar fresh for max CO2 lift. Underbaked centers collapse on cooling. Test multiple spots with toothpick; full bake seals steam pockets for even rise.
How to Fix Cracked Tops?
High oven temp or overmixing causes cracks. Preheat fully to 350F, don’t overbeat batter. If tops crack slightly, level them before frosting; no one notices. Tenting foil midway prevents excess browning. Proper cooling on racks stops further cracking from steam buildup.
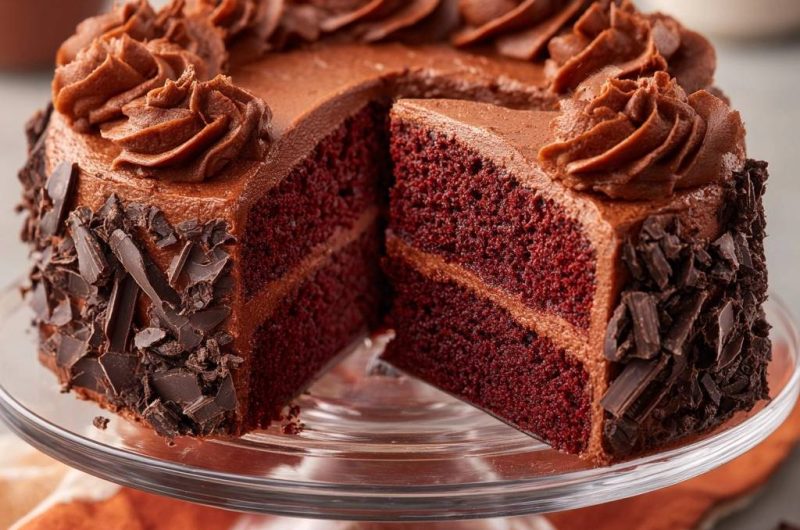
Red Velvet Cake
Course: DessertCuisine: AmericanDifficulty: medium12
servings20
minutes30
minutes550
kcal60
MinutesDry red velvet cake is every home baker’s nightmare, but this recipe fixes it forever with an oil-buttermilk mixing method that locks in moisture while keeping the signature tender crumb. Perfect for holidays or any celebration.
Ingredients
Cake:
2 1/2 cups cake flour
2 tablespoons unsweetened cocoa powder
1 teaspoon baking soda
1 teaspoon salt
1 1/2 cups granulated sugar
1 cup vegetable oil
2 large eggs, room temperature
1 cup buttermilk, room temperature
2 teaspoons vanilla extract
2 tablespoons red food coloring (gel or liquid)
1 teaspoon white vinegar
For the Chocolate Frosting:
1 1/2 cups unsalted butter, softened
4 cups powdered sugar
3/4 cup unsweetened cocoa powder
1/2 cup whole milk
2 teaspoons vanilla extract
Pinch of salt
For Garnish:
4 ounces dark chocolate bar, shaved
Directions
- Preheat oven to 350 degrees F. Grease and flour two 9-inch round cake pans. Line bottoms with parchment paper for easy release.
- Whisk together cake flour, cocoa powder, baking soda, and salt in a medium bowl. Set aside.
- In a large bowl, beat vegetable oil and sugar with an electric mixer on medium speed until fully combined and pale, about 2 minutes. This oil base is the start of our moisture lock.
- Add eggs one at a time, beating well after each. Mix in vanilla and red food coloring until batter is evenly colored.
- With mixer on low, add dry ingredients in three additions, alternating with buttermilk in two additions, starting and ending with dry. Beat just until combined after each, scraping bowl as needed. Do not overmix, or moisture escapes.
- In a small bowl, stir baking soda and vinegar together; it will fizz. Quickly fold into batter with a spatula. The reaction creates steam pockets for lift and tenderness, sealing in ultimate moist crumb. Pour batter evenly into prepared pans.
- Bake 25 to 30 minutes, until toothpick inserted in center comes out clean. Cool in pans 10 minutes, then turn out onto wire racks to cool completely. This prevents steaming and drying.
- For frosting, beat butter until creamy. Gradually add powdered sugar, cocoa, milk, vanilla, and salt, beating on low then high until fluffy, about 3 minutes.
- Level cake layers if needed. Place one layer on serving plate, spread with 1 cup frosting. Top with second layer. Frost top and sides with remaining frosting, creating rosettes with a piping bag.
- Press chocolate shavings onto sides and top. Chill 30 minutes to set. Slice and serve moist perfection every time. Store covered at room temp up to 3 days.
Notes
- Use room temperature ingredients for best results. Do not overmix batter to retain moisture. Store covered at room temperature up to 3 days.