Mastering Crispy Honey Glazed Chicken Tenders
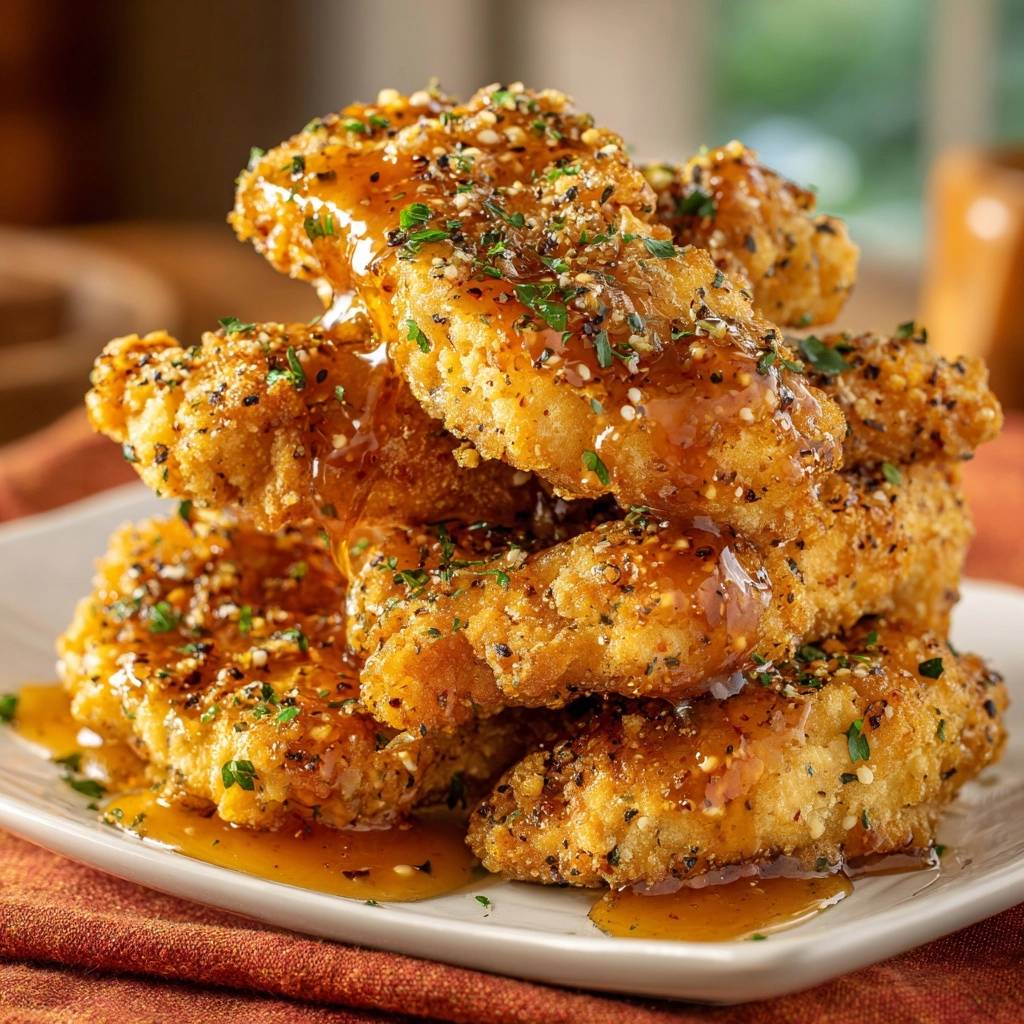
We’ve all been there. You spend forty minutes in the kitchen breading chicken to golden perfection, only to watch it turn into a soggy, sad mess the moment the honey glaze touches the crust. It’s heartbreaking to lose that crunch you worked so hard to achieve. Most recipes fail because they don’t account for the moisture in the sauce, which quickly penetrates standard flour coatings and turns them into mush.
The secret to a professional-grade crunch lies in what I call “structural breading.” Instead of a simple flour dredge, we’re building a fortified armor that uses specific starches to create a moisture-resistant barrier. This ensures your chicken stays shatteringly crisp even when it’s swimming in a thick, glossy glaze. It’s the difference between a mediocre dinner and a meal that tastes like it came from a high-end bistro.
If you want that perfect “shatter” sound when you take a bite, you have to use cornstarch in your final breading stage. Cornstarch interferes with gluten development, which prevents the coating from becoming chewy or bread-like. When it hits the hot oil, it creates a brittle, glass-like texture that stands up to the liquid in the honey glaze. Trust me, once you try this cornstarch-Panko hybrid, you’ll never go back to plain breadcrumbs again.
The Science of the Shatter-Crisp Coating
Creating a crust that survives a heavy glaze requires a bit of kitchen chemistry. Standard all-purpose flour contains proteins that develop gluten when mixed with liquid, like egg wash. While gluten is great for bread, it can make fried coatings feel heavy or doughy. By introducing a significant amount of cornstarch into the mix, we effectively “shorten” those gluten strands. This results in a more brittle, delicate crunch that shatters rather than bends.
Panko breadcrumbs are the other essential half of this equation. Unlike traditional fine breadcrumbs, Panko is made from crustless bread that is processed into large, airy flakes. These flakes have a massive amount of surface area, which creates more “nooks and crannies” for the glaze to cling to without soaking through. Because Panko doesn’t absorb oil as readily as standard crumbs, the final product feels lighter and stays crisp for much longer.
When you combine the structural integrity of cornstarch with the jagged surface of Panko, you create a high-performance coating. This “armor” acts as a sacrificial layer. The glaze sits on the very tips of the Panko flakes and fills the gaps, but the cornstarch-fortified base remains dry and firm against the chicken. This is how you maintain that satisfying contrast between the sticky, sweet exterior and the crunchy, juicy interior.
Essential Components for Crispy Honey Glazed Chicken Tenders
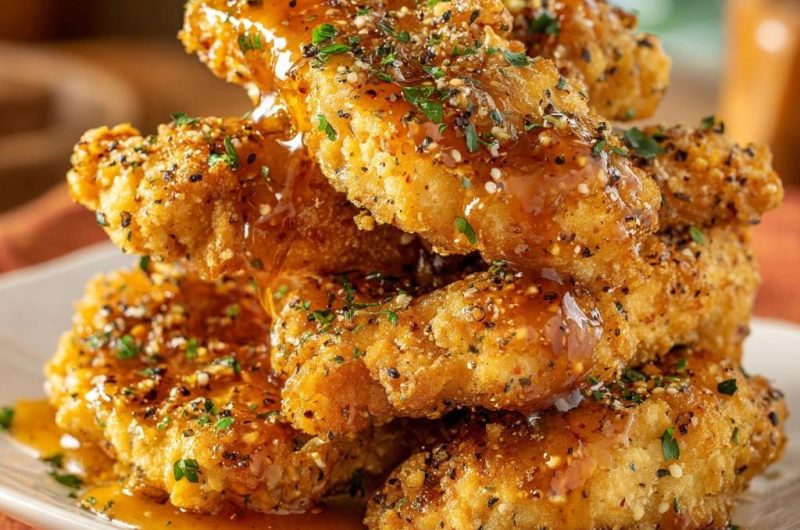
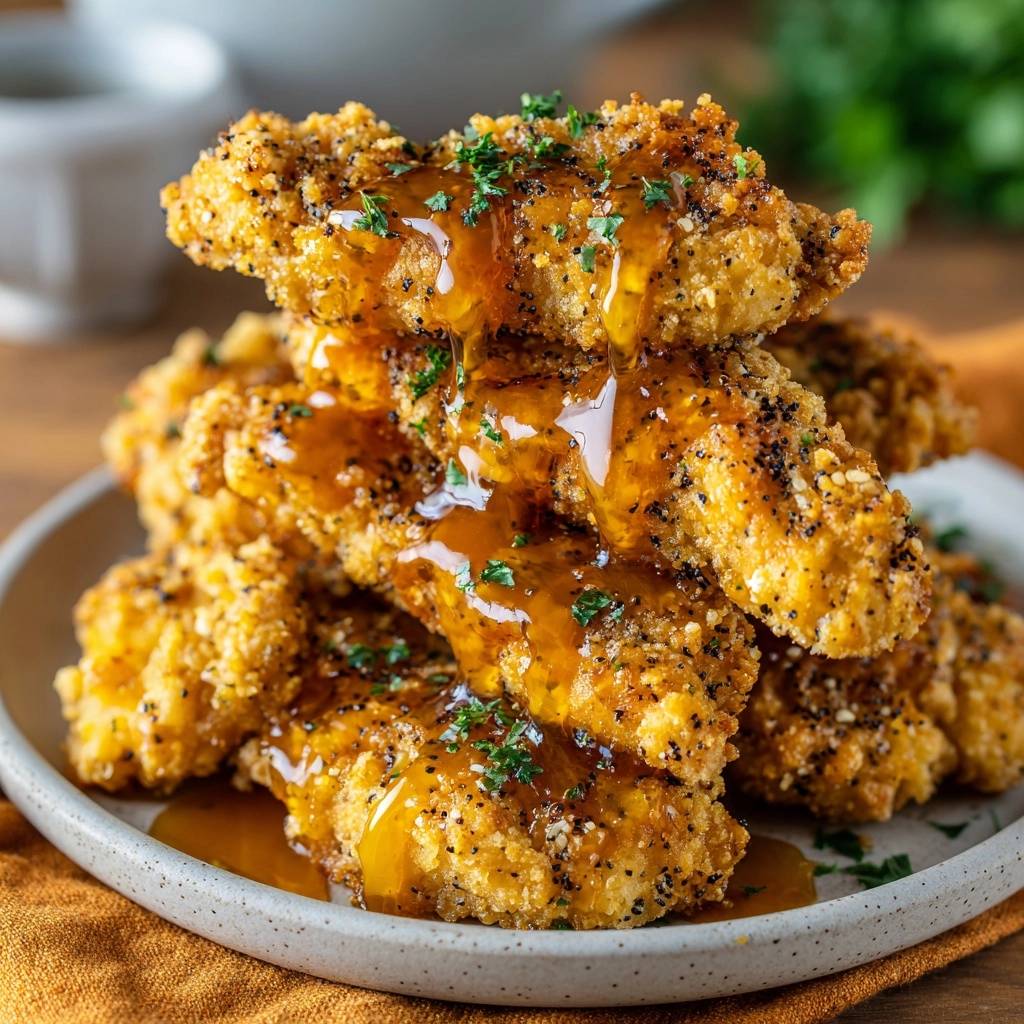
Every ingredient in this recipe serves a specific functional purpose beyond just adding flavor. For instance, I always insist on using coarse ground black pepper rather than finely ground powder. The larger grains provide a sharp, pungent bite that cuts through the richness of the fried coating. Visually, those dark flecks create a beautiful high-contrast look against the golden-brown crust and the amber glaze.
The glaze itself relies on a careful balance of sweetness and acidity. While honey provides the body and floral notes, apple cider vinegar is the unsung hero. The vinegar’s acidity brightens the entire dish, preventing the honey from feeling cloying or one-dimensional. It also helps thin the glaze just enough so it flows over the chicken without needing to be tossed in a bowl, which further preserves the crunch.
Don’t skip the fresh parsley at the end. It isn’t just a garnish to make the plate look pretty. The clean, slightly peppery flavor of fresh herbs provides a necessary “reset” for your palate after the heavy fats and sugars. Similarly, the sesame seeds in the breading add a tiny pop of toasted nuttiness and an extra layer of visual texture that signals a professional touch.
If you enjoy the crispy coating on these tenders, you’ll love the crunch in these popcorn chicken bites.
Selecting and Preparing the Poultry
Success starts with how you handle the meat before it ever touches the flour. You want to cut your chicken breast into uniform strips, roughly one inch wide. Uniformity ensures that every piece finishes cooking at the exact same time, preventing the smaller pieces from drying out while the larger ones reach safety. If the strips vary too much in thickness, use a meat mallet to gently even them out.
The most important rule of frying is that moisture is the enemy. You must pat the chicken strips completely dry with paper towels until there is no visible sheen on the surface. If the meat is damp, the steam created during frying will push the breading away from the chicken. This creates a gap that causes the crust to slide off in one sad piece when you take a bite.
The Role of Starches and Binders
Think of the three-stage dredging process as a construction project. The initial flour layer acts as the primer; it sticks to the meat and creates a dry surface for the “glue” to grab onto. You want this layer to be incredibly thin, so be sure to shake off every bit of excess flour. If this layer is too thick, it will create a gummy interface between the chicken and the crust.
The egg wash is your binder, and it needs to be well-beaten with a splash of water to break up the thick proteins. This ensures an even, thin coating that won’t clump. Finally, the Panko and cornstarch mixture is your armor. When you move the chicken into this final bowl, don’t just toss it. Press the mixture firmly into the meat with your palms to ensure the flakes are deeply embedded in the egg wash.
Step-by-Step: Engineering the Perfect Crunch
To keep your kitchen from becoming a disaster zone, use the “wet hand/dry hand” method. Designate your left hand for the dry flour and Panko, and your right hand for the egg wash. This prevents your fingers from becoming “club hands” covered in thick layers of dough. It keeps the process efficient and ensures the breading stays on the chicken where it belongs.
The Three-Bowl Dredging Station Setup
Arrange your bowls in a clear line: flour, then egg, then Panko. This assembly line flow minimizes drips and mess. As you move each piece, give it a firm press in the final Panko bowl. You want the coating to look a bit uneven and craggy. Those irregular ridges and points are exactly what will turn into extra-crispy bits once they hit the hot oil.
The Critical Ten-Minute Resting Period
This is the “Secret Step” that most home cooks skip. Once the chicken is breaded, let it sit on a wire rack for ten minutes before frying. During this time, the moisture from the egg hydrates the starches in the flour and Panko. This creates a physical bond, essentially “gluing” the crust to the meat. If you fry immediately, the sudden heat causes the steam to blow the breading off, leading to those dreaded “bald spots.”
Shallow Frying and Temperature Management
Use a high-smoke-point oil like vegetable or canola oil, and fill your skillet about one inch deep. You need the oil to be exactly 350°F. If you don’t have a thermometer, dip the end of a wooden spoon in; if it bubbles steadily, you’re ready. If the oil is too cold, the chicken will soak it up like a sponge and become greasy. If it’s too hot, the honey in the breading (if any) or the Panko will burn before the chicken is safe to eat.
Fry in batches to avoid crowding the pan. Adding too much cold meat at once will drop the oil temperature significantly. You’re looking for a deep, golden-brown color. This usually takes about three to four minutes per side. Use tongs to gently flip the pieces, being careful not to pierce the crust and let the juices escape.
Reducing Moisture Retention After Frying
Whatever you do, do not place the finished chicken on paper towels. While it seems like a good way to drain grease, it actually traps steam underneath the chicken. That steam quickly softens the bottom crust, ruining all your hard work. Instead, transfer the tenders to a clean wire rack set over a baking sheet.
The wire rack allows air to circulate 360 degrees around each tender. This constant airflow ensures the bottom stays just as crispy as the top. Let the chicken rest for just a minute or two here while you finish the glaze. This brief pause also allows the internal juices to redistribute, so the meat stays tender and moist when you finally bite in.
Crafting the Balanced Honey Glaze
The glaze should be prepared in a small saucepan over medium heat. You aren’t just warming it up; you’re looking for a slight reduction. Whisk the honey, vinegar, soy sauce, and red pepper flakes until the mixture begins to simmer. You want it to reach a “nappe” consistency, which is a fancy way of saying it should be thick enough to coat the back of a spoon without immediately running off.
Be careful not to over-reduce the sauce. If you cook it too long, the sugars in the honey will reach the “hard ball” stage, turning your glaze into a sticky, tooth-cracking candy. It should be fluid and glossy. Drizzle the warm glaze over the chicken while it’s still on the wire rack. This allows any excess to drip away, ensuring the tenders are coated but not drowned.
Troubleshooting Common Textural Issues
If your breading is falling off, it’s almost always due to moisture. Either the chicken wasn’t dried well enough before dredging, or you skipped the ten-minute resting period. Another culprit could be “over-handling” the chicken in the pan. Let the first side develop a solid crust before you attempt to flip it; if you move it too early, the wet breading will stick to the pan instead of the meat.
If the chicken feels tough, you likely overcooked it. Chicken breast is lean and dries out quickly once it passes 165°F. Use an instant-read thermometer to pull the tenders as soon as they hit 160°F; the carryover heat will bring them to the safe zone while they rest. Also, ensure you are cutting the strips across the grain of the muscle fibers to keep them easy to chew.
Optimal Side Dishes for Glazed Poultry
Since these tenders are rich, sweet, and savory, you want side dishes that provide a sharp contrast. A bright, acidic coleslaw with a vinegar-based dressing is a perfect partner. The crunch of the cabbage mimics the texture of the chicken, while the acidity cuts through the sweetness of the honey glaze. A cooling cucumber salad with red onions and dill also works beautifully to refresh the palate.
If you love this crispy coating method, try it with these panko popcorn chicken bites for a fun twist.
If you want something heartier, serve the tenders over a bed of fluffy jasmine rice. The neutral grain acts as a sponge for any extra glaze that drips off the chicken. Avoid serving this with heavy, deep-fried sides like thick-cut fries, as the meal can become overwhelmingly oily. Instead, opt for steamed snap peas or a light ginger-soy broccoli to keep the flavors balanced.
Storage and Reheating for Maximum Retention
If you have leftovers, store them in an airtight container in the refrigerator for up to three days. However, be aware that the glaze will eventually soften the crust over time. Never use a microwave to reheat fried chicken. The microwave heats from the inside out, vibrating water molecules that turn into steam, which will leave you with a rubbery, soggy mess.
The best way to bring these back to life is in an air fryer or a 375°F oven. Place the tenders on a wire rack and heat for about 5 to 8 minutes. The high, dry heat will re-crisp the starches in the breading and caramelize the glaze slightly. It won’t be exactly the same as fresh out of the fryer, but it will be remarkably close and far superior to any other method.
Frequently Asked Questions
Can I bake these instead of frying?
You can bake them at 400°F on a wire rack, but the texture will be different. To get a similar crunch, you must toast the Panko in a dry pan with a little oil until golden before breading the chicken. Without the direct heat of frying, the cornstarch won’t “shatter” as effectively, and the crust may feel a bit more powdery.
What is the best substitute for Panko?
If you can’t find Panko, crushed saltine crackers or cornflakes are the best alternatives. They both offer a larger surface area and a more substantial crunch than standard fine breadcrumbs. Avoid using toasted breadcrumbs from a can, as they are too fine and will absorb the glaze almost instantly, becoming mushy.
How do I make this spicier without ruining the balance?
The easiest way to increase the heat is to add a teaspoon of cayenne pepper to the flour dredge. This builds the heat into the base of the dish. You can also increase the red pepper flakes in the glaze or add a teaspoon of sriracha. Just be careful not to add too much liquid to the glaze, or it won’t thicken properly.
Can I use honey substitutes like agave or maple syrup?
Agave and maple syrup will work, but they are thinner than honey. You will need to simmer the glaze for a few extra minutes to reach the proper thickness. Keep in mind that maple syrup has a very strong, distinct flavor that will change the profile of the dish from “Asian-inspired” to something more reminiscent of breakfast poultry.
How long does the glaze stay stable before the chicken softens?
Thanks to the cornstarch and Panko method, these tenders will stay remarkably crisp for about 20 to 30 minutes after glazing. This is much longer than standard fried chicken. For the absolute best experience, drizzle the glaze right before serving rather than tossing the chicken in a bowl of sauce, which can accelerate softening.
What Goes Well with Honey Glazed Chicken?
Crispy chicken tenders with a sweet glaze call for sides that add crunch or a light, savory contrast. Here are two options that fit the bill.
- For a fluffy, vegetable-packed side that soaks up any extra glaze, try the Garden Vegetable Rice Pilaf — the herbs and carrots keep things fresh.
- If you want more crunch on the plate, these Crispy Zucchini Fritters have a similar golden-brown exterior and pair well with the chicken’s
Crispy Honey Glazed Chicken Tenders
Course: Main CourseCuisine: AmericanDifficulty: easyYields4
servingsPrep Time20
minutesCook Time12
minutesCalories480
kcalTotal Time32
MinutesThese chicken tenders feature a structural barrier made from Panko and cornstarch to prevent sogginess. Coated in a sweet and spicy honey glaze, they offer a high-contrast visual and a perfect crunch.
Ingredients
1.5 lbs chicken breast strips
1 cup all-purpose flour
2 large eggs, beaten with 1 tablespoon water
1.5 cups Panko breadcrumbs
1/2 cup cornstarch (the secret to the “shatter” crunch)
1 tablespoon garlic powder
1 tablespoon coarse ground black pepper
1 teaspoon kosher salt
1 tablespoon sesame seeds (for visual texture)
1/2 cup honey
2 tablespoons apple cider vinegar
1 tablespoon soy sauce
1 teaspoon red pepper flakes
2 tablespoons fresh chopped parsley
Vegetable oil for shallow frying
Directions
- Pat the chicken strips completely dry with paper towels. Moisture is the enemy of a crisp coating.
- Set up three bowls: (1) Flour mixed with salt and 1/2 tablespoon of the black pepper. (2) Beaten eggs. (3) A mixture of Panko, cornstarch, garlic powder, the remaining black pepper, and sesame seeds.
- Dredge each strip in the flour, shaking off the excess. Dip into the egg wash, then press firmly into the Panko-cornstarch mixture. Ensure the coating is thick and uneven for maximum surface area.
- The Secret Step: Place the breaded chicken on a wire rack for 10 minutes before frying. This allows the proteins in the egg to bond with the starches, ensuring the breading doesn’t slide off in the pan.
- Heat 1 inch of oil in a heavy skillet to 350°F. Fry the chicken in batches for 3 to 4 minutes per side until deep golden brown. The chicken is done when it reaches 165°F (74°C) in the thickest part.
- Transfer the cooked chicken to a clean wire rack. Do not use paper towels; air circulation prevents steam from softening the bottom crust.
- In a small saucepan, whisk the honey, vinegar, soy sauce, and red pepper flakes. Simmer for 3 minutes over medium heat until the glaze coats the back of a spoon.
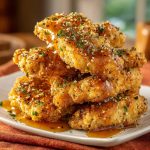
- Drizzle the warm glaze generously over the chicken. Immediately garnish with fresh parsley and an extra pinch of coarse black pepper to achieve the high-contrast look shown in the image. Serve immediately.
Notes
- The secret to the crunch is the 10-minute resting period on a wire rack before frying and avoiding paper towels after frying to prevent steam from softening the crust.