Mastering Dark Chocolate Raspberry Truffles with the Fail-Safe Set Technique
There is a specific, heartbreaking moment when a home cook realizes their expensive chocolate ganache has turned into a puddle rather than a truffle. You’ve spent time chopping and heating, yet the centers remain stubbornly liquid, refusing to hold a shape. This “soupy” ganache is the most common hurdle in confectionery, but it’s entirely avoidable with the right approach.
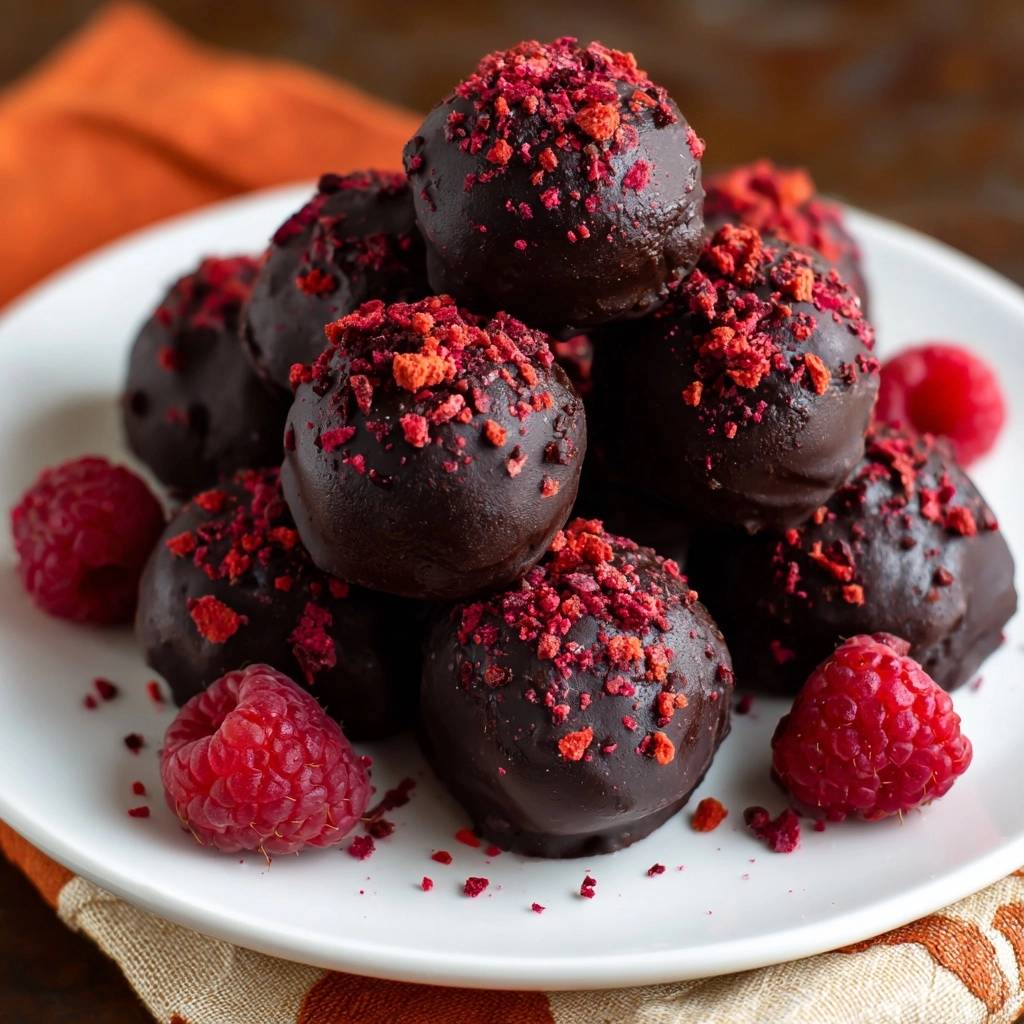
The secret lies in the 2:1 chocolate-to-cream ratio, a formula that ensures structural integrity without sacrificing that signature melt-in-your-mouth texture. By using this precise measurement, you create a stable emulsion that transitions from a silky liquid to a firm, scoopable fudge. This recipe delivers a professional result that mimics high-end chocolate shops, featuring a crisp outer shell that snaps loudly before giving way to a velvety raspberry-infused center.
Expertise in chocolate work often comes down to patience and temperature control. The “Fail-Safe Set Technique” relies on a slow-melt method where the cream does the work, followed by a long, cold rest. If you’ve ever struggled with truffles that melt in your hands before they hit the dipping bowl, this method is your solution. We’re going to focus on stabilizing the fats so your truffles look as good as they taste.
The Chemistry of a Stable Ganache Center
Creating ganache is actually an exercise in molecular science. You are essentially forcing fat and water to live together in harmony, which is known as an emulsion. When you pour hot cream over dark chocolate, the heat breaks down the solid cocoa butter crystals, allowing them to mingle with the liquid in the cream.
The 2:1 ratio is the “golden rule” for truffles because it provides enough chocolate solids to maintain a firm structure at room temperature. If you use too much cream, the mixture stays soft; too little, and it becomes a hard block. By sticking to this ratio, you ensure the ganache is pliable enough to roll but sturdy enough to support the weight of a chocolate coating.
Why Cacao Percentage Dictates Texture
Not all chocolate is created equal when it comes to structural support. A 60% cacao bar has a different balance of sugar and cocoa solids than an 85% bar. Higher cacao percentages contain more cocoa butter, which sets much firmer than the sugar and milk solids found in lighter chocolates.
Therefore, using a very dark chocolate (70% or higher) requires a careful eye on your cream measurements. If the chocolate is too intense, the emulsion can “break,” resulting in an oily mess. However, the high fat content in dark chocolate is exactly what gives these truffles their luxurious, lingering finish on the palate.
Essential Components for Dark Chocolate Raspberry Truffles
Quality is everything when the ingredient list is this short. You must avoid standard “baking chips” found in the cookie aisle, as they contain stabilizers designed to help the chip hold its shape under high heat. These stabilizers prevent the chocolate from melting into a smooth, fluid ganache.
Instead, look for high-quality bar chocolate or “couverture” chocolate. These varieties have a higher cocoa butter content, which is essential for that glossy, professional sheen. When you chop the chocolate, aim for fine, uniform shards so the cream can melt everything evenly without leaving stubborn lumps behind.
Selecting the Right Heavy Cream
The fat content in your cream is the primary driver of the truffle’s mouthfeel. You need heavy whipping cream with a fat content between 36% and 40%. This high fat percentage creates a stable bond with the cocoa butter, resulting in a rich, buttery texture.
In addition, lower-fat alternatives like half-and-half or whole milk contain too much water. This excess moisture will prevent the ganache from setting properly, leading to a grainy or thin center that won’t hold its shape during the rolling process. Stick to the heavy stuff for the best results.
The Role of Freeze-Dried Raspberries
Fresh raspberries are delicious, but they are nearly 90% water. Adding fresh puree to a ganache introduces too much moisture, which can cause the chocolate to seize or shorten the shelf life significantly. Moisture is the enemy of chocolate stability and can lead to rapid mold growth.
Freeze-dried raspberries are the perfect solution because they provide a concentrated, tart “punch” without any added liquid. By crushing them into a fine powder or coarse crumbs, you get an intense fruit flavor that cuts through the richness of the dark chocolate. They also provide a beautiful, natural pink hue and a slight crunch to the topping.
Specialized Tools for Professional Confections
You don’t need a laboratory, but a few specific tools make the process much smoother. A glass or ceramic bowl is superior to plastic because it retains heat longer, ensuring the chocolate melts fully during the resting period. Plastic tends to cool down too quickly, which might leave you with unmelted bits of chocolate.
A small cookie scoop is another “pro” secret for uniform sizing. Consistency isn’t just about aesthetics; it ensures that every truffle chills and sets at the same rate. Finally, a dipping fork or even a standard kitchen fork with the middle tines bent slightly can help you lift the truffles out of the coating with a clean finish and no messy “foot” at the base.
Phase One: Crafting the Perfect Ganache Base
The process begins with simmering your heavy cream. You must watch the pot closely; you are looking for small bubbles around the edges, not a rolling boil. If the cream gets too hot, it can scorch the proteins or cause the cocoa butter to separate from the solids, ruining the texture.
Once you pour the cream over the chocolate, the most important step is to do absolutely nothing. Let it sit untouched for a full five minutes. This allows the heat to penetrate the center of the chocolate shards. If you stir too early, you introduce cool air and lower the temperature, which leads to a grainy, unrefined texture.
After the rest, whisk gently starting from the center and moving outward in small circles. You will see the mixture transform from a muddy mess into a dark, glossy, and perfectly smooth liquid. This is the moment to stir in your vanilla and salt, which brighten the deep cocoa notes.
Phase Two: The Critical Chilling and Shaping Window
Patience is the hardest part of truffle making. The ganache needs at least four hours in the refrigerator to fully crystallize. To prevent a leathery “skin” from forming on top, press a piece of plastic wrap directly onto the surface of the chocolate. This keeps the mixture supple and uniform from top to bottom.
Patience pays off here, just like when you let the layers set in these turtle cheesecake brownies.
When it comes time to roll the truffles, speed is your best friend. The heat from your palms will quickly melt the cocoa butter, making the balls sticky and difficult to handle. If you have “hot hands,” try rinsing them in cold water and drying them thoroughly before you start rolling.
Work quickly to form 1-inch balls and place them on a parchment-lined tray. If the mixture starts to get too soft, don’t fight it. Just pop the tray back into the fridge for fifteen minutes to firm up again. A quick flash-freeze right before dipping helps the outer shell set instantly when it hits the cold center.
Phase Three: Achieving the Snap with a Tempered Shell
The dipping process is where the magic happens. Melt your coating chocolate in short bursts in the microwave, stirring well between each one. This gentle heating helps keep the chocolate in a semi-tempered state, which ensures a shiny finish and a satisfying snap when you bite into it.
Drop a chilled truffle into the melted chocolate and use your fork to lift it out. The “Tap and Slide” technique is vital here: tap the fork against the side of the bowl to shake off excess chocolate, then slide the bottom of the fork over the edge of the bowl. This prevents a pool of chocolate from forming at the base of your truffle.
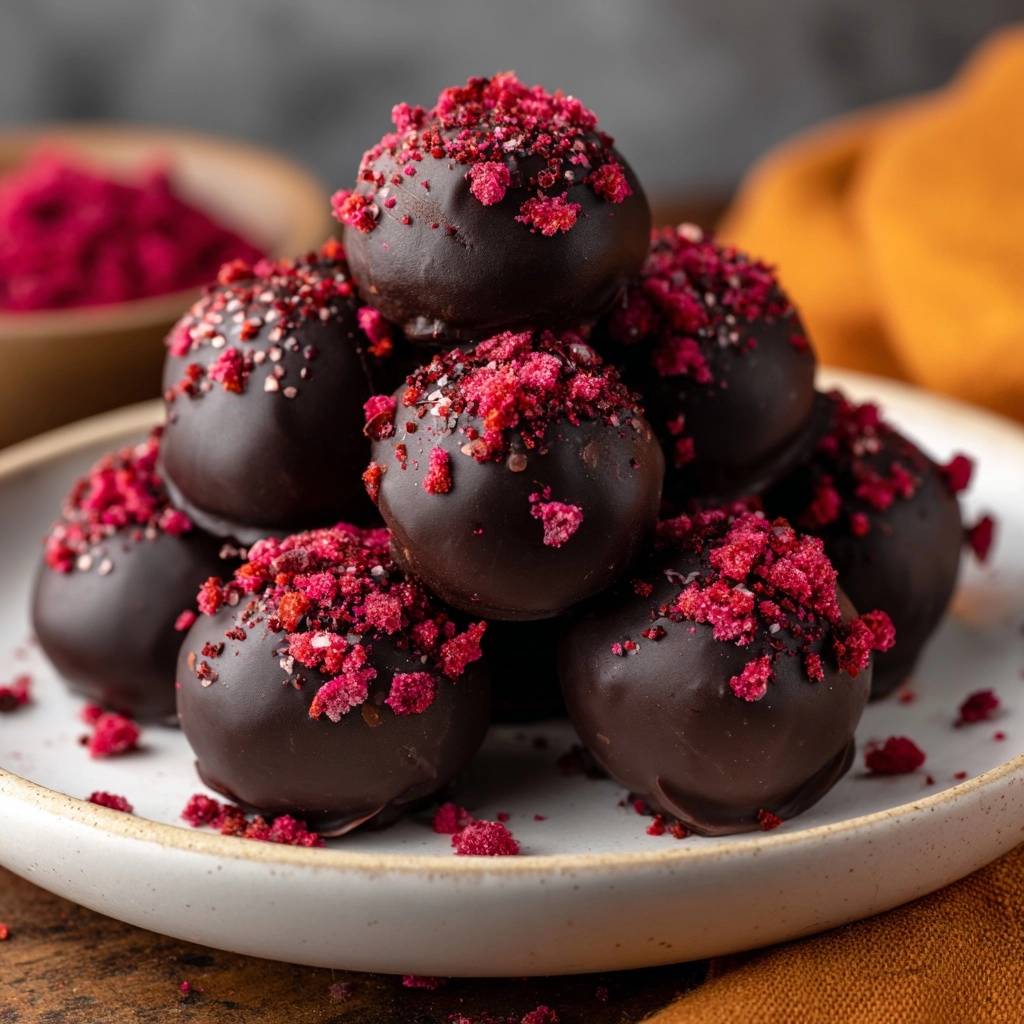
Immediately place the truffle back on the parchment paper. You only have a window of about ten seconds before the cold center causes the shell to harden. Sprinkle the crushed raspberries on top while the chocolate is still wet so they adhere perfectly and create that beautiful, crusted appearance.
Troubleshooting Common Truffle Complications
If your ganache looks oily or “broken,” don’t panic. You can usually fix a broken emulsion by whisking in a teaspoon of warm milk or cream. The extra liquid helps the fats and solids bind back together. Just add it a few drops at a time until the mixture becomes glossy again.
If you notice “sweating” or small beads of moisture on your finished truffles, it’s likely due to a drastic temperature change. Moving truffles directly from a freezing kitchen to a warm room causes condensation. To avoid this, let them sit in the closed container for twenty minutes when moving them from the fridge to the counter.
For centers that simply won’t firm up, you can salvage the batch by gently re-melting the ganache and whisking in another ounce of melted dark chocolate. This increases the solids-to-liquid ratio, ensuring a firmer set once it’s chilled for the second time.
Flavor Variations and Botanical Infusions
Once you master the base, you can experiment with sophisticated flavor profiles. Try steeping an Earl Grey tea bag in the hot cream for five minutes before pouring it over the chocolate. The bergamot notes pair beautifully with the tartness of the raspberries.
In addition, a half-teaspoon of espresso powder added to the ganache won’t make the truffles taste like coffee; instead, it acts as a flavor booster that makes the chocolate taste “darker” and more intense. For a modern twist, a tiny pinch of smoked sea salt on top of the raspberry crumbs adds a wonderful savory contrast.
Storage Logistics and Serving Temperatures
These truffles are best stored in an airtight container in the refrigerator, where they will stay fresh for up to two weeks. You can also freeze them for up to three months, provided they are double-wrapped to prevent freezer burn. However, the texture is always best when they haven’t been frozen.
The most important rule for serving is to bring them to room temperature first. Take them out of the fridge about 30 minutes before you plan to eat them. This allows the cocoa butter to soften just enough so that the ganache melts instantly on your tongue, releasing the full spectrum of chocolate and raspberry flavors.
Expert Confectionery FAQ
Can I use fresh raspberry puree instead of freeze-dried?
It is generally not recommended for this specific recipe. Fresh puree introduces significant water activity, which can cause the ganache to break or develop mold within a few days. If you must use fresh fruit, you would need to simmer the puree until it reduces by half into a thick syrup, but the freeze-dried crumbs provide a much cleaner flavor and better shelf stability.
Why did my chocolate shell turn grey or streaky?
This is known as “bloom,” and it happens when the cocoa butter separates and rises to the surface. It usually occurs if the coating chocolate was overheated or cooled too slowly. While it doesn’t look as pretty, the truffles are still perfectly safe to eat. To prevent this, melt your coating chocolate slowly and avoid getting any water in the bowl.
How do I get the raspberry crumbs to stick perfectly?
Timing is the key to a perfect topping. You must sprinkle the crumbs within the “wet window,” which is the first 10 seconds after the truffle is dipped. Because the truffle centers are cold, the outer shell will set very quickly. Work in small batches, dipping and topping one truffle at a time rather than dipping the whole tray first.
Can I substitute the heavy cream with coconut milk?
Yes, you can use full-fat canned coconut cream as a dairy-free alternative. However, the setting time may be longer, and the truffles will be slightly softer at room temperature. Make sure to use only the thick, white cream from the top of the can and discard the watery liquid at the bottom to maintain the correct fat ratio.
What is the best way to gift-wrap these without smudging?
To keep your truffles looking professional, place each one in a mini paper cupcake liner. This prevents them from rolling around and bumping into each other, which can scuff the delicate chocolate shells. Place the lined truffles in a sturdy tin or a cardboard candy box with a tight-fitting lid to protect them from moisture and odors.
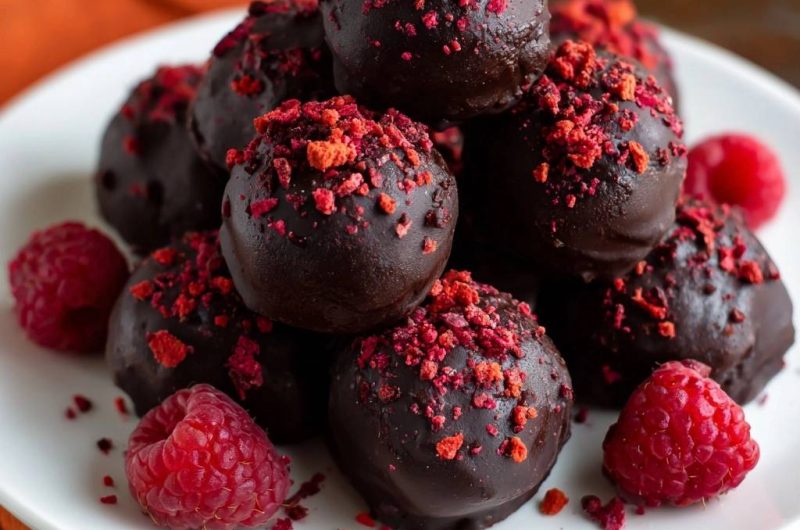
Dark Chocolate Raspberry Truffles
Course: DessertCuisine: FrenchDifficulty: medium18
truffles30
minutes10
minutes145
kcal240
MinutesA foolproof recipe for dark chocolate truffles featuring a stable ganache center, a tempered chocolate coating, and a tart freeze-dried raspberry crust. This method ensures the truffles set perfectly every time.
Ingredients
8 ounces high-quality dark chocolate (60% cacao or higher), finely chopped
1/2 cup heavy cream
1/2 teaspoon vanilla extract
Pinch of sea salt
6 ounces extra dark chocolate, finely chopped (for the dipping shell)
1/2 cup freeze-dried raspberries, crushed into coarse crumbs
Fresh raspberries for garnish
Directions
- Place 8 ounces of finely chopped dark chocolate in a heat-proof glass bowl.
- Heat the heavy cream in a small saucepan over medium heat just until it begins to simmer. Do not let it reach a rolling boil.
- Pour the hot cream over the chocolate and let it sit untouched for 5 minutes. This allows the chocolate to melt evenly without introducing air or cooling the cream too quickly.
- Gently whisk from the center outward until the mixture is glossy and smooth. Stir in the vanilla extract and sea salt.
- Press a piece of plastic wrap directly onto the surface of the ganache to prevent a skin from forming. Refrigerate for at least 4 hours, or until the mixture is firm enough to scoop.
- Use a small cookie scoop to form 1-inch balls. Roll them quickly between your palms to smooth. Place on a parchment-lined tray and freeze for 15 minutes to firm up before dipping.
- Melt the remaining 6 ounces of dark chocolate in a microwave-safe bowl in 30-second increments, stirring until smooth.
- Using a fork or dipping tool, submerge each chilled truffle into the melted chocolate. Tap the fork against the side of the bowl to remove excess.
- Immediately place the dipped truffle back on the parchment paper and sprinkle the top generously with crushed freeze-dried raspberries while the shell is still wet. This ensures the “crusted top” look seen in the image.
- Let the shells set at room temperature for 20 minutes. Store in an airtight container in the refrigerator. Serve with fresh raspberries.
Notes
- The 2:1 chocolate-to-cream ratio is essential for a firm ganache. Ensure the plastic wrap touches the surface of the ganache to prevent a skin from forming during the chilling process.