Green Chili Biscuits: Fluffy Perfection, Every Time!
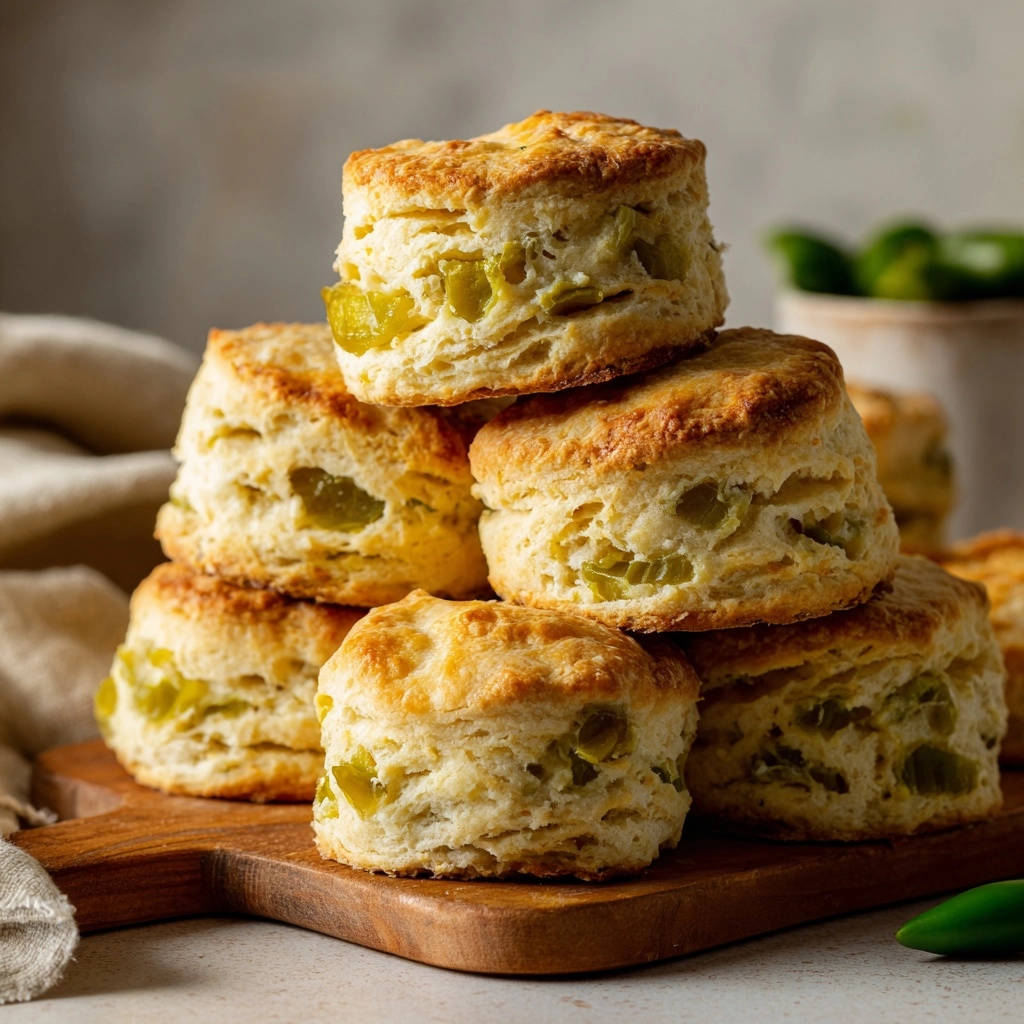
For years, I found myself battling the common biscuit dilemma: aiming for light, airy perfection, but often ending up with hockey pucks. That frustrating journey led me to discover a simple trick that completely transformed my approach to baking, especially when it came to these incredible Green Chili Biscuits.
This recipe isn’t just about combining ingredients; it’s about a reliable method that guarantees a beautiful rise and an irresistibly tender crumb, kissed with just the right amount of savory heat. It’s truly a game-changer, perfect for anyone seeking consistently fluffy results.
Beyond Density: Why Our Green Chili Biscuits Are a Game-Changer
What sets our Green Chili Biscuits apart from the rest is a meticulous focus on a few critical details, particularly the “cold butter” technique. This isn’t just a suggestion; it’s the secret to those coveted flaky layers that often elude home bakers.
Beyond texture, these biscuits strike a delightful balance. The mild, earthy kick from the diced green chilies perfectly complements the buttery, comforting biscuit base, making them versatile for any meal.
This recipe provides clear, actionable steps that demystify biscuit making. Whether you’re a seasoned pro or just starting out, you’ll achieve that bakery-quality rise and tender crumb every single time, banishing dense biscuits forever.
The Essential Ingredients for Your Best Green Chili Biscuits
Success in biscuit baking starts with understanding your ingredients. Quality and temperature are paramount for achieving that perfect texture and flavor.
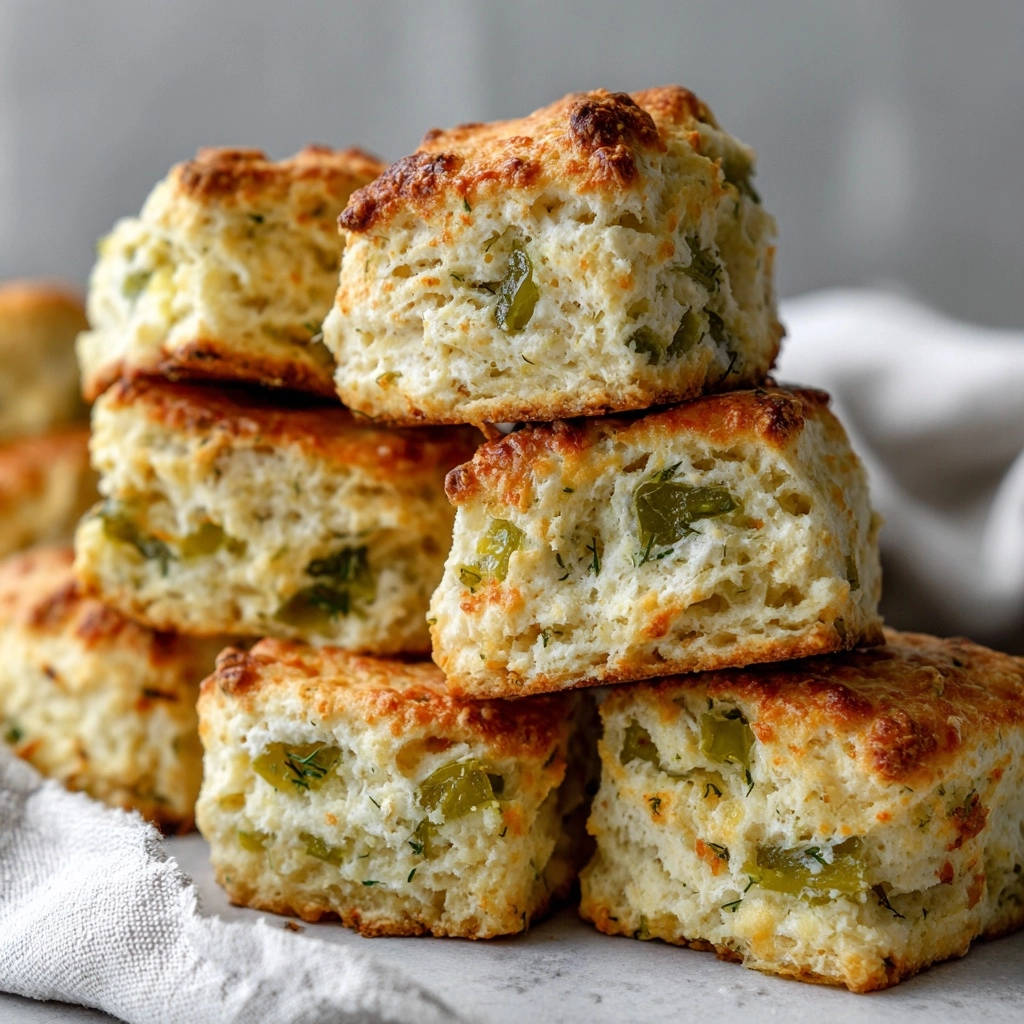
Flour and Leavening: The Foundation of Fluff
All-Purpose Flour: Use unbleached all-purpose flour for the best structure. Accurate measurement is crucial; spoon and level the flour, don’t scoop directly from the bag.
Baking Powder: A fresh, active baking powder is non-negotiable for a good rise. Check the expiration date to ensure your biscuits don’t fall flat.
Salt: Essential for balancing flavors and enhancing the overall taste. Don’t skip it!
The Chilly Secret: Unsalted Butter and Buttermilk
Very Cold Unsalted Butter: This is the star ingredient for flakiness. The tiny pieces of cold butter create pockets of steam during baking, separating the dough into those desirable layers.
Very Cold Buttermilk: Buttermilk reacts with baking powder to create lift, while its acidity also tenderizes the dough. Using it cold helps maintain the overall temperature of the dough, keeping the butter from melting prematurely.
That Signature Kick: Diced Green Chilies
Diced Green Chilies: Canned diced green chilies, well-drained, are incredibly convenient and provide a consistent, mild heat. They infuse a savory, nuanced flavor without overpowering the biscuit.
Ensure they are thoroughly drained to prevent excess moisture from making your dough too wet. This step is vital for the correct dough consistency.
Tools for Biscuit Bliss: What You’ll Need
Having the right equipment makes the biscuit-making process smooth and enjoyable. Here are the essentials:
Large Mixing Bowl: Provides ample space to combine your dry ingredients and incorporate the butter without spills.
Pastry Blender or Forks: Ideal for cutting cold butter into the flour mixture, ensuring even distribution while keeping your hands warm.
Measuring Cups and Spoons: For precise ingredient measurements, which are critical in baking.
Whisk: To thoroughly combine your dry ingredients, preventing clumps and ensuring even leavening.
Rubber Spatula or Fork: For gently mixing in the buttermilk without overworking the dough.
Rolling Pin (Optional): While gentle patting is often enough, a rolling pin can help achieve uniform thickness.
2-inch Biscuit Cutter: Essential for clean, round biscuits with uniform size, promoting even baking.
Baking Sheet: An ungreased baking sheet allows for proper air circulation and browning.
Crafting Your Perfect Batch: Step-by-Step Green Chili Biscuits
Follow these steps closely, paying attention to the details, and you’ll be rewarded with the fluffiest Green Chili Biscuits you’ve ever made.
- Preheat Your Oven:
Set your oven to 425 degrees F (220 degrees C). A hot oven is crucial for biscuits to rise quickly and achieve a golden crust.
- Combine Dry Ingredients:
In a large bowl, whisk together the all-purpose flour, baking powder, and salt.
This ensures the leavening agent and salt are evenly distributed throughout the flour, guaranteeing a consistent rise and flavor in every biscuit.
- Incorporate the Cold Butter:
Add the very cold, cut-up unsalted butter pieces to the flour mixture. Using a pastry blender or your fingertips, quickly cut in the butter.
Continue until the mixture resembles coarse crumbs with some pea-sized pieces of butter remaining. This texture is vital for flaky layers, so work quickly to prevent the butter from melting.
- Add the Green Chilies:
Stir in the well-drained diced green chilies until they are evenly distributed throughout the butter-flour mixture.
Ensuring they are well-drained prevents introducing excess moisture, which could alter the dough’s consistency.
- Gently Mix in Buttermilk:
Pour in the very cold buttermilk. With a fork or spatula, gently mix just until the dry ingredients are moistened.
The dough should look shaggy, with some dry bits remaining – this is exactly what you want! Overworking the dough is the number one enemy of fluffy biscuits, so stop mixing as soon as it comes together.
- Shape the Dough:
Lightly flour a clean surface. Turn the shaggy dough out onto the floured surface and gently pat it into a rectangle about 1 inch thick.
For extra layers, you can fold the dough over itself 2 or 3 times. Do this very gently and minimally to avoid developing the gluten too much.
- Cut the Biscuits:
Using a 2-inch biscuit cutter, cut out the biscuits. Press straight down firmly, but do not twist the cutter.
Twisting seals the edges, which can prevent a good rise. Gather any scraps, gently re-pat them together (minimally), and cut out any additional biscuits.
- Prepare for Baking:
Place the cut biscuits onto an ungreased baking sheet. For softer sides, allow them to touch slightly.
If you prefer crisper sides, space them out more on the baking sheet.
- Bake to Golden Perfection:
Bake for 12-15 minutes, or until the tops are golden brown and the biscuits are fully risen and cooked through.
Keep an eye on them towards the end of the baking time as ovens can vary. Serve these savory delights warm and enjoy their guaranteed fluffiness!
Unlock the Secrets to Unfailingly Fluffy Green Chili Biscuits
Achieving truly light and flaky biscuits is more art than science, but these “secrets” will consistently lead you to success.
Mastering the Cold Butter Technique
The colder your butter, the flakier your biscuits will be. As the cold butter melts in the hot oven, it releases steam, creating pockets that separate the dough into distinct layers.
To ensure your butter is optimally cold, cut it into small pieces and pop it back into the freezer for 10-15 minutes before mixing. You can also grate frozen butter directly into the flour for even smaller, colder pieces.
The Gentle Touch: Why Overmixing is Your Enemy
Overworking biscuit dough develops gluten, leading to a tough, dense biscuit. The goal is to mix just enough until the ingredients are combined, leaving the dough somewhat shaggy and uneven.
When you add the buttermilk, use a fork or a light touch with a spatula. Stop mixing as soon as you see no dry flour pockets, even if the dough looks a little messy. That shaggy texture is the promise of fluffiness.
Cutting for Maximum Rise: The Straight Down Trick
It’s tempting to twist the biscuit cutter to get a clean cut, but resist the urge! Twisting seals the edges of the biscuit, preventing it from rising properly.
Instead, press the cutter straight down firmly, then lift straight up. This preserves the open layers of the dough, allowing them to expand freely in the oven.
Baking Sheet Strategy: Soft Sides vs. Crisp Edges
How you arrange your biscuits on the baking sheet impacts their final texture. For soft, tender sides, arrange the biscuits so they are touching or almost touching.
If you prefer a crisper exterior all around, space them at least an inch apart on the baking sheet. Both methods work perfectly; it simply depends on your preference.
Green Chili Biscuit Troubleshooting: Common Issues, Easy Fixes
Even with the best intentions, baking can sometimes present challenges. Here’s how to fix common biscuit woes.
Biscuits Are Dense or Hard
This is almost always due to overmixing the dough. Too much kneading develops gluten, making the biscuits tough.
Another culprit can be warm butter or buttermilk, which melts the butter before baking, or old baking powder that has lost its potency. Always use cold ingredients and check your leavening agent’s freshness.
Biscuits Spreading Too Much
If your biscuits spread rather than rise, your dough might have been too warm or too wet. Ensure your butter and buttermilk are very cold.
Also, avoid twisting the cutter, as this can seal the edges and lead to spreading rather than a vertical rise.
Not Enough Rise
A lack of rise often points to inactive baking powder, so confirm its freshness. It can also be a result of overworking the dough, which inhibits the leavening action.
Lastly, improper cutting (twisting) or dough that wasn’t kept cold enough can also contribute to a flat biscuit.
Serving Suggestions, Storage & Make-Ahead Tips
These Green Chili Biscuits are incredibly versatile. Here’s how to make the most of them.
Creative Ways to Enjoy Your Green Chili Biscuits
These savory biscuits are fantastic on their own, especially warm with a pat of butter. They are the perfect accompaniment to a hearty chili or a rich stew.
For a perfect pairing, try our Mastering Golden Skillet Dinner Rolls for Bakery-Quality Results.
Serve them as a unique breakfast side with scrambled eggs or alongside a savory breakfast casserole like our Cheesy Ham and Spinach Breakfast Bites. They also make a delicious base for mini sandwiches.
For a complete meal, pair them with a vibrant side dish like Skillet Street Style Corn, adding another layer of texture and flavor to your plate.
If you enjoy working with fresh dough for these biscuits, you’ll love the technique behind these soft buttery garlic herb rolls.
Keeping Your Biscuits Fresh
Once baked, Green Chili Biscuits are best enjoyed warm and fresh from the oven. If you have leftovers, store them in an airtight container at room temperature for up to 2-3 days.
To reheat, pop them in a toaster oven or microwave for a few seconds until warm, or bake at 350°F (175°C) for 5-7 minutes until heated through and slightly crisp.
Can You Make Green Chili Biscuits Ahead?
Yes, you absolutely can! To make ahead, cut out the biscuits and place them on a parchment-lined baking sheet. Freeze them until solid, then transfer to a freezer-safe bag.
You can bake them directly from frozen; just add a few extra minutes to the baking time, looking for that golden-brown color and full rise. This is a great way to have fresh biscuits whenever a craving strikes!
Your Green Chili Biscuit Questions Answered
Let’s address some common queries about this fantastic recipe.
Can I Use Different Chilies?
Absolutely! While canned diced green chilies offer convenience and a mild heat, you can experiment. Roasted poblanos (peeled and diced) will give a smokier, slightly spicier flavor.
For a bit more heat, a finely minced jalapeño (seeds removed for less spice) could be added, but start with a small amount to gauge the intensity.
What if I Don’t Have Buttermilk?
No buttermilk? No problem! You can easily make a substitute. For 3/4 cup of buttermilk, measure 3/4 cup of regular milk (dairy or non-dairy).
Stir in 3/4 tablespoon of white vinegar or lemon juice, and let it sit for 5-10 minutes until it slightly curdles. This acidified milk will work just like buttermilk in the recipe.
Can These Be Made Gluten-Free?
While the recipe is designed for all-purpose flour, you can experiment with a 1:1 gluten-free baking flour blend that contains xanthan gum. The texture might be slightly different, potentially less flaky or more crumbly.
Always follow the specific instructions on your chosen gluten-free flour blend for best results when substituting.
Are Green Chili Biscuits Spicy?
Typically, canned diced green chilies (often Hatch chilies) provide a very mild, approachable heat, more flavorful than spicy. They add a gentle warmth and earthy undertone rather than an intense burn.
If you prefer more spice, you can add a pinch of cayenne pepper to the dry ingredients, or use a spicier variety of fresh chili if you’re comfortable with the heat.
Ready to Bake? Share Your Green Chili Biscuits!
Now that you have all the secrets to fluffy, flavorful Green Chili Biscuits, it’s time to get baking! This recipe is a testament to how simple tweaks can lead to extraordinary results.
What to Serve with Green Chili Biscuits
These savory green chili biscuits have a gentle heat and a tender crumb. Pair them with something hearty for a full meal.
- Let the biscuits soak up the broth in a bowl of Creamy Chicken and Dumplings for a comforting, cozy dinner.
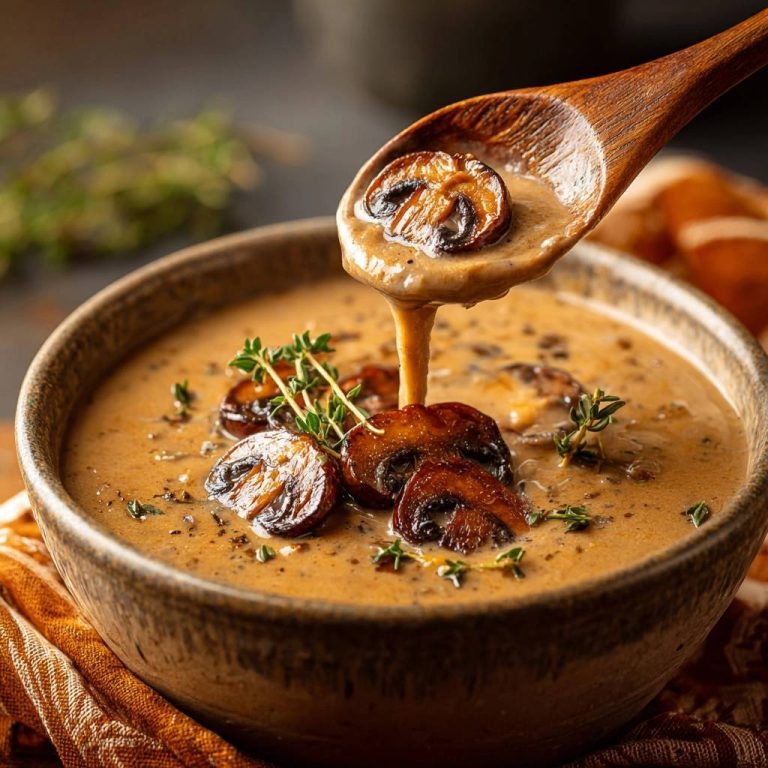
- Use them to mop up the rich, earthy gravy from Southern Biscuits and Mushroom Gravy for a double-biscuit treat.
I can’t wait for you to experience the satisfaction of pulling a perfectly risen, golden batch from your oven. Give this recipe a try, and don’t forget to share your baking triumphs in the comments below!
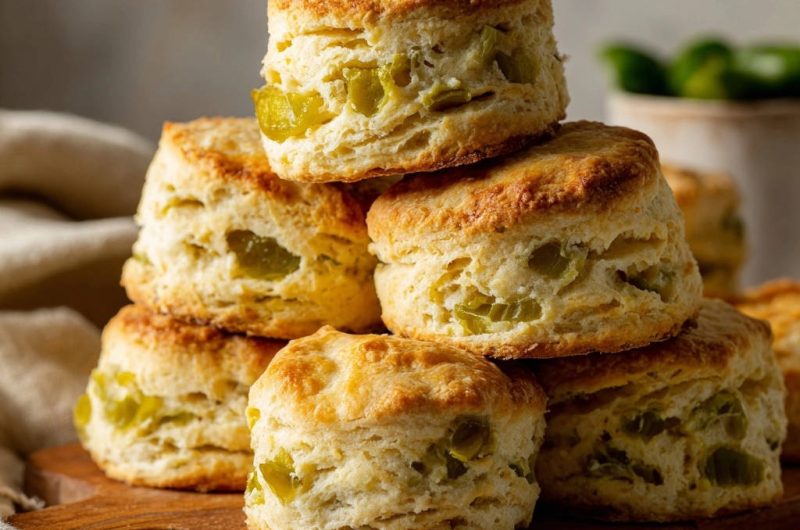
Green Chili Biscuits
Course: BreadCuisine: AmericanDifficulty: easy8
biscuits20
minutes12
minutes120
kcal35
minutesThere’s nothing quite like a warm, fluffy biscuit with a little kick from green chilies. This recipe shares the simple trick that guarantees a beautiful rise and a tender crumb every single time, transforming your biscuit making.
Ingredients
2 cups all-purpose flour
1 tablespoon baking powder
1/2 teaspoon salt
1/2 cup (1 stick) unsalted butter, very cold and cut into small pieces
3/4 cup buttermilk, very cold
1/2 cup diced green chilies, well drained
Directions
- Preheat your oven to 425 degrees F (220 degrees C).
- In a large bowl, whisk together the flour, baking powder, and salt.
- Add the very cold butter pieces to the flour mixture. Using a pastry blender or your fingertips, quickly cut in the butter until the mixture resembles coarse crumbs with some pea-sized pieces of butter remaining. The key here is to keep the butter as cold as possible and work quickly to avoid melting it.
- Stir in the well-drained green chilies until evenly distributed.
- Pour in the cold buttermilk. With a fork or spatula, gently mix just until the dry ingredients are moistened. Do not overmix; a shaggy dough is exactly what you want. Overworking the dough is the number one enemy of fluffy biscuits!
- Lightly flour a clean surface. Turn the dough out onto the floured surface and gently pat it into a rectangle about 1 inch thick. You can fold the dough over itself 2 or 3 times to create layers, but do so very gently and minimally.
- Using a 2-inch biscuit cutter, cut out the biscuits. Press straight down, do not twist the cutter, as twisting can seal the edges and prevent a good rise. Gather any scraps and gently re-pat to cut out additional biscuits.
- Place the biscuits onto an ungreased baking sheet, allowing them to touch slightly for a softer side, or spacing them out if you prefer crisper sides.
- Bake for 12-15 minutes, or until the tops are golden brown and the biscuits are fully risen and cooked through. Serve warm and enjoy that guaranteed fluffiness!
Notes
- The key to fluffy biscuits is keeping butter very cold and avoiding overmixing the dough.