Swirled Pumpkin Cheesecake Bars: No More Soggy Crust!
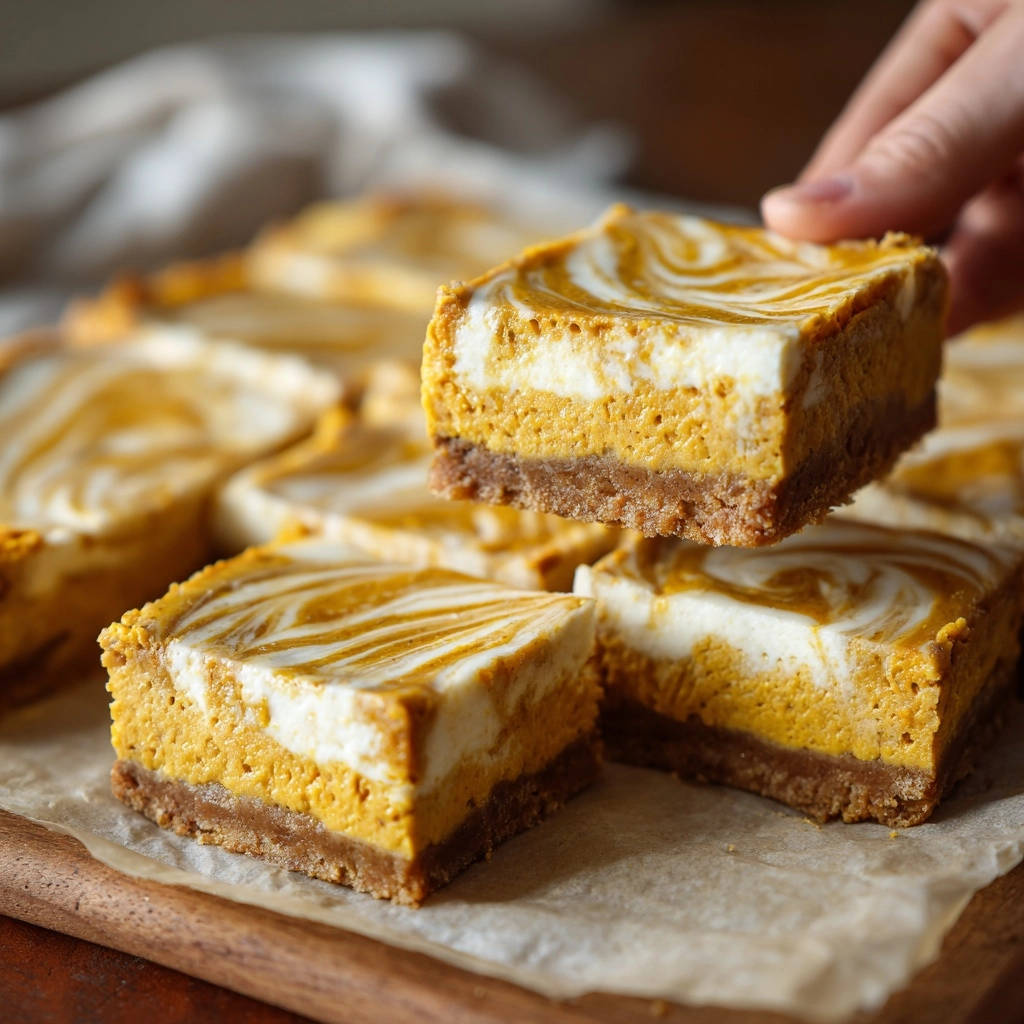
Swirled Pumpkin Cheesecake Bars
should be a joyful experience, not a guessing game ending in a disappointing soggy crust. I’ve personally faced the frustration of a crumbling, moist base far too often. This recipe finally cracks the code, guaranteeing a perfectly firm and crisp foundation every single time, letting the creamy pumpkin and luscious swirl truly shine. Get ready for an irresistible fall treat that tastes as incredible as it looks.Why These Swirled Pumpkin Cheesecake Bars Are Your New Favorite Fall Treat
The “Anti-Soggy” Secret: Perfectly Firm Crust, Every Time
The hallmark of a truly great cheesecake bar is its crust: golden, buttery, and firm enough to support the rich filling without turning soft. This recipe employs a crucial pre-baking step for the graham cracker crust.
This technique sets the crust, creating a protective barrier against the moisture of the creamy pumpkin layer. You’ll achieve that satisfying crisp bite in every square, making those soggy crust woes a distant memory.
Effortless Elegance: Achieving That Signature Swirl
Creating a visually stunning dessert doesn’t have to be complicated. Our technique for the cream cheese swirl is straightforward yet yields a beautifully marbled effect that looks professional.
A simple pass with a knife or skewer is all it takes to transform the layers into an artistic masterpiece. These
Swirled Pumpkin Cheesecake Bars
will undoubtedly impress with minimal effort.Balanced Bliss: Not Too Sweet, Just Right
Some pumpkin desserts can be overwhelmingly sweet, overshadowing the delicate spice and creamy textures. This recipe expertly balances the sweetness from the granulated and brown sugars with the natural earthiness of pumpkin puree.
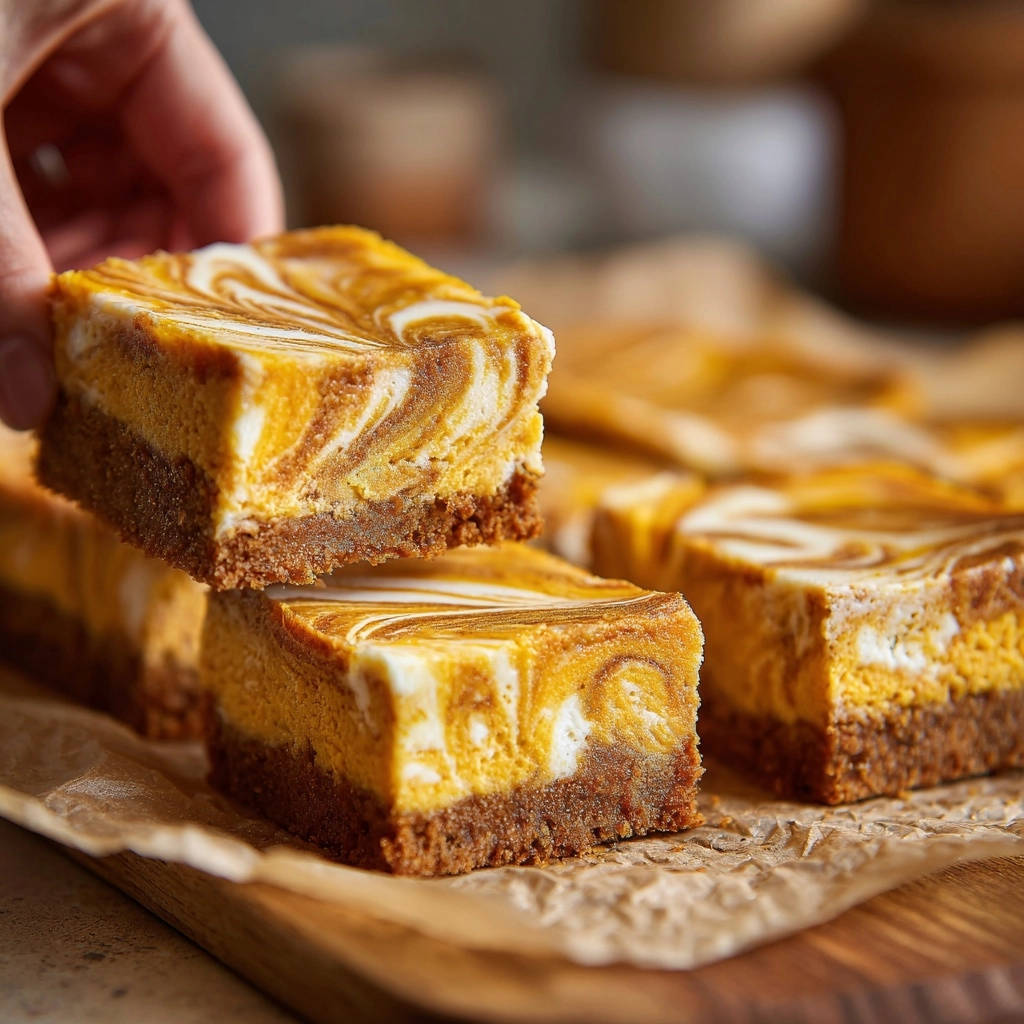
The result is a harmonious blend of warm spices and rich cream cheese, making each bite incredibly satisfying without being cloying. It’s the perfect treat for any autumn gathering.
Essential Tools for Your Swirled Pumpkin Cheesecake Bars Adventure
Must-Have Baking Equipment
8×8 or 9×9 inch Baking Pan: The precise size ensures your bars achieve the correct thickness and baking consistency. A square pan is ideal for neat, even squares.
Parchment Paper: Absolutely essential for easy removal. Leaving an overhang on two sides creates “handles” to lift the entire chilled slab out effortlessly, preventing breakage.
Large and Small Mixing Bowls: You’ll need separate bowls for the crust, the pumpkin cheesecake layer, and the cream cheese swirl. This keeps your prep organized and efficient.
Electric Mixer (Handheld or Stand): Vital for achieving smooth, lump-free cream cheese mixtures and properly incorporating air. This guarantees a creamy, delightful texture for both layers.
Gather Your Ingredients: The Building Blocks of Flavor
For the Irresistible Graham Cracker Crust
The base for these
Swirled Pumpkin Cheesecake Bars
needs to be sturdy and flavorful. Graham cracker crumbs provide a classic, slightly sweet foundation, while butter binds everything together and adds richness.The touch of granulated sugar enhances the sweetness and aids in browning during the crucial pre-bake.
- 1 ½ cups Graham cracker crumbs: Finely crushed for a uniform texture.
- ¼ cup Granulated sugar: Adds a subtle sweetness to the base.
- 6 tablespoons Unsalted butter, melted: Acts as the binding agent, creating a cohesive, buttery crust.
Crafting the Creamy Pumpkin Cheesecake Layer
This is where the magic happens, combining the velvety texture of cheesecake with the warm, comforting flavors of autumn. Quality ingredients are key for a truly decadent result.
- 16 ounces Cream cheese, softened: Use full-fat block cream cheese for the richest, creamiest texture. Softening it ensures a lump-free, smooth batter.
- 1 cup Pumpkin puree (not pie filling): Crucially, use pure pumpkin puree for natural flavor. Pie filling contains added spices and sugar, which will disrupt the recipe’s balance.
- ½ cup Granulated sugar: Provides foundational sweetness.
- ¼ cup Packed light brown sugar: Adds a deeper, molasses-like sweetness that complements the pumpkin beautifully.
- 2 large Eggs: Act as a binder, providing structure and richness to the cheesecake without making it rubbery.
- 1 teaspoon Vanilla extract: Enhances all the other flavors.
- 1 teaspoon Ground cinnamon: The star spice, bringing warmth and classic pumpkin spice notes.
- ½ teaspoon Ground nutmeg: Essential for that authentic fall flavor profile. For an extra touch, consider freshly grated nutmeg.
- Pinch of ground cloves (optional): Adds a subtle, warm depth without overpowering.
The Velvety Cream Cheese Swirl
This contrasting layer provides a beautiful visual and a delightful tang against the pumpkin. Keeping this mixture simple allows the swirl to shine.
- 4 ounces Cream cheese, softened: Again, use full-fat and ensure it’s well softened for a perfectly smooth swirl.
- ¼ cup Granulated sugar: Sweetens the plain cream cheese layer.
- 1 tablespoon Milk: Thins the mixture slightly to achieve a workable, pipeable, or spoonable consistency for swirling.
- ½ teaspoon Vanilla extract: A classic pairing with cream cheese for a pure, sweet flavor.
Step-by-Step Perfection: How to Make Swirled Pumpkin Cheesecake Bars
Preparing Your Pan and Preheating the Oven
Preheat your oven to 350°F (175°C) to ensure it reaches the correct temperature before baking. Line an 8×8 or 9×9 inch baking pan with parchment paper, allowing a generous overhang on two sides.
This overhang acts as a sling, making it incredibly easy to lift the chilled bars out of the pan later, ensuring clean edges and a perfect presentation.
The Crucial Crust: Press and Pre-Bake
In a medium bowl, combine the graham cracker crumbs, 1/4 cup granulated sugar, and melted butter. Mix thoroughly until all the crumbs are evenly moistened and resemble wet sand.
Press this mixture firmly and evenly into the bottom of your prepared pan. A flat-bottomed glass or measuring cup works well for compacting the crust, creating a dense, stable base.
Crucially, bake the crust for 8 to 10 minutes, just until slightly golden and fragrant. This pre-baking step is the “anti-soggy” secret: it sets the crust and creates a protective barrier against the moist filling.
Remove the pre-baked crust from the oven and let it cool completely on a wire rack. This complete cooling is vital to prevent any residual heat or steam from softening your perfectly crisp base once the filling is added.
Whipping Up the Pumpkin Cheesecake Filling
In a large bowl, using an electric mixer, beat the 16 ounces of softened cream cheese until it is perfectly smooth and creamy, about 2-3 minutes. This aeration is key to a light texture.
Add the pumpkin puree, ½ cup granulated sugar, and brown sugar; continue beating until the mixture is well combined and lump-free. Scrape down the sides of the bowl as needed to ensure even mixing.
Beat in the eggs one at a time, mixing only until they are just incorporated. Overmixing eggs can introduce too much air, which can lead to cracks in your cheesecake as it bakes and cools.
Stir in the 1 teaspoon vanilla extract, cinnamon, nutmeg, and the optional pinch of cloves. Mix gently until just combined, ensuring the spices are evenly distributed throughout the pumpkin mixture.
Creating the Smooth Cream Cheese Swirl
In a separate small bowl, combine the 4 ounces of softened cream cheese with ¼ cup granulated sugar, 1 tablespoon milk, and ½ teaspoon vanilla extract.
Beat this mixture with an electric mixer until it is completely smooth and free of any lumps. The milk helps achieve a perfect consistency for easy swirling.
Assembling the Layers and Artistic Swirl
Pour the entire pumpkin cheesecake mixture over your fully cooled, pre-baked crust and gently spread it evenly using an offset spatula or the back of a spoon to create a uniform layer.
Drop spoonfuls of the plain cream cheese swirl mixture strategically over the pumpkin layer. Don’t worry about perfect placement, as the swirling will distribute it.
Using a knife or a skewer, gently swirl the cream cheese into the pumpkin mixture. Start by drawing lines and then making figure-eights to create beautiful marbled patterns, being careful not to overmix and blend the colors completely.
Baking to Golden Perfection
Carefully transfer the pan to the preheated oven and bake for 35 to 45 minutes. The bars are done when the edges are set and lightly golden, and the center is just slightly jiggly when gently shaken.
Do not overbake, as cheesecake continues to set as it cools. Overbaking can lead to a dry texture and undesirable cracks on the surface.
Cooling and Chilling: Patience for Perfection
Once baked, remove the pan from the oven and let the bars cool completely in the pan on a wire rack at room temperature. This gradual cooling process helps prevent cracking.
Once fully cooled to room temperature, transfer the pan to the refrigerator and chill for at least 4 hours, or preferably overnight. Chilling is absolutely essential for the bars to firm up, making them easy to slice cleanly and enhancing their flavor and texture.
If you enjoy the creamy texture of these pumpkin bars, you will love the silky richness of this creamy New York cheesecake.
Chef’s Secrets: Elevating Your Swirled Pumpkin Cheesecake Bars
Ingredient Spotlights: Cream Cheese and Pumpkin Puree
Always opt for full-fat block cream cheese, not the whipped or spreadable kind. The higher fat content is crucial for the rich, dense, and creamy texture we want in cheesecake. Ensure it’s truly softened to room temperature for a lump-free batter.
Use pure pumpkin puree, not pumpkin pie filling. Pie filling has added sugars and spices that will alter the delicate balance of this recipe. The can should list only “pumpkin” as the ingredient.
The Art of Cooling: Why It’s Non-Negotiable
Patience is paramount when cooling. Allowing the bars to cool completely at room temperature before chilling prevents thermal shock, which can cause cracks. The subsequent long chill in the refrigerator is vital.
Chilling for at least 4 hours (overnight is best) allows the cheesecake to fully set, making for clean, precise slices and enhancing the overall firm, creamy texture. Don’t rush this step!
Achieving the Perfect Swirl Effect
The key to a beautiful swirl is a light, artistic hand. Drop spoonfuls of the plain cream cheese mixture onto the pumpkin layer, then use a thin knife or skewer to gently cut through both layers.
Avoid overmixing; you want distinct ribbons of white and orange, not a fully blended color. Simple figure-eights or S-shapes are often the most effective.
Spice Blending for Signature Flavor
While the recipe specifies cinnamon, nutmeg, and optional cloves, feel free to personalize your spice blend. A small amount of ground ginger can add an extra kick, or a pinch of allspice could deepen the warmth.
For the freshest flavor, grate whole nutmeg just before adding it to the batter. This simple step makes a noticeable difference in aroma and taste.
The same cooling method on a wire rack also works perfectly for these creamy lemon coconut bars.
Troubleshooting Common Baking Woes
“My Crust is Still Soggy!”
This is almost always due to not pre-baking the crust long enough or not allowing it to cool completely before adding the wet filling. The pre-bake step creates a crucial barrier.
Ensure your crust is slightly golden and fragrant before pulling it from the oven, and let it cool completely on a wire rack to room temperature.
“The Cheesecake Cracked!”
Cracks often happen for a few reasons: overbaking, overmixing the eggs into the batter, or rapid temperature changes during cooling. Cheesecake needs a gentle transition from hot to cold.
To avoid cracks, bake only until the edges are set and the center has a slight jiggle. Allow for gradual cooling on a wire rack before refrigerating.
“My Swirl Disappeared!”
If your swirl completely vanishes, it’s likely due to over-aggressive swirling, or the cream cheese swirl mixture might have been too thin. You want distinct ribbons, not a fully blended color.
Use a gentle hand when creating the swirl patterns, and ensure your cream cheese swirl mixture has a thick, pipeable consistency, not too runny.
“Bars Are Too Soft/Too Hard!”
Too soft usually means they haven’t baked long enough or, more commonly, haven’t been chilled sufficiently. The chilling process firms up the cheesecake.
If they’re too hard, they were likely overbaked. Remember the “slight jiggle” test for doneness, and ensure they are properly chilled for optimal texture.
Serving, Storing, and Making Ahead
Presentation Perfect: Slicing Your Bars
For impeccably clean slices, ensure your
Swirled Pumpkin Cheesecake Bars
are thoroughly chilled (at least 4 hours, preferably overnight). Use a long, sharp knife dipped in hot water and wiped clean between each cut.This trick helps the blade glide through the cheesecake and crust without dragging or crumbling, leaving you with picture-perfect squares. To achieve even more seasonal flair, you could serve these alongside our decadent pumpkin pie truffles for a full dessert spread.
How to Store Leftovers for Peak Freshness
Store any leftover
Swirled Pumpkin Cheesecake Bars
in an airtight container in the refrigerator. This prevents them from drying out and absorbing other fridge odors.Properly stored, they will maintain their delicious taste and texture for up to 3-4 days. For an exciting variation on cheesecake bars, try our luscious chocolate crumb cheesecake bars too!
Can I Make These Swirled Pumpkin Cheesecake Bars in Advance?
Absolutely! These bars are ideal for making ahead. In fact, they taste even better the day after they’re made, as the flavors have more time to meld and the cheesecake fully sets.
What’s Next?
Try these delicious pairings:
- Mastering Cheesy Sausage Breakfast Puffs with a Crisp Crust
- S’mores French Toast Stack: Crispy Edges, Melty Core
You can prepare them up to 2-3 days in advance and store them, tightly covered, in the refrigerator until you’re ready to serve. This makes them perfect for holiday gatherings or meal prepping desserts.
Swirled Pumpkin Cheesecake Bars FAQs
Can I use pumpkin pie filling instead of puree?
No, it’s highly recommended to use pure pumpkin puree for this recipe. Pumpkin pie filling contains added sugars and spices, which will alter the intended flavor and sweetness balance of these
Swirled Pumpkin Cheesecake Bars
.How do I know when the bars are done baking?
The bars are done when the edges appear set and slightly golden, but the center still has a slight jiggle when you gently shake the pan. They will continue to set as they cool.
Can I make these gluten-free?
Yes, you can easily make these gluten-free by substituting standard graham cracker crumbs with gluten-free graham cracker crumbs. The rest of the ingredients are naturally gluten-free.
What size pan should I use?
An 8×8 inch pan will yield thicker bars and might require a few extra minutes of baking time. A 9×9 inch pan will result in slightly thinner bars, often baking closer to the minimum time specified in the recipe. Both work beautifully!
Can I freeze Swirled Pumpkin Cheesecake Bars?
Yes,
Swirled Pumpkin Cheesecake Bars
freeze wonderfully. Once completely chilled and sliced, arrange them in a single layer on a parchment-lined baking sheet and freeze until solid. Then, transfer the frozen bars to an airtight freezer-safe container or bag, separating layers with parchment paper. They will keep for up to 1 month. Thaw in the refrigerator overnight before serving.Ready to Indulge? Your New Favorite Fall Dessert Awaits!
Armed with these expert tips and a foolproof recipe, you’re now ready to create the most incredibleSwirled Pumpkin Cheesecake Bars
you’ve ever tasted. Say goodbye to soggy crusts and hello to a perfectly balanced, beautifully marbled fall delight. This recipe is a testament to the fact that baking perfection is within everyone’s reach. Don’t just take our word for it; whip up a batch this season and experience the magic yourself. We’d love to see your creations! For more seasonal inspirations and comforting recipes, be sure to explore our full collection on the site.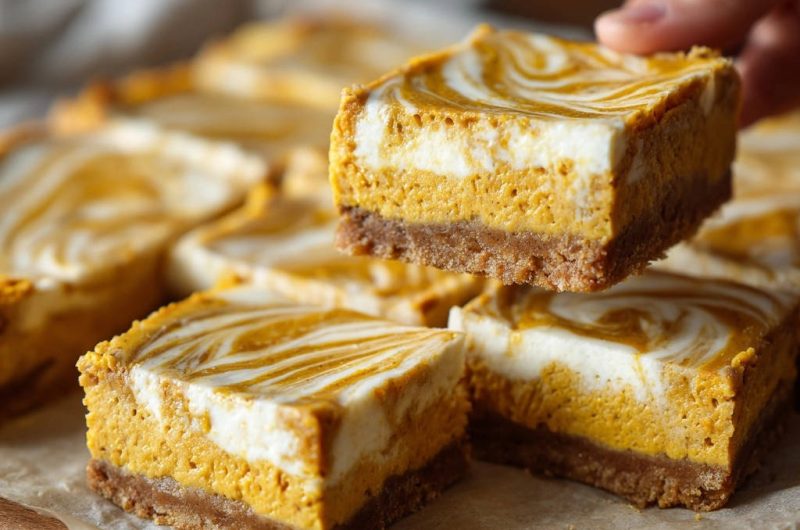
Pumpkin Cheesecake Bars
Course: DessertCuisine: AmericanDifficulty: medium12
bars30
minutes45
minutes350
kcal480
minutesDiscover the secret to perfectly firm and crisp pumpkin cheesecake bars every time. These delightful bars feature a graham cracker crust, a creamy pumpkin cheesecake layer, and a beautiful cream cheese swirl. The pre-baked crust prevents sogginess, allowing the rich, spiced pumpkin flavor to truly shine.
Ingredients
For the Crust:
1 1/2 cups graham cracker crumbs
1/4 cup granulated sugar
6 tablespoons unsalted butter, melted
For the Pumpkin Cheesecake Layer:
16 ounces cream cheese, softened
1 cup pumpkin puree (not pie filling)
1/2 cup granulated sugar
1/4 cup packed light brown sugar
2 large eggs
1 teaspoon vanilla extract
1 teaspoon ground cinnamon
1/2 teaspoon ground nutmeg
Pinch of ground cloves (optional)
For the Cream Cheese Swirl:
4 ounces cream cheese, softened
1/4 cup granulated sugar
1 tablespoon milk
1/2 teaspoon vanilla extract
Directions
- Preheat your oven to 350F (175C). Line an 8×8 or 9×9 inch baking pan with parchment paper, allowing an overhang on two sides for easy lifting later.
- In a medium bowl, combine the graham cracker crumbs, 1/4 cup granulated sugar, and melted butter. Mix until the crumbs are evenly moistened. Press the mixture firmly into the bottom of the prepared pan.
- Bake the Crust (The Anti-Soggy Secret!): Bake the crust for 8 to 10 minutes, just until slightly golden and fragrant. This crucial pre-baking step is what prevents a soggy crust by setting it and creating a protective barrier against the moist filling. Remove from oven and let it cool completely on a wire rack while you prepare the fillings. This complete cooling is vital to avoid any steam from softening your perfect crust.
- In a large bowl, using an electric mixer, beat the 16 ounces softened cream cheese until smooth and creamy. Add the pumpkin puree, 1/2 cup granulated sugar, and brown sugar; beat until well combined. Beat in the eggs one at a time until just incorporated. Stir in 1 teaspoon vanilla extract, cinnamon, nutmeg, and optional cloves. Pour this mixture over your fully cooled crust and spread evenly.
- In a separate small bowl, beat the 4 ounces softened cream cheese with 1/4 cup granulated sugar, milk, and 1/2 teaspoon vanilla extract until smooth and no lumps remain.
- Drop spoonfuls of the cream cheese swirl mixture over the pumpkin layer. Using a knife or skewer, gently swirl the cream cheese into the pumpkin mixture to create a beautiful marbled effect.
- Bake for 35 to 45 minutes, or until the edges are set and the center is just slightly jiggly. Do not overbake, as they will continue to set as they cool.
- Let the bars cool completely in the pan on a wire rack. Once fully cooled, transfer the pan to the refrigerator and chill for at least 4 hours, or preferably overnight, before lifting them out of the pan using the parchment paper overhang and slicing into squares.
Notes
- The pre-baking of the crust is essential for preventing sogginess. Ensure complete cooling of the crust and bars, and chill thoroughly for best results.