Homemade Everything Bagels: New York Style Chewy Perfection
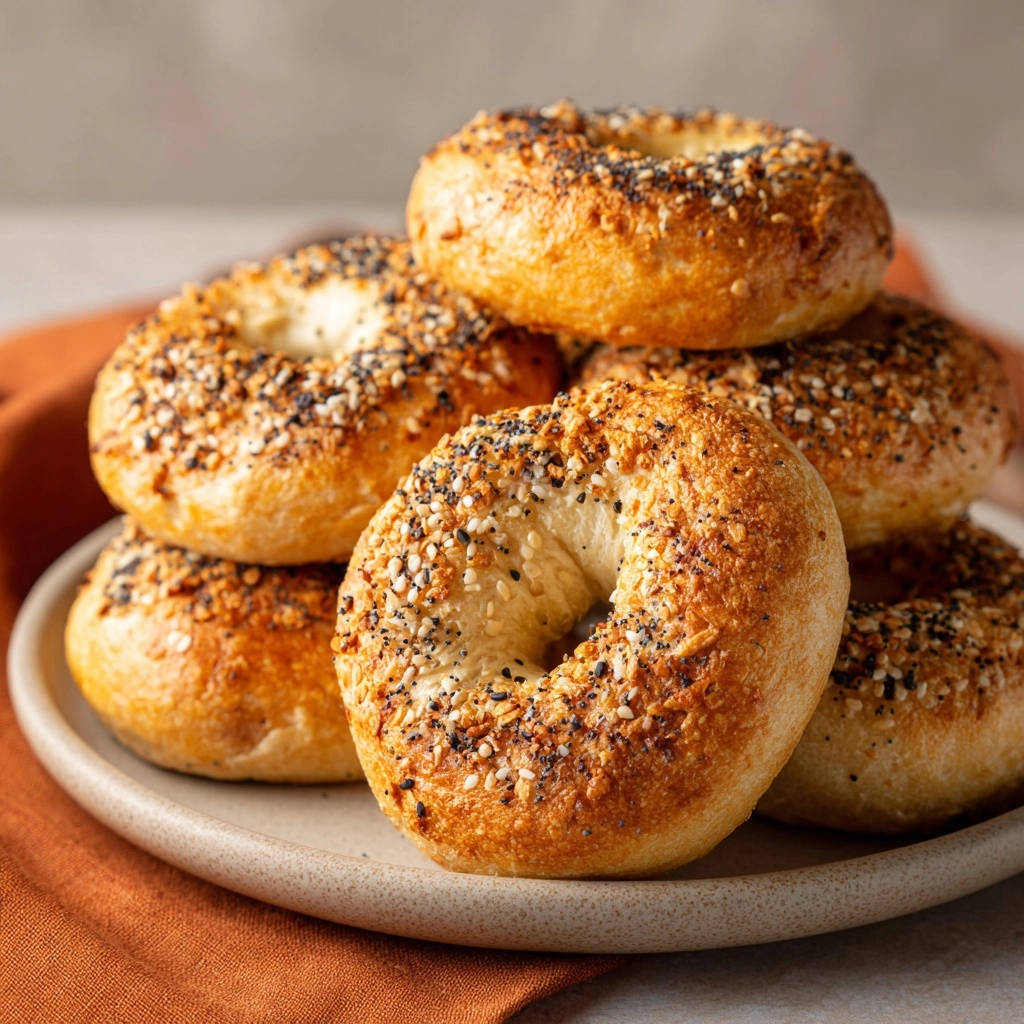
I used to believe that achieving that legendary New York chew in homemade bagels was an impossible feat, often resulting in dense, bread-like disappointments. Yet, through countless trials, I uncovered the simple, powerful secrets that now consistently deliver truly exceptional Homemade Everything Bagels, complete with that glorious, perfect chew.
This recipe isn’t just about mixing ingredients; it’s a meticulously crafted guide, brimming with expert techniques to ensure your bagels boast a deep flavor and irresistible texture every single time. Prepare to transform your kitchen into a genuine bagel bakery.
Unlocking the Secret to Truly Chewy Homemade Bagels
Many home bagel recipes fall short, yielding a product that lacks the distinct, satisfying chew and shiny crust of a true bagel shop favorite. Our approach tackles these common pitfalls head-on.
This recipe distinguishes itself by focusing on a trifecta of crucial techniques. Each step is designed to build the ideal structure and flavor, guaranteeing a superior result.
Why Our Recipe Guarantees That Perfect New York Chew
The extended, vigorous kneading phase is paramount for developing a robust gluten network. This foundational step is non-negotiable for achieving the signature chewy bagel texture, allowing the dough to stretch without tearing.
Our cold proofing method, a slow refrigeration period, significantly enhances both the bagels’ flavor depth and their characteristic chewiness. This patient approach allows the yeast to work its magic over a longer period.
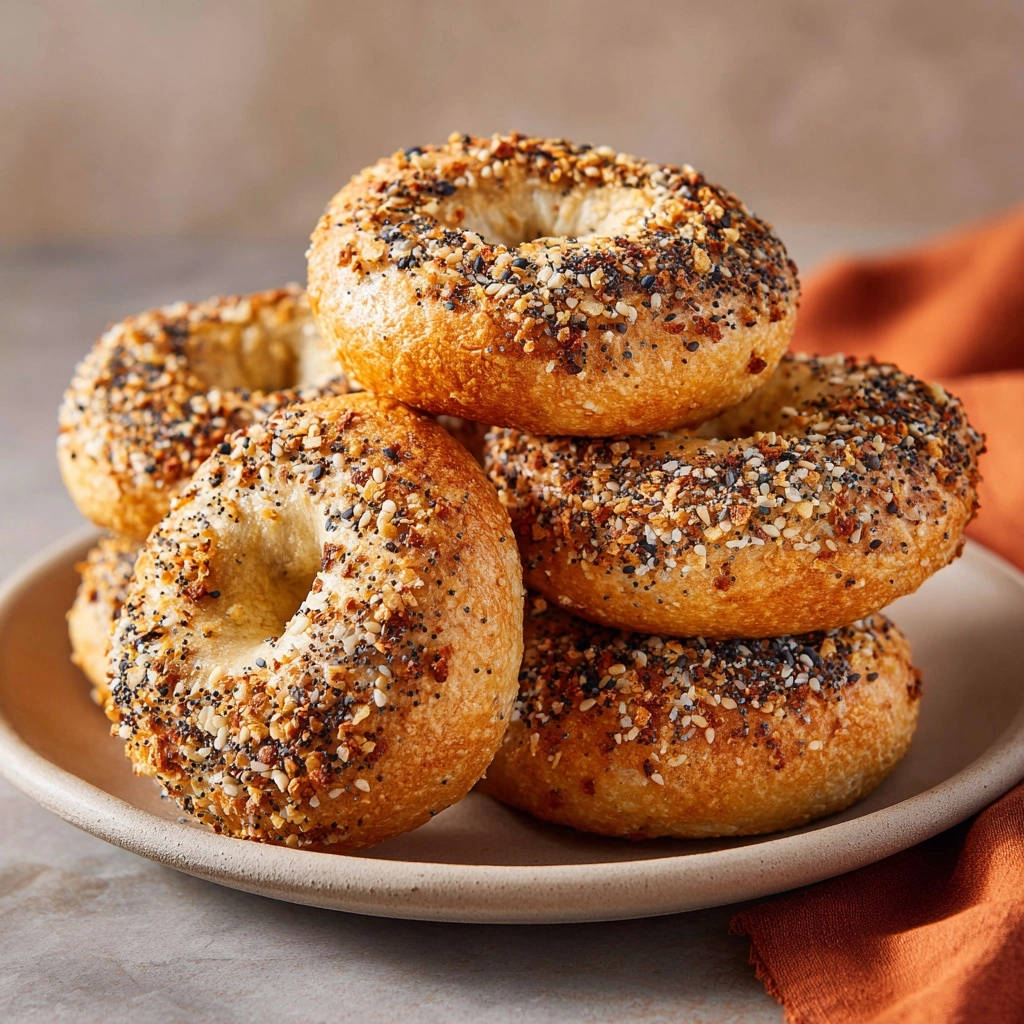
Finally, the baking soda boil is the magic touch for the crust. This quick immersion in boiling water gelatinizes the starches, creating that unique, shiny, and distinctly chewy exterior that defines a great bagel.
Gathering Your Bagel Building Blocks
Every exceptional bagel begins with high-quality ingredients. Understanding their role is key to mastering your bagel recipe at home.
Dough Essentials: Flour, Yeast, Sugar, and Salt
All-purpose flour (about 500g) forms the base of our bagel dough, providing the necessary structure. While bread flour can be used for an even chewier texture, all-purpose is more accessible and still yields fantastic results.
Instant dry yeast is our leavening agent, responsible for the dough’s rise and flavor development. Using instant yeast streamlines the process, as it can be added directly without proofing.
Granulated sugar feeds the yeast, ensuring active fermentation, and contributes a subtle sweetness to the dough. It also aids in browning during baking.
Salt is vital for enhancing flavor and controlling yeast activity. It also strengthens the gluten structure, which is crucial for a chewy bagel.
The Boiling Solution: Water, Sugar, Baking Soda
Plain water forms the foundation of our boiling bath. It provides the medium for our bagels to get their signature crust.
Granulated sugar in the boiling water contributes to the deep golden-brown color of the baked bagels. It also adds a slight sweetness to the crust.
Baking soda is the star of the boiling solution. It raises the pH of the water, creating an alkaline environment that gelatinizes the starches on the bagel’s surface, resulting in that unique shiny, crisp, and chewy exterior.
The Signature Topping: Everything Bagel Seasoning
Everything Bagel Seasoning is what truly elevates these Homemade Everything Bagels, offering a burst of garlicky, oniony, poppy, and sesame flavor. Its texture adds another layer of deliciousness.
If you don’t have it, you can make your own with equal parts white sesame seeds, black sesame seeds, poppy seeds, dried minced garlic, dried minced onion, and flaky sea salt. Alternatively, choose a single topping like sesame or poppy seeds.
Essential Gear for Your Bagel-Making Journey
Large Mixing Bowl: Essential for combining ingredients and the first rise.
Stand Mixer (Optional but Recommended): Can simplify the crucial kneading process, though hand-kneading is also effective.
Baking Sheets & Parchment Paper: For shaping, proofing, and baking without sticking.
Large Pot for Boiling: Needs to be wide enough to accommodate 2-3 bagels comfortably without overcrowding.
Slotted Spoon or Spider: For safely transferring bagels from boiling water.
Wire Rack: For cooling the bagels evenly and preventing a soggy bottom.
Crafting Your Homemade Everything Bagels: A Step-by-Step Guide
Activating the Yeast & Forming the Shaggy Dough
In a large mixing bowl, combine the warm water (105-115°F), granulated sugar, and instant dry yeast. Let this mixture sit undisturbed for 5 minutes.
Look for a foamy layer to appear on the surface, which indicates that your yeast is active and ready to work its magic. This ensures your dough will rise properly.
Now, add the all-purpose flour and salt to the bowl. Mix thoroughly with a sturdy spoon or a stand mixer with a dough hook until a shaggy, somewhat sticky dough forms.
Ensure all the flour is incorporated, but don’t worry about it being smooth yet; the real work comes next.
The Kneading Marathon for Maximum Chewiness
Turn the shaggy dough out onto a lightly floured surface. Begin to knead vigorously for 10-12 minutes.
This extended kneading time is absolutely crucial for developing a strong gluten network. This is what gives Homemade Everything Bagels their signature chewy bagel texture, making them stretchable and satisfying.
The dough will gradually transform into a smooth, elastic ball that feels springy to the touch. You should be able to stretch a small piece thinly without it tearing easily.
First Rise: Patience Pays Off
Lightly oil a clean bowl and place the kneaded dough inside, turning it once to coat all surfaces. Cover the bowl snugly with plastic wrap.
Let the dough rise in a warm place for 1 to 1 1/2 hours, or until it has visibly doubled in size. This initial rise allows the yeast to produce gases, developing flavor and volume.
A warm environment helps the yeast to activate efficiently, leading to a lighter, airier dough structure before shaping.
Shaping Perfection: Your Bagel’s Signature Look
Gently punch down the risen dough to release the accumulated air. Transfer the dough to a lightly floured surface.
Divide the dough into 8 equal pieces. For consistency, you can use a kitchen scale to ensure each piece is roughly the same weight, leading to even baking.
Roll each piece into a smooth, tight ball. Using your thumb, poke a hole directly in the center of each ball, then gently stretch the hole to about 1 inch in diameter, forming the classic bagel shape.
Place the shaped bagels on a baking sheet lined with parchment paper, ensuring there is enough space between each one to prevent sticking.
The Cold Proofing Advantage: Enhancing Flavor and Texture
For the absolute best chewy bagel texture and deeper flavor, cover the shaped bagels loosely with plastic wrap and refrigerate them for at least 30 minutes, or up to 12 hours. This is the cold proofing bagels step.
This slow, cold proofing greatly enhances the chewiness, develops more complex flavors, and improves the internal crumb structure. It’s a key step for New York style bagels.
If you are short on time, you can let them proof at room temperature for 20-30 minutes until they look slightly puffy, though the cold proof offers superior results.
Preparing for the Boil & Bake
Preheat your oven to 425 degrees F (220 degrees C). While the oven heats, line a clean baking sheet with fresh parchment paper; this will be for the boiled bagels.
In a large pot, bring 8 cups of water, 2 tablespoons of granulated sugar, and 1 teaspoon of baking soda to a rolling boil. It’s crucial that the water is actively boiling and not just simmering.
The Critical Boil: Unlocking That Irresistible Crust
Carefully place 2-3 bagels into the actively boiling water. Do not overcrowd the pot, as this will drop the water temperature too much and impede proper crust formation.
Boil each side for exactly 60 seconds. This vital step is what gelatinizes the starches on the exterior of the bagel, creating that unique, shiny, and distinctly chewy crust that makes a true bagel so irresistible.
Use a slotted spoon or a spider to remove the boiled bagels. Allow any excess water to drip off before transferring them back to the parchment-lined baking sheet.
Seasoning Your Masterpiece
While the bagels are still warm and slightly tacky from the boiling process, generously sprinkle each one with Everything Bagel Seasoning.
Press the seasoning lightly to help it adhere firmly to the surface. Working quickly ensures the seasoning sticks well before the bagel’s surface dries.
Baking to Golden, Chewy Excellence
Bake the seasoned bagels for 18-22 minutes, or until they are beautifully golden brown and fully cooked through. The exact time may vary slightly depending on your oven.
Once baked, let them cool completely on a wire rack before slicing and enjoying that perfect Homemade Everything Bagels texture you just created!
Mastering Your Bagel Game: Pro Tips & Troubleshooting
Expert Advice for Flawless Homemade Everything Bagels
Don’t Skimp on Kneading: The 10-12 minutes of vigorous kneading is non-negotiable for a truly chewy bagel. Feel the dough’s texture transform from shaggy to smooth and elastic; this is your best indicator.
Perfecting the Hole: A slightly larger hole than you initially think you need (around 1 inch) is ideal. It will shrink during both proofing and baking, ensuring a distinct hole remains in your finished bagel.
The Cold Proofing Secret: While optional if you’re truly short on time, the cold proof yields superior flavor and texture. Plan ahead to allow for this step for the best possible results.
Boiling Timing is Key: Stick precisely to 60 seconds per side. Too short, and you miss the crucial crust development; too long, and they can get tough and rubbery.
Generous Seasoning: Don’t be shy with the Everything Bagel Seasoning! Press it firmly onto the warm, tacky surface immediately after boiling for maximum adherence and flavor.
Common Bagel-Making Hiccups and How to Fix Them
Bagels Are Too Dense: This usually points to insufficient kneading or not allowing enough rise time during the first proof. Ensure you knead thoroughly until the dough is elastic and give it adequate time to double in size.
Bagels Spread Too Much: This can happen if the bagel dough is too wet (try adding a touch more flour during kneading) or if the cold proof was skipped or too short. Properly shaped, tight dough balls also help maintain their form.
Crust Isn’t Chewy/Shiny Enough: This almost always means the boiling step was either too short, the water wasn’t at a rolling boil, or the baking soda was omitted. The boil is critical for that distinctive New York style bagels crust; never skip or rush it!
Seasoning Falls Off: Make sure to apply the seasoning immediately after boiling when the bagels are still warm and tacky. This surface stickiness is what allows the seasoning to adhere. Press it gently but firmly.
Beyond the Oven: Enjoying and Storing Your Fresh Bagels
Creative Serving Suggestions
While delicious simply toasted with a generous schmear of cream cheese, don’t limit your horizons! Try your Homemade Everything Bagels with creamy avocado and a sprinkle of flaky sea salt for a healthy kick.
What to Serve With Your Bagels
These chewy New York-style bagels are versatile enough for breakfast, lunch, or a snack. Here are two hearty recipes that pair well with their dense, malty texture.
- For a creamy, tangy contrast to the chewy bagel, try this Creamy Sun-Dried Tomato Chicken Penne — the rich tomato sauce and tender chicken make a satisfying meal alongside a toasted bagel half.
- If you want something comforting and soft to balance the bagel’s crusty exterior, the Creamy Chicken and Dumplings with fluffy, air-light results offers a soothing bowl of broth and tender dumplings that complement the bagel’s chewiness.
Transform your bagel into a gourmet breakfast sandwich with a perfectly fried egg, crispy bacon, and melty cheese for a truly satisfying start to your day.
For a lighter yet flavorful option, a smear of hummus, thinly sliced cucumber, and a dash of everything bagel seasoning can be surprisingly delightful.
They also make fantastic open-faced tuna melts or mini pizzas for a quick and easy lunch, showcasing their versatility beyond breakfast.
If you’re ready to expand your bread-making skills, try these golden skillet dinner rolls for a soft, buttery alternative.
Storing Your Homemade Everything Bagels for Freshness
Once completely cooled, store your homemade bagels in an airtight container or a large zip-top bag at room temperature. They will retain their best quality for up to 2-3 days.
For longer storage, it’s best to slice them in half first. Then, freeze them in a freezer-safe bag for up to 2-3 months. You can toast them directly from frozen for ultimate convenience and a fresh taste.
Can You Make Bagels Ahead? Yes!
Absolutely! The beauty of the cold proofing bagels step is that it doubles as an excellent make-ahead strategy. You can shape your bagels, cold proof them in the refrigerator for up to 12 hours, and then boil and bake them fresh in the morning.
Alternatively, you can bake them fully, cool them completely, and then freeze as described above. This allows for quick access to delicious Homemade Everything Bagels whenever a craving strikes, straight from your freezer to your toaster.
Your Top Bagel Questions Answered
What’s the best flour for bagels?
While this recipe uses all-purpose flour effectively for accessible and delicious Homemade Everything Bagels, many professional bagel makers opt for high-gluten bread flour. Its higher protein content yields an even chewier texture, but it can be a bit harder to work with for beginners due to its increased elasticity.
Why is boiling so important for bagels?
Boiling is what gives bagels their unique shiny, crisp crust and contributes significantly to their chewy bagel texture. The hot, alkaline water (thanks to baking soda) gelatinizes the starches on the exterior of the dough, effectively setting the crust before baking and locking in moisture, preventing them from becoming too crispy like regular bread.
Can I make these without Everything Bagel Seasoning?
Absolutely! While Everything Bagel Seasoning is a classic choice for these Homemade Everything Bagels, you have many options. You can top your bagels with sesame seeds, poppy seeds, flaked sea salt, dried garlic flakes, or even a simple egg wash for a plain bagel. Feel free to get creative with your favorite toppings!
How long do homemade bagels last?
Homemade bagels are best enjoyed fresh, ideally within 2-3 days when stored in an airtight container at room temperature. For longer preservation, slicing and freezing them is highly recommended, extending their life and deliciousness to a couple of months. Just toast straight from frozen!
If you enjoy working with yeast doughs for these bagels, you’ll love shaping a batch of soft buttery garlic herb dinner rolls next.
Ready to Elevate Your Breakfast? Share Your Homemade Bagel Journey!
You’ve now got the secret weapon for making incredibly chewy, deeply flavorful Homemade Everything Bagels right in your own kitchen. No more dense, sad bread rolls – just pure, authentic New York-style perfection awaits.
Don’t be surprised if your kitchen becomes the new go-to bagel shop for friends and family! We encourage you to try this recipe and share your delicious creations. What will be your favorite topping or serving suggestion? Let us know in the comments below!
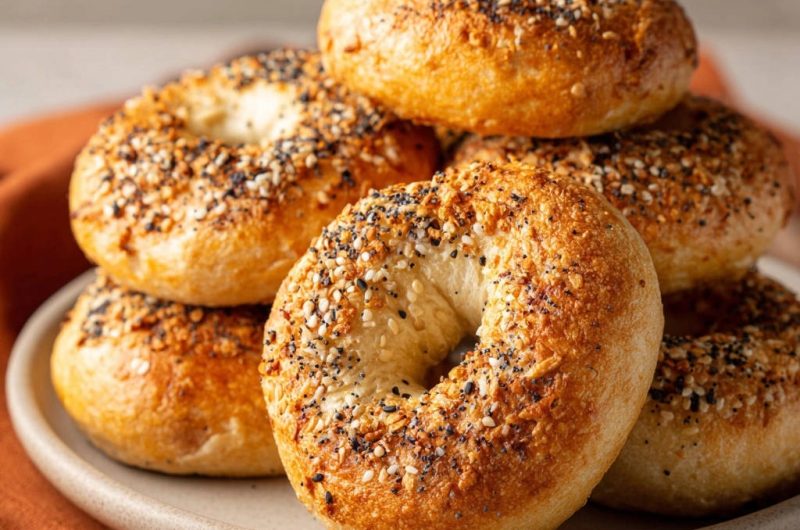
Everything Bagels
Course: BreadCuisine: AmericanDifficulty: medium8
bagels45
minutes30
minutes120
kcal180
minutesDiscover the secret to perfectly chewy homemade Everything Bagels. This recipe guides you through creating New York-style bagels with a glorious crust and incredible chew, turning even beginners into bagel masters.
Ingredients
For the dough:
4 cups all-purpose flour (about 500g)
1 1/2 cups warm water (105-115 degrees F)
2 teaspoons instant dry yeast
1 tablespoon granulated sugar
1 1/2 teaspoons salt
For the boil:
8 cups water
2 tablespoons granulated sugar
1 teaspoon baking soda
For the topping:
1/2 cup Everything Bagel Seasoning
Directions
- Activate Yeast & Start Dough: In a large bowl, combine the warm water, granulated sugar, and instant dry yeast. Let it sit for 5 minutes until it becomes foamy. Add the flour and salt. Mix thoroughly until a shaggy dough forms.
- Develop Gluten for That Chewy Bite: Turn the dough out onto a lightly floured surface. Knead vigorously for 10-12 minutes. This extended kneading time is absolutely crucial for developing the strong gluten network that gives bagels their signature chewy texture. The dough should transform into a smooth, elastic ball that can be stretched thinly without tearing.
- First Rise: Place the kneaded dough into a lightly oiled bowl, turn it once to coat, cover with plastic wrap, and let it rise in a warm place for 1 to 1 1/2 hours, or until it has doubled in size.
- Shape the Bagels: Gently punch down the risen dough to release the air. Divide the dough into 8 equal pieces. Roll each piece into a smooth, tight ball. Using your thumb, poke a hole in the center of each ball, then gently stretch the hole to about 1 inch in diameter, forming the classic bagel shape. Place the shaped bagels on a baking sheet lined with parchment paper.
- Second Rise (Cold Proof for Enhanced Chew): For the absolute best chewy texture and deeper flavor, cover the bagels loosely with plastic wrap and refrigerate them for at least 30 minutes, or up to 12 hours. This slow, cold proofing greatly enhances the chewiness. If you are short on time, let them proof at room temperature for 20-30 minutes until they look slightly puffy.
- Preheat Oven & Prepare Boiling Solution: Preheat your oven to 425 degrees F. Line a clean baking sheet with parchment paper. In a large pot, bring 8 cups of water, 2 tablespoons of granulated sugar, and 1 teaspoon of baking soda to a rolling boil.
- The Boiling Secret to a Perfectly Chewy Crust: Carefully place 2-3 bagels into the actively boiling water (do not overcrowd the pot). Boil each side for exactly 60 seconds. This vital step is what gelatinizes the starches on the exterior of the bagel, creating that unique, shiny, and distinctly chewy crust that makes a true bagel so irresistible. Use a slotted spoon to remove the boiled bagels and transfer them back to the parchment-lined baking sheet.
- Season & Bake: While the bagels are still warm and slightly tacky from the boiling process, generously sprinkle each one with Everything Bagel Seasoning. Press lightly to help it adhere.
- Bake to Golden Perfection: Bake the bagels for 18-22 minutes, or until they are beautifully golden brown and fully cooked through. Let them cool completely on a wire rack before slicing and enjoying that perfect chewy texture you just created!