Mastering the Classic Vanilla Cupcakes with Stable Domes
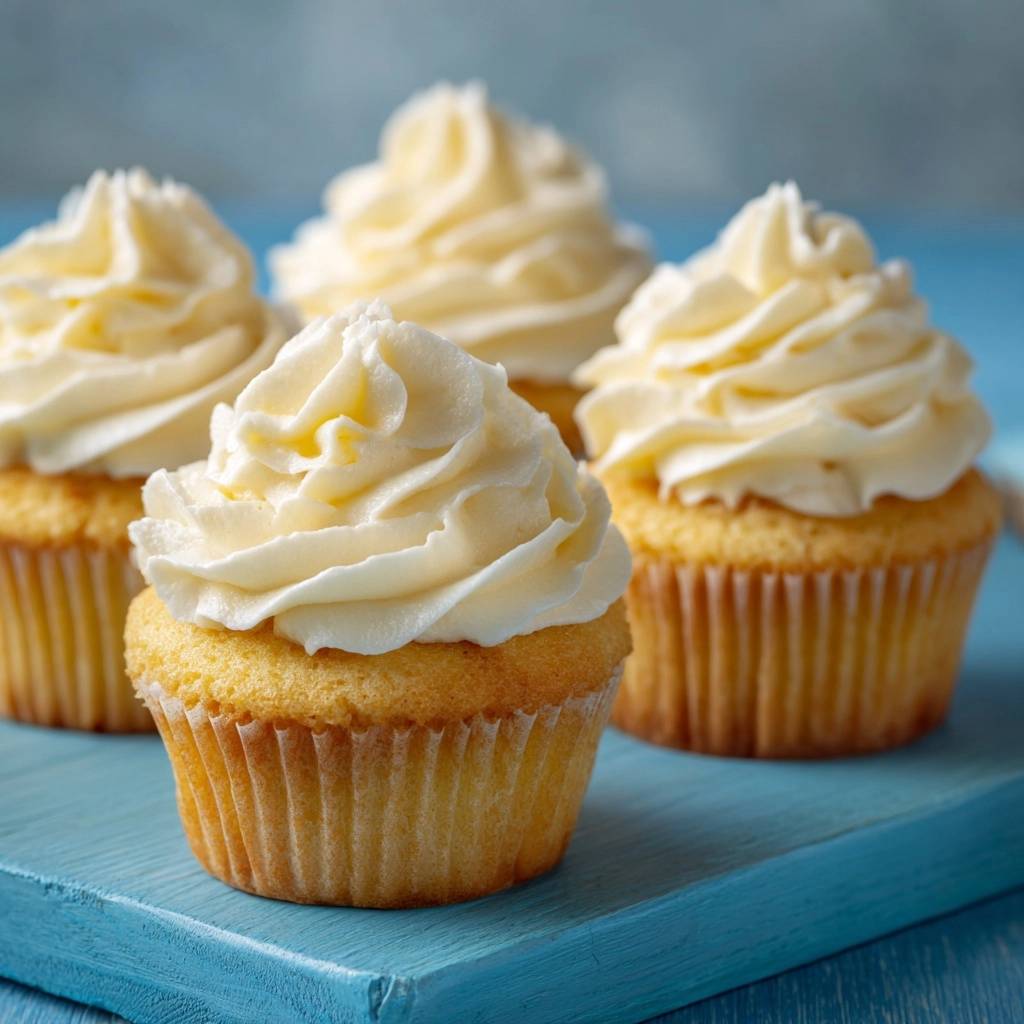
You’ve likely felt that sinking feeling—literally. You pull a tray of golden, fragrant cupcakes from the oven, and they look like absolute perfection. Then, as they cool, the centers slowly dip into a sad, hollow crater that no amount of frosting can truly hide. It’s one of the most common frustrations in baking, but it isn’t a matter of bad luck; it’s a matter of structural integrity.
Most recipes rely on the traditional creaming method, which can trap too much unstable air. This recipe changes the game by using a professional technique that ensures your cupcakes hold their shape. We’re focusing on building a sturdy “skeleton” for the cake so that when the steam escapes, the dome stays right where it belongs. You’re about to bake the most reliable, bakery-standard treats you’ve ever made.
The secret to this success is the reverse-creaming method. By coating the flour in fat before adding any liquids, we control the gluten and create a tight, velvety crumb. This isn’t just about flavor; it’s about the science of a stable cake. If you follow the temperature and mixing cues closely, you’ll never have to worry about a sunken center again.
The Chemistry of the Reverse Creaming Method
Traditional recipes usually start by beating butter and sugar together to trap air. While that works for some cakes, it often leads to a fragile structure in cupcakes. In this recipe, we use the reverse-creaming method. You’ll start by mixing your dry ingredients and then beating in the softened butter cubes until the mixture looks like damp sand.
This process is vital because the butter coats the flour particles in a thin layer of fat. Since fat repels water, this coating prevents the flour from developing too much gluten once you add the milk and eggs. Gluten is what makes bread chewy, but in a cupcake, too much of it creates a tough, rubbery texture that can trap large air bubbles. Those bubbles eventually pop and cause the cake to collapse.
By limiting gluten development, you’re ensuring a fine, tight crumb that is incredibly soft but structurally sound. The fat-coated flour creates a “velvety” mouthfeel that mimics high-end wedding cakes. Because the structure is so uniform, the cupcakes rise evenly and stay domed long after they’ve cooled on the rack.
Why Room Temperature Ingredients are Non-Negotiable
If you use a cold egg or milk straight from the fridge, you’re essentially sabotaging your batter. When cold liquids hit the softened butter you’ve just worked into the flour, the butter will immediately seize and turn into tiny, hard clumps. This breaks the emulsion you’re trying to build and leads to an uneven bake.
You want your ingredients in the 65-70°F range. At this temperature, the fats and liquids can bond smoothly. A proper emulsion traps air in tiny, microscopic pockets rather than large, unstable bubbles. If your batter looks curdled or “broken,” it’s usually because the temperatures were mismatched, which is a leading cause of cupcakes sinking in the middle.
For perfectly domed tops every time, try the same room-temperature method with this glazed blueberry lemon bundt cake.
Essential Components for Classic Vanilla Cupcakes
The foundation of these Classic Vanilla Cupcakes is all-purpose flour. While some prefer cake flour, all-purpose provides the necessary protein to support that high, stable dome. It gives the cake enough “backbone” to hold up under a heavy swirl of buttercream without feeling heavy or dense. It’s the perfect middle ground for a reliable bake.
Granulated sugar does more than just sweeten the batter; it aids in aeration and keeps the cake moist by holding onto water molecules. When combined with whole milk, you get a rich, tender result. Always reach for whole milk here. The extra fat content is what separates a “good” cupcake from a “bakery-quality” one, providing a much better mouthfeel than skim or 2% milk.
Quality matters when it comes to your vanilla. Since this is a vanilla-forward recipe, imitation extracts can leave a chemical aftertaste. Use a high-quality pure vanilla extract or even vanilla bean paste if you want those beautiful little black specks. Because there are so few ingredients, the quality of each one really shines through in the finished product.
If you enjoy working with bright citrus notes, try this glazed lemon blueberry loaf for another simple, flavorful bake.
Selecting the Right Leavening Agent
Baking powder is the engine of this recipe. It’s a double-acting leavener, meaning it reacts once when it touches the wet ingredients and again when it hits the heat of the oven. This two-stage lift is exactly what creates that beautiful dome. However, baking powder loses its potency over time, so make sure yours is fresh.
Precision is everything here. Measuring exactly 1 and 1/2 teaspoons is vital. Too much leavening will cause the cupcakes to rise too fast and then “exhaust” themselves, leading to a collapse. Too little, and they’ll be dense and flat. Use a level measuring spoon to ensure you’re getting the exact amount needed for that perfect rise.
Step-by-Step: Building the Cupcake Structure
The first phase is the “Sand Phase.” When you add the cubed butter to the flour and sugar, keep your mixer on low. You’re looking for the butter to disappear into the flour until no large chunks remain. The mixture should look like wet beach sand. If you see large yellow bits of butter, keep mixing; those bits will melt in the oven and leave holes in your cake.
Next comes the “Aeration Phase.” After you whisk your room-temperature egg, milk, and vanilla, you’ll pour half of it into the sandy flour mixture. Turn the mixer up to medium-high and beat for a full minute. This is where you build the “skeleton” of the cupcake. You’ll see the batter transform from a thick paste into a smooth, pale, and slightly fluffy consistency.
The final phase is the “Finishing Phase.” Add the rest of the liquid and mix just until combined—about 30 seconds. You want the batter to be smooth, but you must avoid the over-mixing trap. If you keep beating at this stage, you’ll develop too much gluten, resulting in a “tough” cake that has a peaked, cracked top rather than a smooth, rounded dome.
Precision Filling and the 2/3 Rule
Overfilling is the fastest way to ruin the shape of your cupcakes. If you fill the liners to the brim, the batter will spill over the edges of the tin, creating a “mushroom top.” These thin edges don’t have the sidewall support of the paper liner, so they eventually cave in, pulling the center of the cupcake down with them.
To get a consistent result, fill each liner exactly 2/3 full. This leaves just enough room for the cake to climb the walls of the liner and form a sturdy dome. A triggered ice cream scoop is the best tool for this job. It ensures every single cupcake has the exact same amount of batter, which means they will all bake at the same rate.
Thermal Management and the Cooling Process
Your cupcakes will typically need 18 to 20 minutes at 350°F. Don’t just rely on a timer, though. Use the “spring-back” test: gently press the center of a cupcake with your finger. If it bounces back immediately, it’s done. If it leaves an indentation, it needs another minute or two. A toothpick should also come out clean or with just a few moist crumbs.
The “2-Minute Rule” is perhaps the most important part of the cooling process. Once you pull the tin out of the oven, let it sit for only two minutes. After that, move the cupcakes to a wire rack immediately. If they stay in the hot metal tin, the residual heat creates steam at the bottom of the liners. This steam softens the sugar structure, making the cupcakes soggy and causing the centers to dip.
Crafting the High-Swirl Vanilla Buttercream
A great cupcake deserves a great frosting. The secret to a bakery-style buttercream is all in the initial beating of the butter. Don’t just mix it; beat the softened butter on high for at least 3 minutes before adding any sugar. It should turn from a yellow color to a very pale, almost white ivory. This incorporates air and makes the base incredibly light.
When adding the powdered sugar, do it gradually to avoid a sugar cloud in your kitchen. Once the sugar, heavy cream, and vanilla are in, beat it again on high for another 3 to 5 minutes. You are looking for “stiff peaks.” The frosting should be firm enough that if you pull the whisk out, the peak stands straight up without drooping. This ensures your high swirls won’t wilt or slide off the cake.
Piping Techniques for Bakery-Style Height
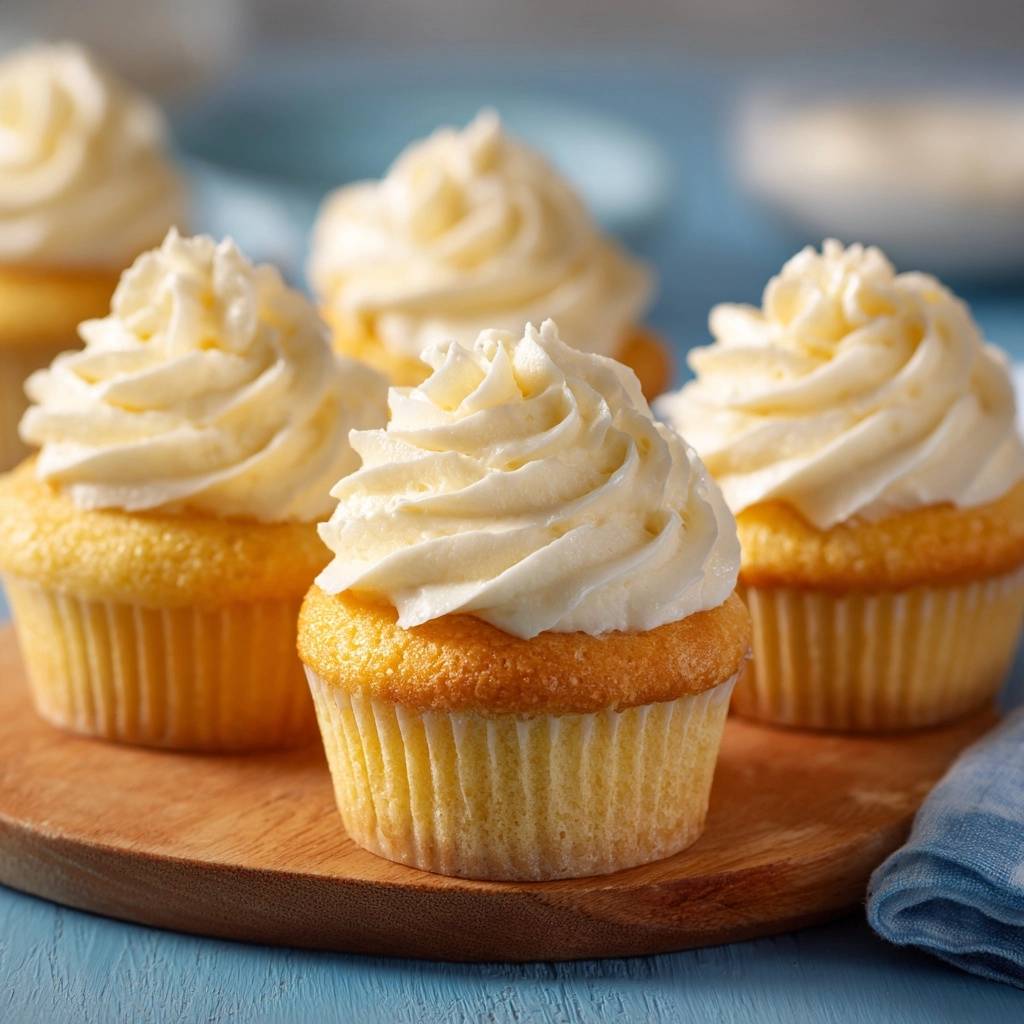
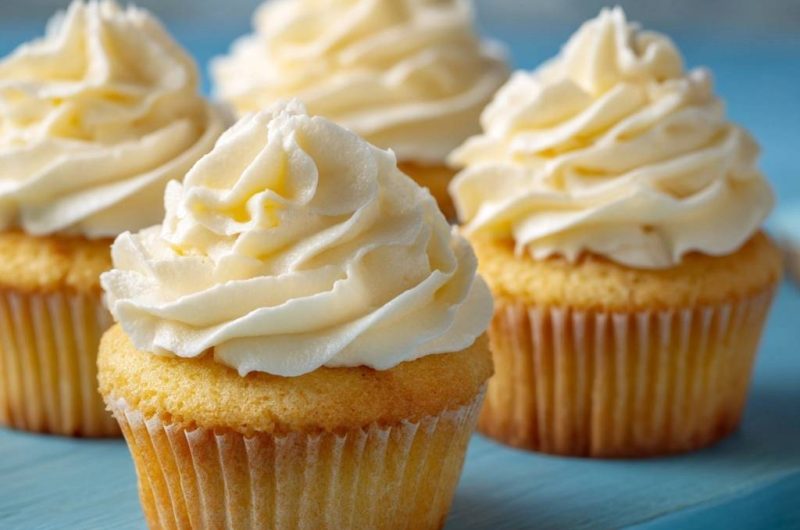
To get that iconic high-swirl look, you’ll need a large open-star piping tip, like a 1M or 2D. Hold the bag vertically, directly over the center of the cooled cupcake. Start in the very center, then move the tip toward the outer edge of the cake. Trace a circle around the perimeter, then spiral inward and upward.
As you reach the second “layer” of the spiral, keep the pressure steady. You want to build three distinct tiers of height. To finish, stop squeezing the bag and pull upward quickly to create a sharp, clean point. This technique creates a professional, voluminous look that makes the cupcakes look like they came from a high-end boutique.
Troubleshooting Common Baking Failures
If your liners are peeling away from the sides, it’s usually due to moisture. This often happens if you store the cupcakes in an airtight container while they are still even slightly warm. The trapped steam settles between the cake and the paper, causing the glue-like bond to fail. Always wait until they are completely cool to the touch before covering them.
A coarse or “holey” crumb usually means the butter wasn’t incorporated well enough during the “Sand Phase.” If the butter pieces are too large, they melt and leave behind air pockets. On the flip side, if the tops are sticky, it’s a sign of high humidity or under-baking. Ensure your oven is truly at 350°F by using an oven thermometer, as many home ovens run cool.
Make-Ahead Strategies and Storage Logistics
You can easily make these a day in advance. Store the frosted cupcakes in a tall, airtight container at room temperature. If you need to make them further ahead, you can freeze the unfrosted bases. Wrap each cupcake tightly in plastic wrap and place them in a freezer bag. They’ll stay fresh for up to two months.
When you’re ready to serve frozen cupcakes, let them thaw at room temperature while still wrapped to prevent them from drying out. For the buttercream, you can make it ahead and keep it in the fridge, but you’ll need to let it come to room temperature and beat it again for a minute to restore that fluffy, pipeable texture.
Optimal Serving Temperatures
Butter-based cakes and frostings are designed to be eaten at room temperature. When butter is cold, it’s hard and can feel “waxy” on the tongue. If you’ve kept your cupcakes in the fridge, take them out at least an hour before serving. This allows the fats to soften, ensuring the cake is tender and the frosting melts perfectly as soon as you take a bite.
Frequently Asked Questions
Can I substitute cake flour for all-purpose flour?
You can, but the structure will be much more delicate. Cake flour has less protein, which results in a very soft crumb but may increase the risk of the cupcakes sinking if they aren’t handled carefully. If you use cake flour, increase the amount by two tablespoons to help compensate for the lower density.
How do I prevent the liners from becoming greasy?
Greasy liners usually happen when the butter leaks out of the batter. This is often caused by using butter that is too warm or not properly emulsified into the flour. Ensure your butter is “room temperature” (it should dent with a finger but still feel cool) and follow the reverse-creaming steps precisely to lock that fat into the flour.
Can I use this batter for a standard 9-inch cake?
Yes, this batter works beautifully for layer cakes. The reverse-creaming method produces a very flat, level cake which is perfect for stacking. You will likely need to double the recipe for two 9-inch rounds and increase the bake time to 25-30 minutes. The resulting cake will be sturdy enough for heavy fillings but still very tender.
Why did my cupcakes pull away from the sides of the liners?
This is typically caused by over-baking. As the cake loses moisture in the oven, it shrinks. If the cupcakes stay in the oven even two or three minutes too long, they will pull away from the paper. Check them at the 18-minute mark. Additionally, avoid using cheap, thin liners, as they tend to pull away more easily than high-quality greaseproof ones.
What is the best way to transport high-swirl cupcakes without a carrier?
If you don’t have a dedicated cupcake carrier, use a deep roasting pan or a sturdy cardboard box. Place a small dab of frosting on the bottom of each cupcake liner to “glue” it to the bottom of the container. This prevents them from sliding around and smashing those beautiful high swirls against the sides during transit.
What to Try Next
If the light, fluffy texture of these vanilla cupcakes won you over, the same tender crumb carries into these pancake recipes — perfect for a weekend brunch or a sweet breakfast treat.
- For a berry-packed morning, these
Get the full recipe in your inbox in seconds – perfect for shopping and cooking.
Vanilla Cupcakes
Course: DessertCuisine: AmericanDifficulty: easy12
cupcakes15
minutes20
minutes450
kcal35
MinutesA foolproof vanilla cupcake recipe utilizing a specific reverse-creaming technique and temperature-controlled ingredients to ensure stable, bakery-style height and a fine texture.
Ingredients
1 and 1/2 cups all-purpose flour
1 cup granulated sugar
1 and 1/2 teaspoons baking powder
1/2 teaspoon salt
1/2 cup unsalted butter, softened to room temperature (cubed)
1 large egg, room temperature
1/2 cup whole milk, room temperature
2 teaspoons vanilla extract
For the High-Swirl Frosting:
1 cup (2 sticks) unsalted butter, softened
3 and 1/2 cups powdered sugar, sifted
2 tablespoons heavy cream
1 and 1/2 teaspoons vanilla extract
A pinch of salt
Directions
- Preheat your oven to 350°F (175°C) and line a standard 12-cup muffin tin with paper liners.
- In a large bowl, whisk together the flour, sugar, baking powder, and salt until well combined.
- Add the softened, cubed butter to the dry ingredients. Use a hand mixer on low speed to beat the butter into the flour for 1-2 minutes until the mixture resembles fine, damp sand. This “reverse creaming” coats the flour in fat, which inhibits gluten development and prevents the cupcakes from toughening or sinking.
- In a separate small bowl, whisk the egg, milk, and vanilla together. Ensure these are strictly at room temperature; cold liquids will cause the butter to seize, leading to an uneven bake and potential collapse.
- Pour half of the liquid mixture into the flour-butter mixture. Beat on medium-high speed for 1 minute to build the cake’s structure. Add the remaining liquid and beat on medium speed for another 30 seconds until the batter is smooth. Do not overmix.
- Fill each cupcake liner exactly 2/3 full. Overfilling creates a “mushroom top” that lacks the structural integrity to stay domed, leading to a sunken center.
- Bake for 18 to 20 minutes, or until the tops spring back when lightly touched and a toothpick inserted into the center comes out clean.
- Crucial Step: Leave the cupcakes in the tin for only 2 minutes, then immediately move them to a wire cooling rack. Leaving them in the hot tin creates steam at the bottom which softens the structure and causes the centers to dip.
- While cupcakes cool completely, prepare the frosting. Beat the butter for 3 minutes until very pale and creamy. Gradually add powdered sugar, cream, vanilla, and salt. Beat on high for another 3-5 minutes until stiff enough to hold a peak.
- To achieve the visual result in the image, use a large open-star piping tip (such as a 1M or 2D). Start in the center, move to the edge, and spiral upward into a tall, triple-layered peak.
Notes
- Ensure all liquid ingredients are strictly at room temperature to prevent the butter from seizing. Move cupcakes to a wire rack after 2 minutes to prevent steam-induced sinking.