Skillet Chocolate Chip Cookie: Your Secret to Gooey Perfection
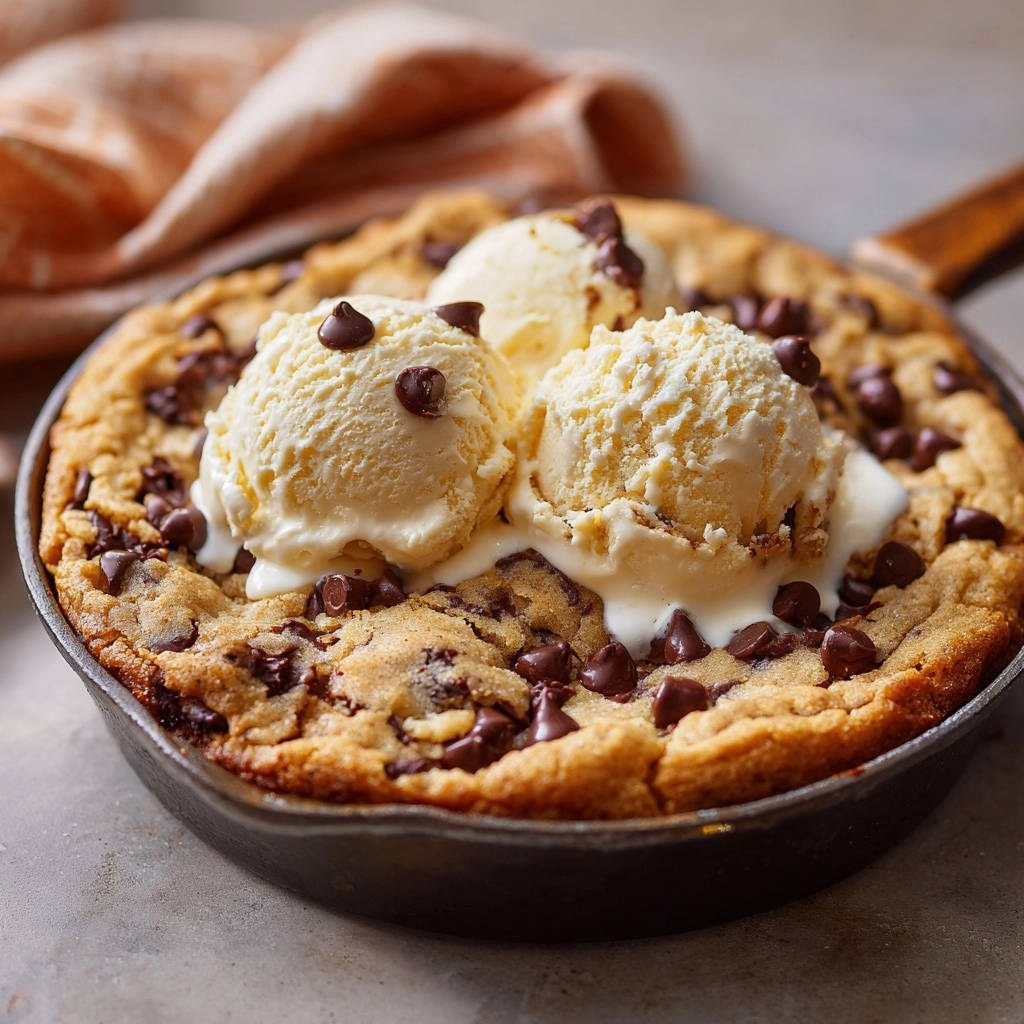
There’s nothing quite like the comforting aroma of a fresh-baked chocolate chip cookie. But achieving that perfect balance of crispy edges and a truly gooey, molten center in a single serving can often feel like a baking enigma. My expert trick, focusing on residual heat, guarantees your Skillet Chocolate Chip Cookie comes out absolutely flawless every time, ready for generous scoops of vanilla ice cream.
Why THIS Skillet Cookie Recipe Will Become Your Go-To Dessert
This isn’t just another cookie recipe; it’s a meticulously crafted guide to a dessert experience that consistently delivers. We’re unlocking the secrets to a cookie that’s both impressive and incredibly simple to execute, perfect for any occasion or craving.
The Magic of the Gooey Center (Without Overbaking!)
The true genius of this recipe lies in its method for a perfectly gooey core. By pulling the Skillet Chocolate Chip Cookie from the oven when its center still appears slightly underbaked, we allow the cast iron’s retained heat to gently finish the cooking process.
This crucial technique prevents a dry, overbaked cookie, ensuring that irresistible soft, melty texture. It’s a game-changer for homemade cookie perfection.
Crispy Edges, Soft Interior: A Symphony of Textures
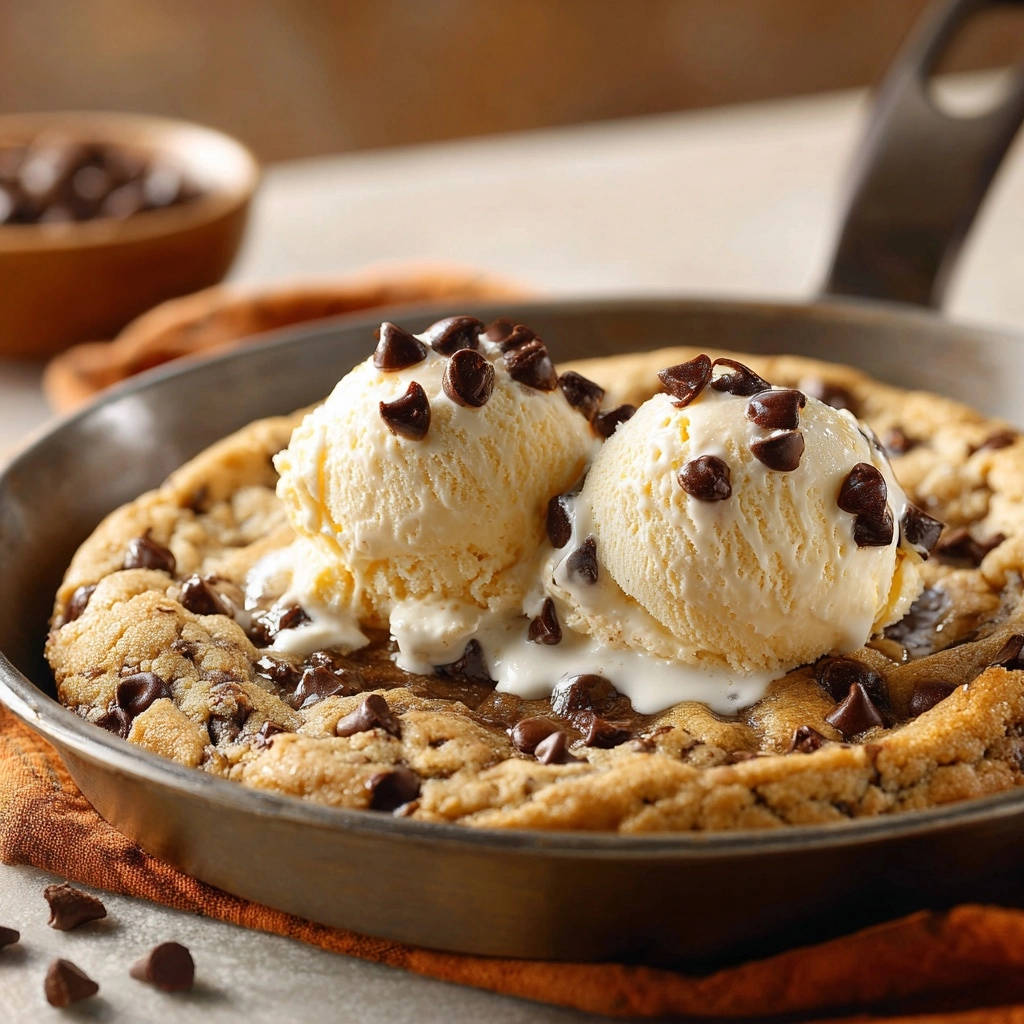
Imagine biting into a cookie where the edges offer a delightful, buttery crispness, immediately followed by a soft, yielding interior loaded with melted chocolate. This recipe guarantees that exact textural contrast.
The skillet’s heat distribution creates that beautiful golden crust, while the carefully timed bake preserves the tender crumb within.
Effortless Elegance: Simple Steps for a Showstopper
Despite its impressive presentation and gourmet taste, this Skillet Chocolate Chip Cookie recipe is remarkably straightforward. It requires minimal fuss and common pantry ingredients.
You’ll achieve a dessert that looks and tastes like it took hours, all with an approachable set of instructions. It’s the ideal showstopper for bakers of all skill levels.
Gear Up: Essential Tools for Skillet Cookie Success
Having the right equipment ensures a smooth baking process and the best possible outcome for your delicious cookie.
The Heart of the Bake: Choosing Your Skillet
A 9-inch cast iron skillet is the star of this recipe, prized for its exceptional heat retention and even distribution. This quality is crucial for developing those crispy edges and maintaining a gooey center.
If you don’t have cast iron, any other oven-safe skillet of similar size will work, but cast iron truly enhances the experience.
Mixing & Measuring: What You’ll Need at Hand
Electric Mixer: Essential for creaming butter and sugar to achieve that light, fluffy texture that defines a great cookie.
Large Mixing Bowls: You’ll need one for wet ingredients and another for dry, making it easier to combine them correctly.
Measuring Cups and Spoons: Accuracy is key in baking, so precise measurements are vital for consistent results.
The Perfect Pantry: Ingredients for Your Skillet Chocolate Chip Cookie
Each ingredient in this recipe plays a specific role in creating the ultimate taste and texture. High-quality ingredients make a noticeable difference.
Butter and Sugars: The Foundation of Flavor and Texture
Softened unsalted butter is critical; it creams beautifully with granulated and light brown sugars. This creaming process incorporates air, yielding a tender, airy cookie texture.
The combination of sugars provides depth of flavor and contributes to both chewiness (brown sugar) and crispness (granulated sugar).
Flour Power: Achieving the Right Structure
All-purpose flour forms the structural backbone of our Skillet Chocolate Chip Cookie. It provides the necessary body and chewiness.
Careful mixing is key here to avoid overdeveloping the gluten, which could result in a tough cookie.
The Leavening Lift: Baking Soda’s Role
Baking soda is our leavening agent, reacting with the brown sugar’s acidity to create gas. This reaction gives the cookie its desirable rise and contributes to its characteristic spread and tender crumb.
A Pinch of Salt: Balancing the Sweetness
Salt isn’t just for savory dishes; it’s a flavor enhancer in sweet baking. A quarter teaspoon of salt expertly balances the sweetness, preventing the cookie from tasting one-dimensional.
It truly makes the chocolate and vanilla notes pop, elevating the overall taste.
Chocolate Chips: Choosing Your Melty Morsels
Semi-sweet chocolate chips are the classic choice, offering a balanced sweetness that pairs perfectly with the cookie dough. Their melting quality creates irresistible pockets of gooey chocolate.
Don’t hesitate to add extra chips on top before baking for a visually appealing and extra chocolatey finish.
Optional Indulgences: Elevating Your Serving Experience
While the cookie is perfect on its own, a generous scoop of vanilla ice cream is the ultimate accompaniment. The cold, creamy ice cream melting into the warm cookie is pure bliss.
I always recommend trying this same dough with flaky sea salt on top, so if you love that salty-sweet contrast, you will also love these sea salt dark chocolate chunk cookies.
A sprinkle of extra chocolate chips or a drizzle of caramel sauce can further enhance this decadent dessert.
Baking Brilliance: Your Step-by-Step Guide to the Ultimate Skillet Chocolate Chip Cookie
Follow these detailed steps to ensure your cookie is a resounding success, from prep to serving.
- Prep Your Skillet and Oven:
Preheat your oven to 350°F (175°C) and lightly grease a 9-inch cast iron skillet or other oven-safe skillet.
A well-greased skillet ensures the cookie doesn’t stick and releases cleanly, preserving those beautiful edges.
- Creaming for Perfection:
In a large bowl, cream together the softened butter, granulated sugar, and brown sugar with an electric mixer until light and fluffy, about 2-3 minutes.
This aeration step is absolutely key for creating that desired tender, non-dense cookie texture, incorporating essential air.
- Wet Ingredients United:
Beat in the large egg and vanilla extract until they are fully incorporated into the butter and sugar mixture.
Ensure no streaks remain for a consistent batter, which leads to an even bake and uniform flavor.
- Introducing the Dry Elements (Gently!):
In a separate small bowl, whisk together the flour, baking soda, and salt. Gradually add these dry ingredients to the wet mixture, mixing on low speed until just combined.
Overmixing develops gluten, which can lead to a tough, chewy cookie. Stop as soon as the flour disappears into the dough.
- Folding in the Chocolate:
By hand, gently stir in the 1 cup of semi-sweet chocolate chips until they are evenly distributed throughout the dough.
A sturdy spatula or wooden spoon works best here to avoid overworking the dough, keeping it tender.
- Pressing into Place:
Press the cookie dough evenly into your prepared skillet. Feel free to sprinkle a few extra chocolate chips on top for an appealing, chocolate-rich finish.
An even layer ensures uniform baking, preventing both dry or undercooked spots in your magnificent Skillet Chocolate Chip Cookie.
- The Secret Bake: Achieving That Gooey Center:
Bake for 20-25 minutes. The crucial indicator is when the edges turn golden brown and set, while the very center of the cookie still looks slightly soft and might jiggle gently when gently shaken.
This specific cue is the “secret” to achieving a perfectly gooey center without overbaking the entire cookie.
- Cooling to Perfection: The Skillet’s Residual Magic:
Remove the skillet from the oven and let it cool on a wire rack for at least 10-15 minutes.
The residual heat from the cast iron skillet continues to cook the center to an ideal gooey consistency, ensuring it sets without drying out. This step is non-negotiable for perfection.
This same residual heat trick works wonders for a batch of loaded almond chocolate chunk cookies too.
- Serve It Up Warm and Wonderful:
Serve your Skillet Chocolate Chip Cookie warm directly from the skillet, generously topped with scoops of vanilla ice cream and extra chocolate chips.
This is when the cookie is at its absolute best, offering an unparalleled dessert experience!
Mastering Your Bake: Expert Tips for the Ultimate Skillet Chocolate Chip Cookie
Elevate your baking with these critical insights, ensuring every cookie is a masterpiece.
Don’t Overmix! The Gluten Guardian: Overmixing is the enemy of a tender cookie. Mix until just combined to keep your cookie soft and chewy, not tough and dense.
The Visual Cues for Doneness: Trust your eyes, not just the timer! Look for those golden edges and the slightly underbaked, jiggly center. This ensures ultimate gooeyness.
Harnessing Residual Heat: Your Gooey Secret Weapon: Allowing the cookie to cool in the hot skillet is critical. This passive cooking is key to its perfect texture, so resist the urge to cut too soon!
Butter Temperature Matters: Softened, Not Melted: Softened butter creams better with sugar, incorporating air that contributes to the cookie’s light and fluffy texture. Melted butter will yield a denser, greasier cookie.
Chocolate Chip Choices: Mix and Match for Flavor: While semi-sweet is classic, experiment with milk, dark, or even white chocolate chips, or a mix of several types, for different flavor dimensions. This can truly personalize your Skillet Chocolate Chip Cookie.
Salt: The Unsung Hero of Sweet Bakes: Don’t skip the salt! It perfectly balances the sweetness, enhancing the overall depth of flavor in your Skillet Chocolate Chip Cookie and preventing it from being cloyingly sweet.
Troubleshooting Your Skillet Chocolate Chip Cookie: Common Fixes
Even seasoned bakers encounter challenges. Here’s how to solve common cookie woes.
Why Is My Cookie Dry or Crumbly?
A dry or crumbly cookie usually indicates overbaking or too much flour. Always measure your flour correctly (spoon and level!), and pay close attention to the visual cues for doneness rather than just the timer.
My Skillet Chocolate Chip Cookie Spread Too Much! What Happened?
Excessive spreading can be due to butter that was too soft or even melted, a too-warm oven, or an incorrect ratio of wet to dry ingredients. Ensure your butter is softened, not liquid, and check your oven temperature with an oven thermometer.
The Center Isn’t Gooey Enough (or Too Raw!)
If your center isn’t perfectly gooey, it might be slightly underbaked, or you didn’t allow enough residual cooking time. If it’s too raw, it needs more bake time, paying attention to those golden edges and the gentle jiggle.
Edges Burnt, Center Underbaked: An Uneven Bake
This often points to an oven that heats unevenly or placing the skillet too close to a heating element. Try rotating the skillet halfway through baking. Using a properly sized, thick-bottomed skillet also helps distribute heat more evenly.
Beyond the Classic: Delicious Variations and Customizations
Once you’ve mastered the classic, get creative with these exciting twists on your Skillet Chocolate Chip Cookie.
Nutty Additions and Sweet Surprises
Fold in 1/2 cup of chopped pecans, walnuts, or even pretzels for an added crunch and savory note. Crushed toffee bits or mini peanut butter cups also make delightful additions, enhancing both flavor and texture.
Spice It Up! Seasonal Flavor Twists
Infuse your cookie with warm spices like a teaspoon of cinnamon or a pinch of nutmeg, especially perfect for fall. For an unexpected kick, a tiny dash of cayenne pepper can beautifully complement the chocolate without making it overtly spicy.
Dairy-Free and Gluten-Free Adaptations
For a dairy-free option, substitute a good quality plant-based butter (like Miyoko’s Kitchen or Earth Balance) for the unsalted butter. For gluten-free, use a 1:1 gluten-free baking flour blend, ensuring it contains xanthan gum. Be aware that texture might be slightly different.
Serving Suggestions and Smart Storage Solutions
Maximize your enjoyment of this incredible dessert with these tips.
The Perfect Scoop: Pairing with Vanilla Ice Cream (and Beyond!)
Classic vanilla ice cream is a match made in heaven, but don’t stop there! Try salted caramel, coffee, or even mint chip ice cream. A drizzle of homemade hot fudge or a sprinkle of flaky sea salt can elevate the experience further.
Make-Ahead Magic: Preparing Your Dough in Advance
You can prepare the cookie dough up to 3 days in advance. Simply press it into your greased skillet, cover tightly with plastic wrap, and refrigerate. When ready to bake, add a few extra minutes to the baking time since the dough will be cold.
Storing Leftovers (If There Are Any!)
If you happen to have any leftovers, cover the skillet tightly with foil or transfer the cookie to an airtight container. It will keep at room temperature for up to 2 days. To reheat, simply warm slices in the microwave or briefly in a preheated oven until gooey again.
Frequently Asked Questions About Skillet Chocolate Chip Cookie
Here are answers to common questions about perfecting your skillet cookie.
Can I use a different size skillet?
Yes, you can. If you use a smaller skillet (e.g., 6-inch), the cookie will be thicker and require a longer baking time (check for doneness around 25-30 minutes). For a larger skillet (e.g., 10-inch), the cookie will be thinner and bake faster (around 15-20 minutes). Always adjust baking time and watch for visual cues.
Is chilling the Skillet Chocolate Chip Cookie dough necessary?
For this specific recipe, chilling the dough is not strictly necessary for perfect results, as the skillet baking method helps control spread. However, if you find your cookies spreading too much, a 30-minute chill can help. For other cookie doughs, chilling can significantly improve flavor and texture, especially for recipes like our classic banana bread, where moisture balance is key.
How do I know when it’s perfectly baked for that gooey center?
Look for edges that are visibly golden brown and set. The very center of the cookie should still appear slightly soft and may jiggle a bit when you gently shake the skillet. This visual cue is crucial for ensuring that perfect gooey interior after cooling.
Can I make this Skillet Chocolate Chip Cookie recipe gluten-free?
Yes, you can! Substitute the all-purpose flour with a 1:1 gluten-free baking flour blend that contains xanthan gum. The texture might be slightly different, potentially a bit cakier, but it will still be delicious. Ensure all other ingredients are naturally gluten-free.
Can I freeze the dough or baked cookie?
Absolutely! For the dough, press it into the greased skillet, cover tightly with plastic wrap and foil, and freeze for up to 3 months. Bake from frozen, adding 10-15 minutes to the baking time. For a baked cookie, let it cool completely, then wrap tightly and freeze for up to 1 month. Thaw at room temperature and reheat gently.
Ready to Indulge? Your Skillet Chocolate Chip Cookie Awaits!
There’s truly nothing quite like a warm, fresh-from-the-oven Skillet Chocolate Chip Cookie to bring smiles and comfort. With our tried-and-true method, you’re not just baking a dessert; you’re creating a moment of pure joy.
What to Make Next
If you are baking that skillet cookie for a gathering, these breakfast-style sweets share a similar warm, soft texture.
- For a fruitier morning treat that uses the same griddle-friendly method, try these Fluffy Blueberry Pancakes with their tender crumb.
- If you want another stovetop option with a hearty twist, the Fluffy Oatmeal Pancakes offer a nutty flavor that pairs nicely with a drizzle of maple syrup.
So go ahead, preheat that oven, gather your ingredients, and prepare for a truly unforgettable treat. We’d love to see your delicious creations; share your Skillet Chocolate Chip Cookie triumphs with us on social media!
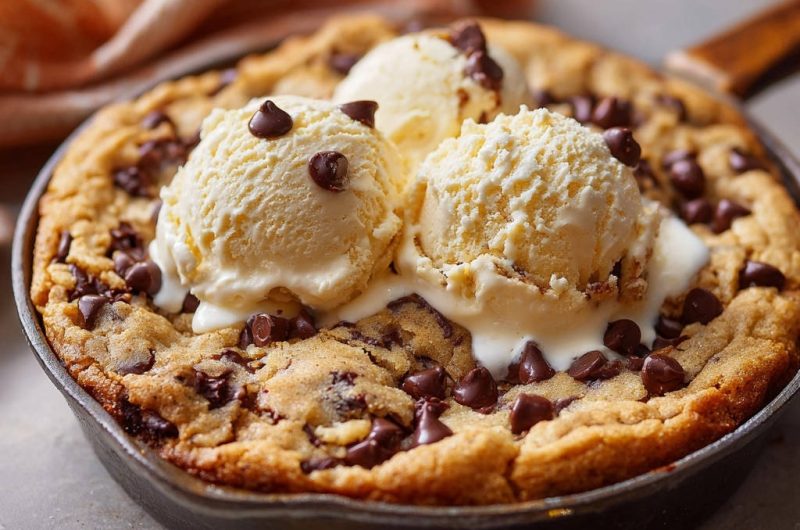
Skillet Chocolate Chip Cookie
Course: DessertCuisine: AmericanDifficulty: easy6
servings15
minutes25
minutes230
kcal55
minutesDiscover the ultimate comfort with a warm, gooey skillet chocolate chip cookie. This recipe guarantees crispy edges and a perfectly soft, molten center every time, ideal for serving with ice cream.
Ingredients
1/2 cup (1 stick) unsalted butter, softened
1/2 cup granulated sugar
1/4 cup packed light brown sugar
1 large egg
1 teaspoon vanilla extract
1 1/4 cups all-purpose flour
1/2 teaspoon baking soda
1/4 teaspoon salt
1 cup semi-sweet chocolate chips, plus more for topping
Vanilla ice cream, for serving
Directions
- Preheat your oven to 350F (175C). Lightly grease a 9-inch cast iron skillet or other oven-safe skillet.
- In a large bowl, cream together the softened butter, granulated sugar, and brown sugar with an electric mixer until light and fluffy, about 2-3 minutes. This step is key for texture.
- Beat in the egg and vanilla extract until well combined.
- In a separate small bowl, whisk together the flour, baking soda, and salt. Gradually add the dry ingredients to the wet ingredients, mixing on low speed until just combined. Be careful not to overmix.
- Stir in the 1 cup of chocolate chips by hand until evenly distributed throughout the dough.
- Press the cookie dough evenly into the prepared skillet. Sprinkle a few extra chocolate chips on top if desired.
- Bake for 20-25 minutes. The secret to a perfectly gooey center is to watch for the edges to turn golden brown and set, while the very center of the cookie still looks slightly soft and underbaked. It might even jiggle a little when gently shaken.
- Remove the skillet from the oven and let it cool on a wire rack for at least 10-15 minutes. The residual heat from the skillet will continue to cook the center to that ideal gooey consistency without drying it out.
- Serve warm directly from the skillet, topped generously with scoops of vanilla ice cream and extra chocolate chips.
Notes
- Cooling in the skillet is crucial for achieving the perfect gooey center.