Halloween Witch Hat Brownies: Fudgy, Chewy & Spooktacular!
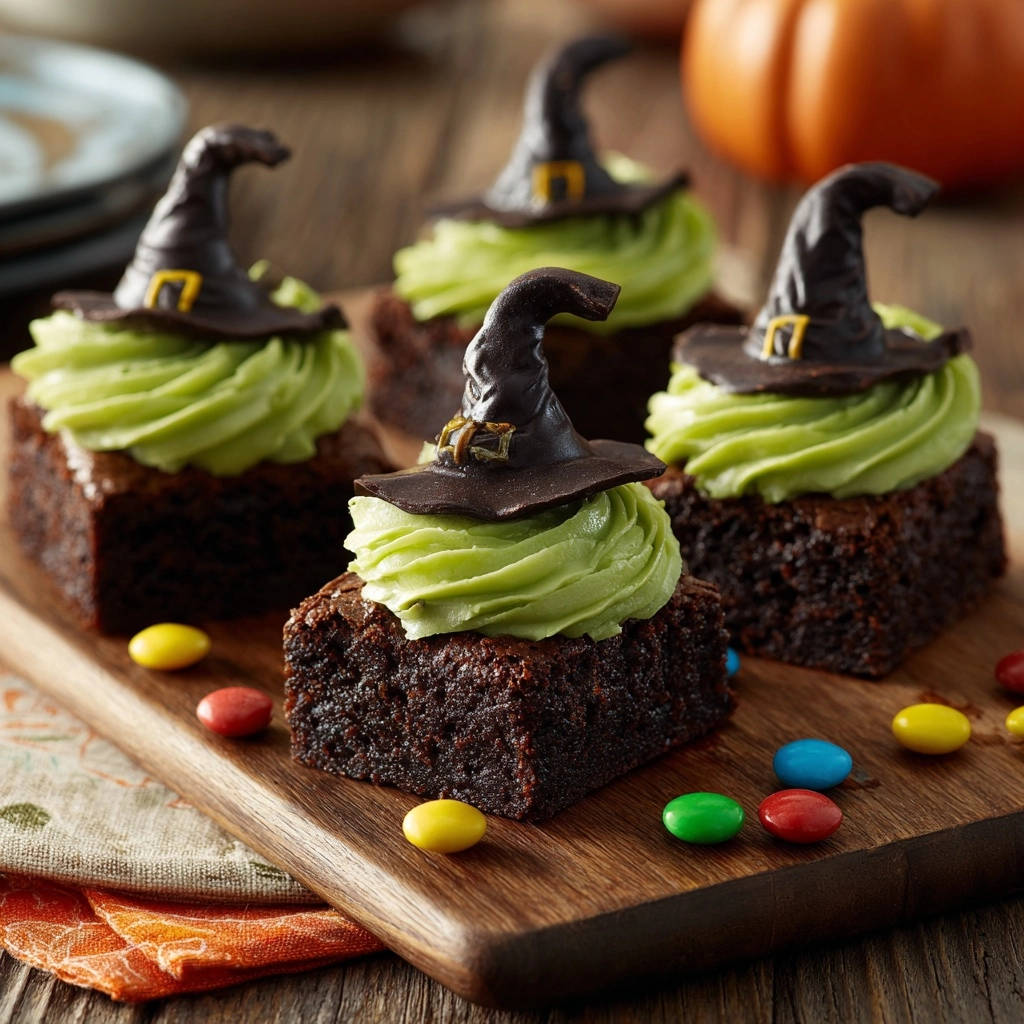
I used to struggle to get that perfect rich, dense texture for my Halloween treats. So many brownies end up dry and crumbly, which is exactly what we don’t want for a festive occasion. This recipe for Halloween Witch Hat Brownies is the result of cracking the code: consistently fudgy, with an amazing chew, and surprisingly simple to decorate for a truly spooktacular dessert.
Why This Recipe Belongs in Your Halloween Collection
These Halloween Witch Hat Brownies aren’t just another dessert; they’re a centerpiece of spooky fun. They combine classic comfort with playful festivity, making them a true standout.
The Secret to Unrivaled Fudginess, Every Time
Our recipe prioritizes a higher fat and chocolate content, along with a precise sugar balance, creating an intensely rich brownie base. Critical baking cues ensure they are perfectly cooked to that sweet spot of fudgy perfection without drying out.
Achieving That Amazing Chewy Texture
The secret to a delightful chew lies in minimal flour and careful mixing, which prevents gluten overdevelopment. Proper cooling also plays an essential role, allowing the brownies to set into that satisfying dense and chewy consistency everyone craves.
Effortless & Eye-Catching Witch Hat Decorations
Crafting the adorable chocolate witch hats is surprisingly simple, even for novice bakers. This easy decoration technique transforms a delicious brownie into an instant Halloween icon, making it an engaging activity for all ages.
A Versatile Treat for All Your Spooky Celebrations
Whether it’s a school party, a family gathering, or an adult Halloween bash, these fudgy treats are universally loved. They’re a delightful addition to any Halloween party, offering a festive twist on a classic dessert. For more seasonal delights, consider adding our decadent pumpkin pie truffles to your dessert spread.
The Magical Ingredients: What You’ll Need
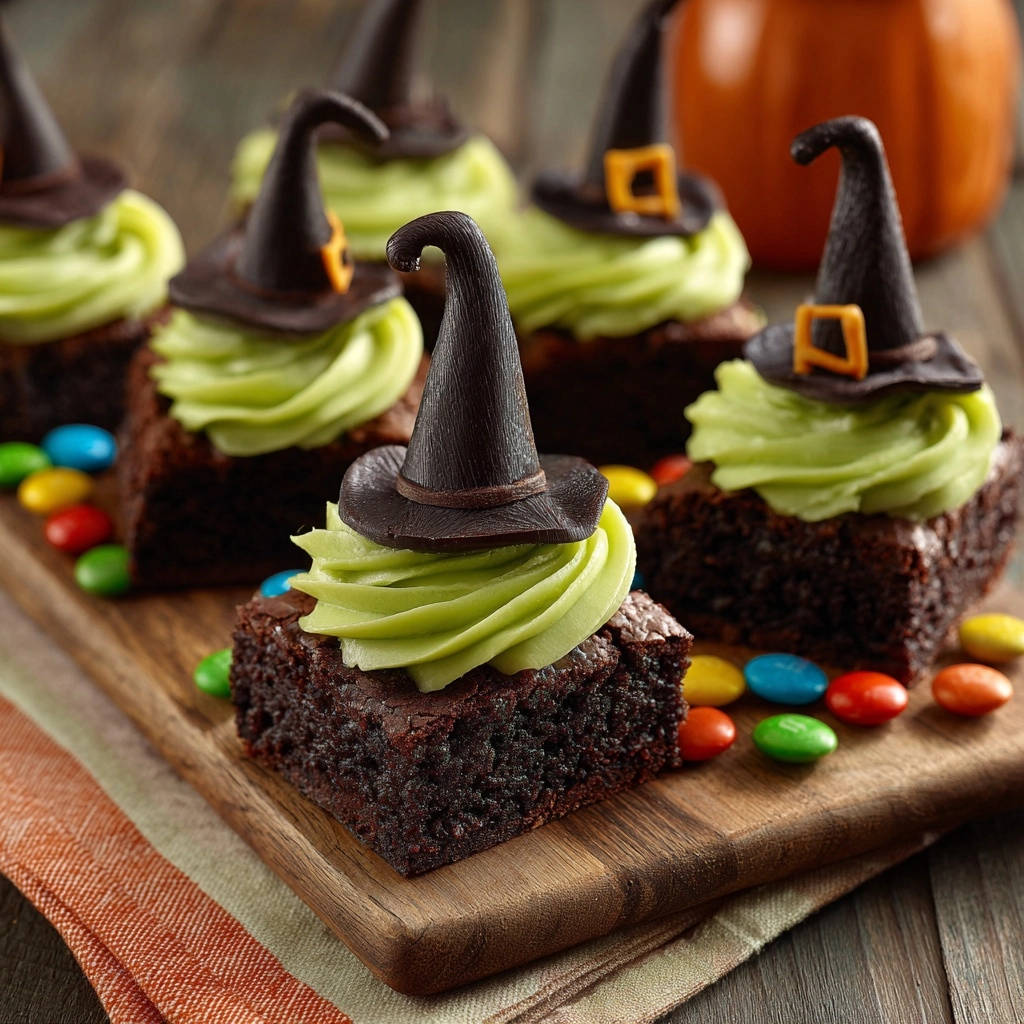
Each ingredient plays a vital role in creating these perfectly balanced and festive Halloween Witch Hat Brownies.
For the Irresistibly Fudgy Brownie Base
Unsalted Butter & Unsweetened Chocolate: The foundation for deep, rich chocolate flavor and a moist crumb, essential for that signature fudgy texture.
Granulated Sugar & Large Eggs: Essential for sweetness, moisture, and binding, contributing to the brownies’ dense and rich texture.
Vanilla Extract: A crucial flavor enhancer that complements the chocolate beautifully, adding depth to the overall taste.
All-Purpose Flour & Salt: Provides just enough structure without making the brownies cakey, with salt balancing the sweetness for a well-rounded flavor profile.
Crafting the Vibrant Green Buttercream Frosting
Softened Unsalted Butter & Powdered Sugar: The core of a creamy, pipeable, and perfectly sweet frosting that forms the witch’s face.
Vanilla Extract & Milk/Cream: For a smooth consistency and a touch of extra flavor, ensuring the frosting is light and fluffy.
Green Gel Food Coloring: Delivers a vivid, spooky green without adding excess liquid, preserving your buttercream’s ideal texture.
For a perfect pairing, try our Mastering Triple Chocolate Chunk Brownie Cookies.
Assembling Edible Chocolate Witch Hats
Dark Chocolate Chips or Chopped Chocolate: Forms the sturdy and delicious witch hat shapes, providing a delightful chocolate crunch.
Small Yellow Candy Decorations: The perfect whimsical touch for the witch hat buckle, adding a pop of color and charm.
Extra Festive Flourishes
Assorted Small Chocolate Candies (e.g., M&Ms): For scattering around the finished brownies, adding color, texture, and an extra layer of fun to your presentation.
Essential Tools for Your Spooky Baking Adventure
Having the right tools on hand will make preparing your Halloween Witch Hat Brownies a smooth and enjoyable process.
8×8 inch baking pan
Parchment paper (with overhang)
Microwave-safe bowls
Large mixing bowls
Whisk and rubber spatula
Electric mixer (handheld or stand mixer for frosting)
Piping bags with round tips (for frosting and chocolate hats)
Wire cooling rack
Parchment-lined baking sheet
For a perfect pairing, try our Mastering Dark Chocolate Cherry Brownies: The Anti-Soggy Method.
Toothpicks
Your Detailed Path to Perfect Halloween Witch Hat Brownies
Follow these steps closely to ensure your brownies are incredibly fudgy and your witch hats are perfectly spooky.
- Prepare Your Pan & Preheat Oven:
Line an 8×8 inch baking pan with parchment paper, ensuring a generous overhang on two sides for effortless brownie removal. This parchment sling makes lifting the cooled brownies out incredibly simple. Preheat your oven to 350°F (175°C).
- Melt Chocolate and Butter Gently:
In a microwave-safe bowl, combine the unsalted butter and chopped unsweetened chocolate. Heat in short 30-second intervals, stirring thoroughly after each, until the mixture is smooth and fully melted. Allowing it to cool slightly is crucial, as hot chocolate can scramble the eggs in the next step.
- Whisk in Sugar & Eggs:
In a large bowl, vigorously whisk the slightly cooled chocolate mixture with the granulated sugar until well combined. This step helps dissolve the sugar and starts building structure. Beat in the eggs one at a time, ensuring each is fully incorporated before adding the next, then stir in the vanilla extract for a deep, aromatic flavor.
- Fold in Dry Ingredients Carefully:
Gently fold the all-purpose flour and salt into the wet mixture until just combined. Exercise caution not to overmix, as this develops gluten and can lead to a cakey texture instead of the desired fudginess. Stop mixing as soon as no dry streaks of flour are visible.
- Bake for Optimal Fudginess:
Pour the brownie batter into the prepared pan and spread it evenly. Bake for 20-25 minutes. The crucial indicator of done-ness for fudgy brownies is when a toothpick inserted into the center comes out with moist crumbs, not liquid batter; the edges should be set while the center still appears slightly underbaked and jiggles gently. Overbaking is the enemy of fudgy brownies, so err on the side of slightly underdone to maintain that luscious texture.
- Cool Completely for Dense Texture:
Remove the pan from the oven and let the brownies cool completely on a wire rack within the pan. This step is as vital as baking time for achieving that dense, fudgy texture; do not rush it. Cooling allows the brownies to finish setting and prevents them from falling apart. Once fully cool, use the parchment overhang to lift them out and cut them into even squares.
- Whip Up the Green Buttercream Frosting:
In a medium bowl, beat the softened butter until it’s light and creamy, approximately 2-3 minutes. Gradually add the powdered sugar, mixing until well combined and lump-free. Stir in the vanilla extract and milk or cream, then beat until the frosting is light and fluffy. Add green gel food coloring a few drops at a time until you achieve your desired vibrant spooky shade, ensuring thorough mixing for even color.
- Craft Your Chocolate Witch Hats:
Melt the dark chocolate chips in a microwave-safe bowl, heating in 30-second intervals and stirring until completely smooth. Spoon about a tablespoon of melted chocolate onto a parchment-lined baking sheet and spread it into a flat circle for the hat brim. Immediately pipe a small peak of chocolate in the center for the hat top and attach a small yellow candy decoration for the buckle. Repeat for all desired hats and let them set in the refrigerator for 10-15 minutes until firm and easily handled.
- Assemble Your Spooky Brownie Masterpieces:
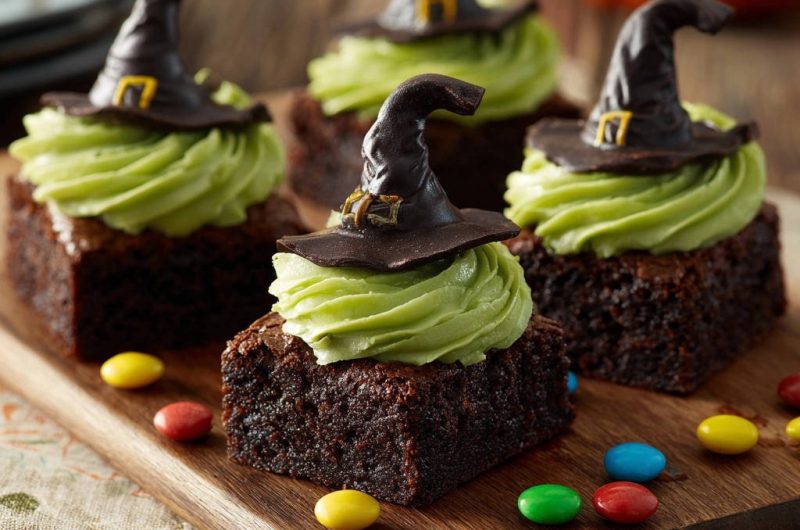
Pipe a generous swirl of the green buttercream frosting onto the center of each brownie square. Gently place a firm chocolate witch hat on top of the frosting, pressing lightly to secure. Arrange your completed Halloween Witch Hat Brownies on a serving platter and scatter with assorted small chocolate candies for an extra festive touch and added crunch.
Chef’s Secrets: Elevating Your Witch Hat Brownies
These expert tips will help ensure your Halloween Witch Hat Brownies are a show-stopping success.
Mind the Melted Chocolate Temperature: When combining melted chocolate and butter with sugar and eggs, ensure the chocolate mixture has cooled slightly to lukewarm. Adding eggs to hot chocolate can scramble them, affecting your brownie’s texture and resulting in an unappealing consistency.
The “Underbaked” Brownie Philosophy: For the ultimate fudgy brownie, it’s always better to slightly underbake than overbake. A truly fudgy brownie will often seem slightly unset in the center when removed from the oven but will firm up perfectly as it cools, retaining its moist interior.
More to Try with Your Witch Hat Brownies
These rich, fudgy brownies with their chocolate base pair well with other soft, sweet treats or something savory to balance the sugar.
- If you want another gooey chocolate experience, these Ultra-Gooey Chocolate Cinnamon Rolls share the same indulgent, soft texture and cocoa flavor.
- For a savory contrast to all that sweetness, serve the brownies alongside a batch of Southern Biscuits and Mushroom Gravy for a hearty, earthy counterpoint.
Patience is Key for Cooling: Resist the urge to cut into warm brownies! Cooling completely allows the brownies to finish setting, resulting in that dense, chewy texture and clean cuts. Warm brownies will be gooey, messy, and tend to fall apart, making neat squares impossible.
Perfecting Your Witch Hat Piping: For neat witch hats, use a small piping bag (or a Ziploc bag with a tiny corner snipped) for both the brim and the peak. Work quickly with the melted chocolate as it sets fast, especially when cold, to achieve clean lines and defined shapes.
Gel Food Coloring for Best Results: Opt for gel food coloring over liquid for your buttercream. Gels are more concentrated, delivering vibrant color without thinning out your frosting’s perfect consistency, ensuring a stable and pipeable texture.
Common Questions About Halloween Witch Hat Brownies
Can I prepare these Halloween Witch Hat Brownies in advance?
Yes, absolutely! The brownie base can be baked 2-3 days ahead and stored airtight at room temperature. The frosting can be made a day in advance and refrigerated, then re-whipped to fluffiness just before assembly. The chocolate hats can also be made several days ahead and kept in an airtight container in the fridge, ready for assembly. For other make-ahead chocolate treats, our chocolate crumb cheesecake bars are also fantastic.
What’s the best way to store leftovers?
Store assembled Halloween Witch Hat Brownies in an airtight container at room temperature for up to 3 days, or refrigerate for up to 5 days. For optimal texture and flavor, allow refrigerated brownies to come closer to room temperature before serving, as this enhances their fudginess.
My brownies turned out cakey, what went wrong?
Cakey brownies are typically a result of overmixing the flour, which develops too much gluten, or overbaking. Ensure you fold the flour in just until no dry streaks remain and pull the brownies from the oven when the center still looks slightly underdone with moist crumbs on a toothpick.
Can I customize the frosting color or hat design?
Of course! While green frosting and classic black hats are spooky staples, feel free to use purple, orange, or even black frosting for a different vibe. You could also experiment with different candy “buckles” or sprinkle colors for unique hats, letting your creativity shine.
Are there any gluten-free alternatives for this recipe?
You can often substitute a good quality 1:1 gluten-free all-purpose flour blend for the regular flour in the brownie recipe. Ensure your blend contains xanthan gum for structure, which helps mimic the elasticity of gluten. For the most reliable results, choose a blend specifically designed for baking applications like brownies.
Troubleshooting Your Halloween Witch Hat Brownies
Problem: My brownies are dry and crumbly.
Solution: The most common culprit for dry brownies is overbaking. Aim for that slightly underdone look in the center and moist crumbs on a toothpick when checking for doneness. Additionally, double-check your liquid and fat measurements to ensure they are accurate, as too little can also lead to dryness.
Problem: The buttercream frosting is either too thin or too thick.
Solution: If your frosting is too thin, gradually beat in more powdered sugar, a tablespoon at a time, until it reaches the desired pipeable consistency. If it’s too thick, add milk or cream in small increments (half a teaspoon at a time) until it’s smooth and spreadable. The temperature of your butter also affects this, so ensure it’s properly softened but not melted.
Problem: The chocolate witch hats are breaking easily.
Solution: Fragile hats usually indicate the chocolate wasn’t thick enough when piped or wasn’t fully set. Ensure your chocolate is firm by chilling it thoroughly in the refrigerator for at least 10-15 minutes. For more robust hats, you can create a slightly thicker base and peak when piping the chocolate.
Share Your Spooky & Delicious Creations!
You’re now fully equipped to bake a batch of the most fudgy, chewy, and utterly adorable Halloween Witch Hat Brownies! This recipe promises not only a delectable treat but also a fun, festive activity that brings smiles and spooky cheer to any gathering.
We absolutely love seeing your culinary triumphs! Please share photos of your festive Halloween Witch Hat Brownies on social media and tag us, or leave a comment below to tell us how they turned out. Happy haunting and happy baking!
Brownies
Course: DessertCuisine: AmericanDifficulty: medium12
brownies1
hour25
minutes150
kcal180
minutesAchieve incredibly fudgy, dense brownies with a perfect chew for Halloween. This recipe guides you to a rich, delicious brownie base, topped with vibrant green buttercream and adorable chocolate witch hats, making your spooky celebrations extra special and simple to create.
Ingredients
For the Fudgy Brownies:
1/2 cup (113g) unsalted butter
4 ounces (113g) unsweetened chocolate, chopped
1 1/2 cups (300g) granulated sugar
2 large eggs
1 teaspoon vanilla extract
1/2 cup (60g) all-purpose flour
1/4 teaspoon salt
For the Green Buttercream Frosting:
1/2 cup (113g) unsalted butter, softened
2 cups (240g) powdered sugar
1/4 teaspoon vanilla extract
1 tablespoon milk or cream
Green gel food coloring
For the Chocolate Witch Hats:
4 ounces (113g) dark chocolate chips or chopped chocolate
Small yellow candy decorations (like small M&Ms or sprinkles)
For Decoration:
Assorted small chocolate candies (like M&Ms)
Directions
- Prepare Brownies: Preheat oven to 350F (175C). Line an 8×8 inch baking pan with parchment paper, leaving an overhang on two sides for easy removal.
- In a microwave-safe bowl, melt butter and chopped unsweetened chocolate together. Heat in 30-second intervals, stirring until smooth. Let cool slightly.
- In a large bowl, whisk together the cooled chocolate mixture and granulated sugar until well combined. Beat in the eggs one at a time, then stir in the vanilla extract.
- Fold in the all-purpose flour and salt until just combined. Do not overmix; overmixing develops gluten and can lead to cakey brownies instead of fudgy ones.
- Pour batter into the prepared pan and spread evenly.
- Bake for Fudginess: Bake for 20-25 minutes. This is the critical step for achieving a truly fudgy brownie. The brownies are done when a toothpick inserted into the center comes out with moist crumbs, not clean. The edges should be set but the center should still look slightly underbaked and jiggle a little when gently shaken. Overbaking is the enemy of fudgy brownies, so err on the side of slightly underdone.
- Cool Completely: Remove from oven and let cool completely in the pan on a wire rack. Cooling is just as important as baking time for achieving that dense, fudgy texture. Do not rush this step. Once completely cool, lift out of the pan using the parchment paper overhang and cut into squares.
- Make Frosting: In a medium bowl, beat softened butter until creamy. Gradually add powdered sugar, mixing until combined. Add vanilla extract and milk or cream, then beat until light and fluffy. Add green gel food coloring a few drops at a time until desired shade is reached.
- Make Witch Hats: Melt dark chocolate chips in a microwave-safe bowl in 30-second intervals, stirring until smooth. Spoon about 1 tablespoon of melted chocolate onto a parchment-lined baking sheet and spread into a flat circle for the brim. Immediately pipe a small peak of chocolate in the center of the brim for the hat top. Attach a small yellow candy decoration for the buckle. Repeat for desired number of hats. Let set in the refrigerator for 10-15 minutes until firm.
- Assemble: Pipe a swirl of green frosting onto each brownie square. Gently place a set chocolate witch hat on top of the frosting. Arrange on a serving platter and scatter with assorted small chocolate candies for extra decoration.
Notes
- For incredibly fudgy brownies, be careful not to overmix or overbake, and ensure they cool completely before frosting and serving.