Sticky Sweet & Savory Chicken Wings: Crispy, Never Soggy!
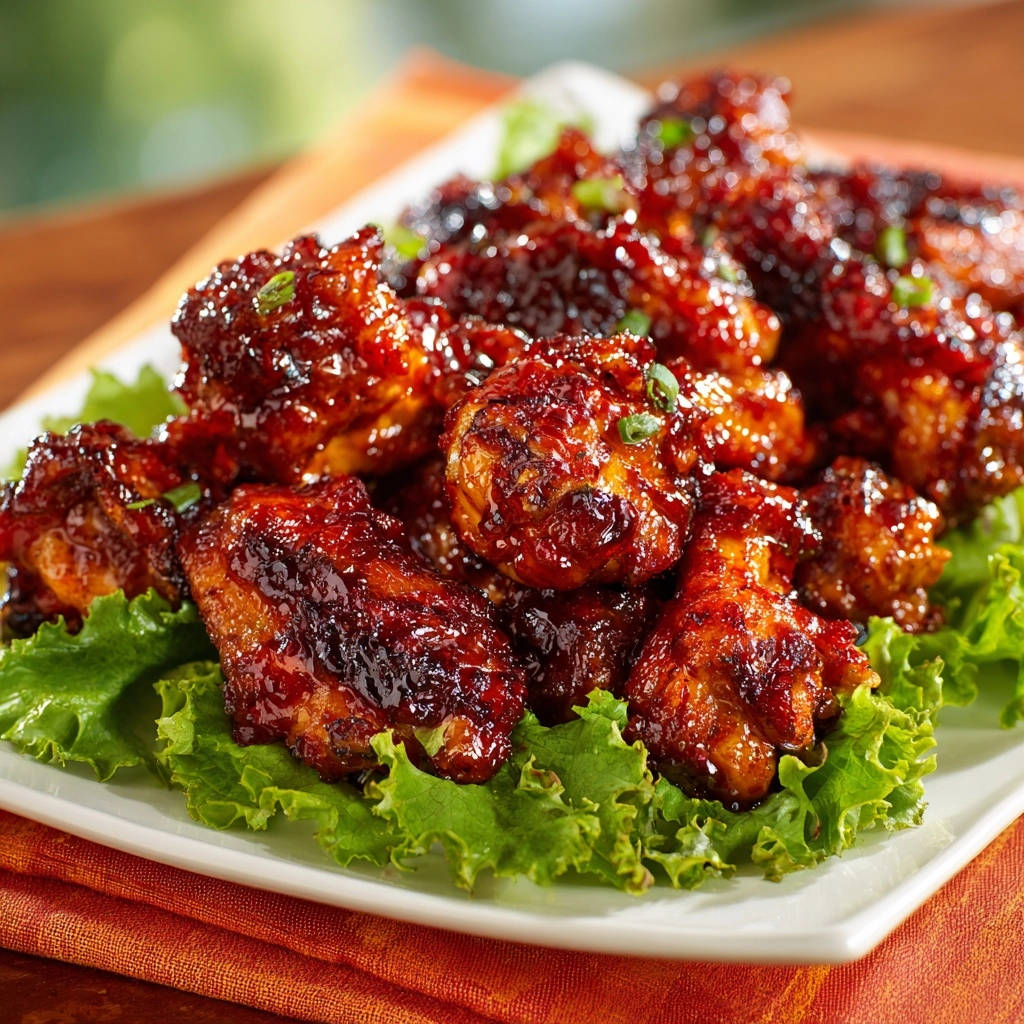
I used to struggle with glazed chicken wings, often ending up with a delicious sauce but disappointingly soft skin. It felt like a culinary battle I couldn’t win, until I perfected this method for truly crispy, Sticky Sweet & Savory Chicken Wings.
This recipe ensures every bite is met with an irresistible crunch, enveloped in a perfectly caramelized, sweet and savory glaze that clings beautifully. Get ready to elevate your wing game and impress everyone at your next gathering with these show-stopping Sticky Sweet & Savory Chicken Wings.
Why This Recipe is Your New Wing Obsession
The “Never Soggy” Secret Unveiled
Our unique two-stage baking process is the key to preventing sogginess. It guarantees a foundational crispness before the sauce is even introduced.
This technique locks in that coveted crunch, ensuring your Sticky Sweet & Savory Chicken Wings stay perfectly textural.
A Glaze That Truly Clings and Caramelizes
The carefully balanced glaze is simmered to the ideal consistency, allowing it to coat each wing beautifully. A final high-heat bake caramelizes the sugars, creating a glossy, sticky finish.
This isn’t just a sauce; it’s a flavor adhesive that becomes one with the crispy skin.
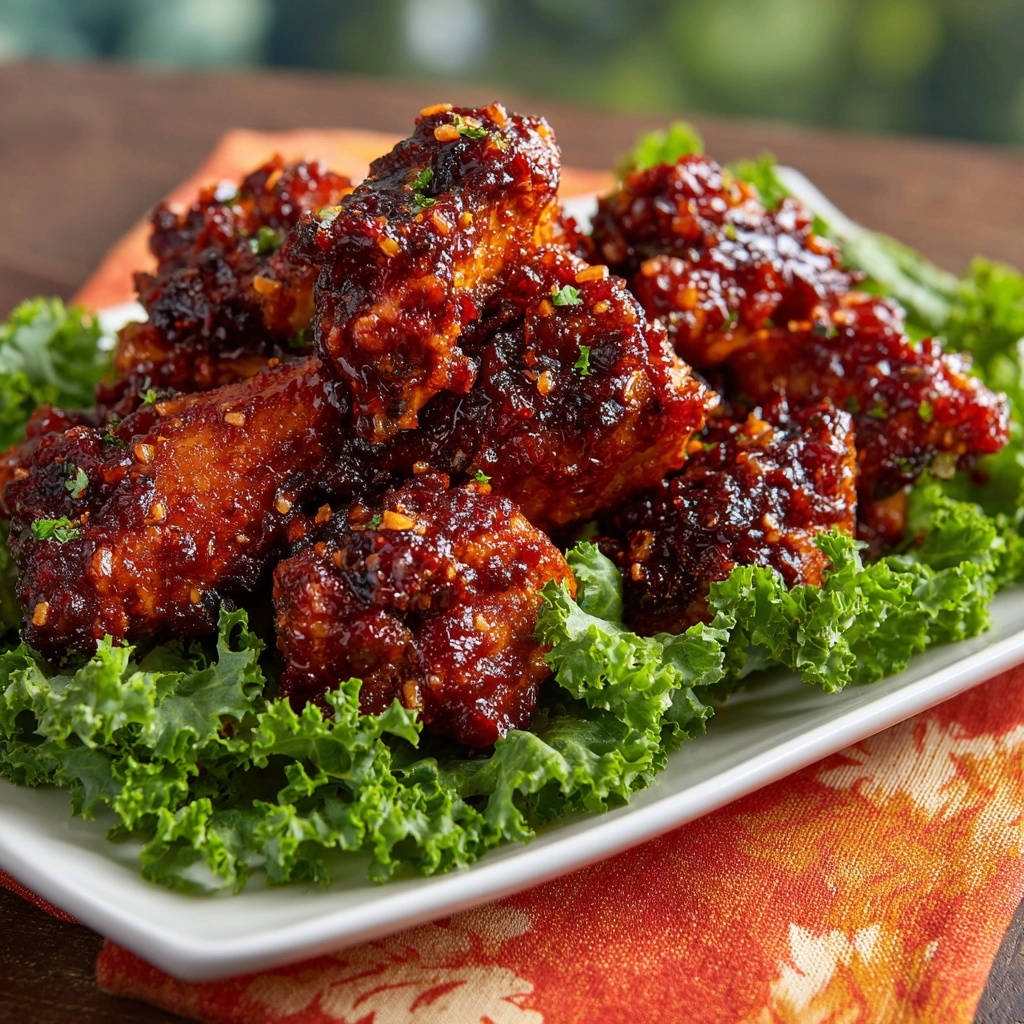
Flavor Balance: Sweet, Savory, and a Hint of Heat
The interplay of honey, brown sugar, soy sauce, and fresh aromatics creates a harmonious taste profile. Rice vinegar adds a crucial tangy counterpoint.
For the crispiest results with that same sticky glaze, try these crispy glazed chicken wings.
Optional red pepper flakes introduce a subtle warmth, completing the irresistible profile of these sweet and savory chicken wings.
Essential Gear for Perfect Wings
Your Crispy Wing Toolkit
Large Baking Sheet: Crucial for spreading wings in a single layer without crowding.
This allows for even cooking and browning.
Oven-Safe Wire Rack: Absolutely essential for air circulation around each wing.
This ensures all sides get crispy, preventing the bottom from becoming soggy.
Parchment Paper or Foil: Makes cleanup a breeze, especially with sticky glazes.
It also protects your baking sheet from drips and burnt-on sugars.
Large Mixing Bowls: You’ll need one for seasoning the raw wings and another for tossing the cooked wings with the glaze.
Ample space prevents mess and ensures even coating.
Small Saucepan & Whisk: Necessary for simmering the glaze ingredients.
The whisk ensures everything dissolves smoothly and prevents sticking.
Tongs: Perfect for flipping wings during baking and tossing them gently in the glaze.
They provide control and keep your hands clean.
The Core Ingredients for Irresistible Sticky Sweet & Savory Chicken Wings
The Foundation: Fresh Chicken Wings
Start with fresh, high-quality chicken wings, preferably separated into drumettes and flats. This ensures uniform cooking.
The quality of your wings directly impacts the final texture and taste of your Sticky Sweet & Savory Chicken Wings.
Mastering the Seasoning Blend
A simple yet effective blend of salt, black pepper, and garlic powder forms the base flavor. This penetrates the chicken during the initial bake.
The seasoning enhances the chicken’s natural taste, creating a delicious foundation before the glaze is even applied.
Crafting the Signature Sticky Glaze
Soy Sauce (low sodium): Provides the essential savory umami depth without excessive saltiness.
Honey & Brown Sugar: These are the twin pillars of sweetness, contributing to the sticky texture and rich caramelization. They create that signature sticky finish.
Rice Vinegar: A touch of acidity is crucial to balance the sweetness and cut through the richness, brightening the overall flavor profile.
Grated Fresh Ginger & Minced Garlic: These aromatics infuse the glaze with pungent, fresh flavors, adding complexity and warmth.
Red Pepper Flakes: An optional but highly recommended addition for a subtle, pleasant kick that elevates the sweet and savory chicken wings.
The Finishing Touch: Green Onions
Fresh chopped green onions add a vibrant color, a fresh, mild oniony bite, and a crucial aromatic lift.
They provide a beautiful contrast and enhance the overall presentation of your Sticky Sweet & Savory Chicken Wings.
Step-by-Step: Your Guide to Crispy, Sticky Sweet & Savory Chicken Wings
- Prep for Unrivaled Crispness:
Preheat your oven to 400°F (200°C) and set up your baking sheet with a wire rack. This arrangement allows hot air to circulate freely around each wing.
Pat the chicken wings incredibly dry with paper towels; moisture is the enemy of crispiness. Then, toss them in a large bowl with salt, black pepper, and garlic powder until perfectly coated.
- The First Bake: Developing That Golden Crunch:
Arrange the seasoned wings in a single layer on the wire rack, ensuring they have plenty of space and don’t touch. This prevents steaming and encourages even crisping.
Bake for 30 minutes, then flip them over and continue baking for another 20-30 minutes, or until they’re beautifully golden brown and truly crispy. This crucial step renders fat and sets the foundational crunch before the glaze.
- Simmering the Irresistible Glaze:
While the wings are baking, combine the soy sauce, honey, brown sugar, rice vinegar, grated ginger, minced garlic, and red pepper flakes (if using) in a small saucepan.
Bring the mixture to a simmer over medium heat, stirring consistently, until the brown sugar has fully dissolved and the sauce has slightly thickened, which usually takes about 5 minutes. Remove the finished glaze from the heat.
- Tossing the Wings in Their Sticky Bath:
Once the wings emerge from their first bake, perfectly crispy, carefully transfer them to a large, clean mixing bowl. Pour the prepared, slightly cooled glaze over them.
Gently toss the wings using tongs, ensuring every single piece is thoroughly and evenly coated in the sweet and savory glaze. The pre-crisped skin will hold up wonderfully.
- The Final Bake: Setting the Glaze to Perfection:
Return the glazed wings to the wire rack on the baking sheet, again ensuring they are in a single layer. Increase your oven temperature to 425°F (220°C).
Bake for an additional 8-12 minutes. During this stage, the glaze will bubble, caramelize beautifully, and cling tightly to the wings. Watch them closely during this final bake to prevent any burning.
- Serving Your Sticky Sweet & Savory Chicken Wings Masterpiece:
Carefully remove the wings from the oven and let them rest on the wire rack for just a minute or two. This allows the glaze to set slightly more.
Transfer them to a serving platter and garnish generously with fresh chopped green onions for a pop of color and freshness. Enjoy your perfectly crispy, sweet and savory chicken wings!
Chef’s Secrets for Next-Level Sticky Sweet & Savory Chicken Wings
The Power of the Pat Dry
This is arguably the most important step for crispy wings. Any residual moisture creates steam, which leads to soggy skin instead of a crisp exterior.
This same drying method is what gives these sticky garlic ginger wings their signature crisp.
Spend an extra minute or two ensuring each wing piece is as dry as possible with paper towels.
Don’t Crowd the Rack
Overcrowding prevents air from circulating properly, causing the wings to steam rather than crisp. Give each wing its personal space on the wire rack.
If you have too many wings, use two baking sheets and rotate them halfway through baking for even results.
Watch Your Glaze: Prevent Burning!
Sugary glazes can go from perfectly caramelized to burnt very quickly, especially in the final high-heat bake. Stay vigilant.
If you notice the glaze browning too fast, you can reduce the heat slightly or even remove them a minute or two early.
Customize Your Kick with Red Pepper Flakes
The specified amount provides a mild background warmth. If you love heat, feel free to increase the red pepper flakes in the glaze.
For a milder experience, you can omit them entirely without compromising the core sweet and savory flavor.
Experiment with Vinegars
While rice vinegar is preferred for its mild tang, apple cider vinegar can be a good substitute. It offers a slightly fruitier and bolder acidity.
Feel free to experiment with what you have on hand, understanding it might subtly alter the glaze’s brightness.
Troubleshooting Common Wing Woes
Why Are My Wings Soggy?
The most common culprit is insufficient drying before baking or overcrowding the baking sheet. Moisture and lack of air circulation are your enemies.
Always pat wings very dry and ensure they are arranged in a single layer with space between each piece on the wire rack.
My Glaze Isn’t Sticky Enough
This usually means the glaze wasn’t simmered long enough to thicken. The sugars need to dissolve and reduce slightly to create that characteristic stickiness.
Ensure it simmers for at least 5 minutes, or until it coats the back of a spoon. The final high-heat bake will further caramelize it.
The Glaze Burned Quickly!
Sugars in the glaze can burn fast, especially at 425°F. Your oven might run hotter, or the wings were baked slightly too long.
Keep a very close eye on them during the final bake, and don’t hesitate to remove them as soon as the glaze is bubbly and caramelized to your liking.
Wings Lacking Flavor Depth
Ensure your wings are well-seasoned with salt, pepper, and garlic powder before the first bake. This base layer is crucial.
For the glaze, use fresh ginger and garlic, as dried versions won’t provide the same vibrant punch that defines these Sticky Sweet & Savory Chicken Wings.
Elevate Your Experience: Serving & Pairing Suggestions
Perfect Sides for Sticky Sweet & Savory Chicken Wings
These sweet and savory chicken wings pair beautifully with refreshing, cooling sides to balance their richness. A crisp Asian-inspired coleslaw is an excellent choice.
Other great options include fluffy steamed jasmine rice to soak up extra sauce, a simple green salad with a light vinaigrette, or roasted broccoli for a hint of char.
What to Serve Next
If you enjoyed these sticky, savory chicken wings, here are two more chicken-based recipes that share a similar balance of sweet heat and crispy texture.
- For a lighter option with the same sweet-spice kick, try this Sweet and Spicy Chicken Salad – it uses a similar glaze but in a cool, crunchy format.
- When you want another sticky, caramelized bite, these Sticky Glazed Teriyaki Meatballs offer the same crisp exterior and glossy sauce, perfect for game day or a quick dinner.
Drink Pairings That Hit the Spot
For beverages, an ice-cold light lager or a crisp, dry sparkling cider beautifully complements the sweet and savory notes.
Alternatively, a chilled glass of unsweetened iced tea or sparkling water with a slice of lime offers a refreshing contrast to the richness of the wings.
Make-Ahead & Storage Tips
Prepping Ahead: Your Future Self Will Thank You
You can prep the wings by separating, patting dry, and seasoning them up to 24 hours in advance. Store them uncovered on a wire rack in the fridge to further dry out the skin.
The glaze can also be made a day or two ahead and stored in an airtight container in the refrigerator. Reheat gently before using.
Storing Leftover Sticky Sweet & Savory Chicken Wings
Allow any leftover Sticky Sweet & Savory Chicken Wings to cool completely before transferring them to an airtight container.
They can be stored in the refrigerator for up to 3-4 days, maintaining their delicious flavor.
Reheating for Optimal Crispness
To revive the crispness, reheat leftover wings in a preheated oven or air fryer at 350°F (175°C) for about 10-15 minutes.
Avoid the microwave, as it will make them soggy. A quick blast of dry heat is key to regaining that texture.
Your Sticky Sweet & Savory Chicken Wings Questions Answered (FAQs)
Can I use frozen wings?
Yes, but ensure they are fully thawed in the refrigerator overnight before proceeding. Thoroughly pat them dry, even more so than fresh wings, to achieve the desired crispness.
What if I don’t have a wire rack?
While a wire rack is highly recommended for optimal crispness, you can still make these. Place the wings directly on a parchment-lined baking sheet, but be aware they might not get as uniformly crispy on all sides.
You’ll need to flip them more frequently to ensure even cooking and browning.
Can I make this recipe gluten-free?
Absolutely! Simply substitute tamari or a gluten-free soy sauce alternative for regular soy sauce in the glaze.
All other ingredients are naturally gluten-free, allowing you to enjoy these delicious wings safely.
How spicy are these wings?
As written, with 1/4 teaspoon of red pepper flakes, the wings have a very mild, pleasant warmth that complements the sweet and savory profile without overpowering it.
Feel free to adjust the quantity of red pepper flakes to your personal spice preference, or omit them for a no-heat version.
Can I fry or air fry these wings instead?
This recipe is specifically designed for oven-baking to achieve maximum crispness and glaze adhesion. However, the glaze can certainly be used for fried or air-fried wings.
If using a fryer, ensure the wings are fully cooked and crispy first, then toss them with the prepared warm glaze before a very quick final bake or broil (watch closely!) to set the glaze.
Ready to Transform Your Wing Game?
You now have all the tools and expertise to create truly exceptional Sticky Sweet & Savory Chicken Wings that are crispy, juicy, and coated in an utterly addictive glaze. This recipe is a game-changer, promising perfect results every single time.
Don’t just dream about perfect wings; make them a reality! Try this recipe for your next gathering or a special weeknight treat. We’d love to hear how your wings turn out, so please share your successes and any questions in the comments below.
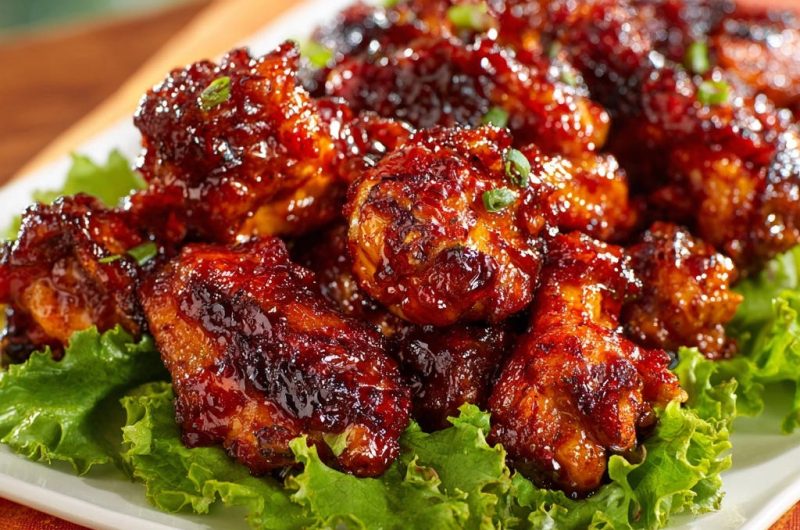
Chicken Wings
Course: Main CourseCuisine: AsianDifficulty: medium4
servings15
minutes1
hour450
kcal75
minutesDiscover the secret to perfectly crispy, sticky, and flavorful chicken wings that will be the star of any gathering. This recipe uses a clever two-bake method to ensure maximum crunch, coated in an irresistible sweet and savory glaze. Say goodbye to soggy wings and hello to guaranteed deliciousness!
Ingredients
3 pounds chicken wings (drumettes and flats separated)
1 teaspoon salt
1/2 teaspoon black pepper
1/2 teaspoon garlic powder
1/4 cup soy sauce (low sodium preferred)
1/4 cup honey
2 tablespoons brown sugar
1 tablespoon rice vinegar (or apple cider vinegar)
1 teaspoon grated fresh ginger
1 clove garlic, minced
1/4 teaspoon red pepper flakes (optional, for a little kick)
2 tablespoons vegetable oil (or olive oil)
2 tablespoons chopped green onions, for garnish
Directions
- Prep the Wings for Maximum Crispiness: Preheat your oven to 400°F (200°C). Line a large baking sheet with parchment paper or foil, and place an oven-safe wire rack on top. This is key for allowing air to circulate around the wings. Pat the chicken wings very dry with paper towels. The drier they are, the crispier they’ll get. In a large bowl, toss the wings with salt, black pepper, and garlic powder until evenly coated.
- First Bake for Crisp Perfection: Arrange the seasoned wings in a single layer on the wire rack, making sure they aren’t touching. Bake for 30 minutes. Flip the wings and bake for another 20-30 minutes, or until they are golden brown and truly crispy. This initial bake is crucial for developing that amazing crunch before the sauce is added.
- Whip Up the Sticky Glaze: While the wings are baking, prepare your glaze. In a small saucepan, combine the soy sauce, honey, brown sugar, rice vinegar, grated ginger, minced garlic, and red pepper flakes (if using). Bring the mixture to a simmer over medium heat, stirring occasionally, until the brown sugar is dissolved and the sauce slightly thickens, about 5 minutes. Remove from heat.
- Glaze and Finish Bake for Ultimate Stickiness: Once the wings are crispy from their first bake, carefully remove them from the oven. In a large clean bowl, add the cooked wings and pour the prepared glaze over them. Toss gently to ensure every wing is evenly coated.
- Set the Glaze (No More Soggy!): Return the glazed wings to the wire rack on the baking sheet. Increase oven temperature to 425°F (220°C). Bake for another 8-12 minutes, or until the glaze is bubbling, caramelized, and clinging beautifully to the crispy wings. Keep a close eye on them to prevent burning. The chicken is done when it reaches 165°F (74°C) in the thickest part.
- Serve It Up: Remove from the oven, let rest for a minute, then transfer to a serving platter. Garnish generously with fresh chopped green onions. Enjoy your perfectly crispy, sticky, and flavorful wings!
Notes
- The two-bake method and patting wings very dry are crucial for ultimate crispiness.