Thyme-Topped Baked Mac and Cheese Recipe
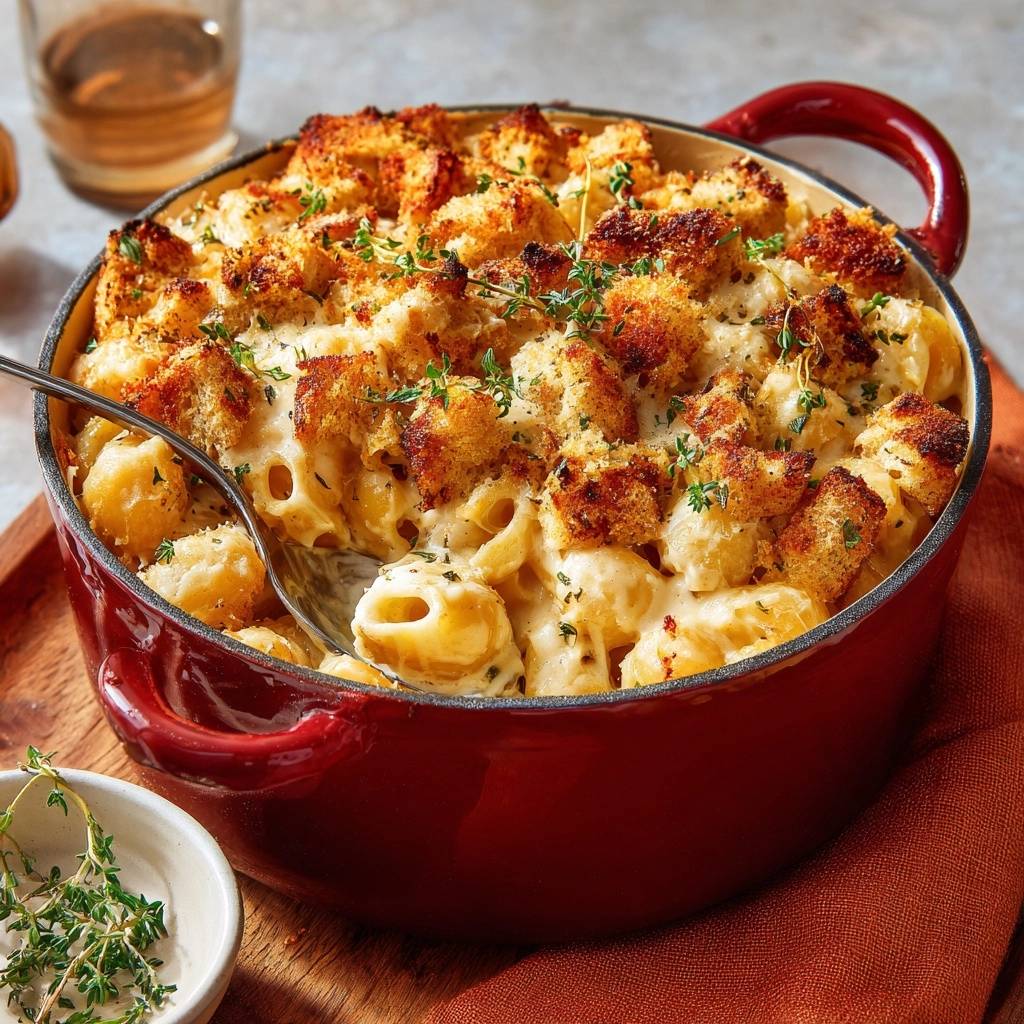
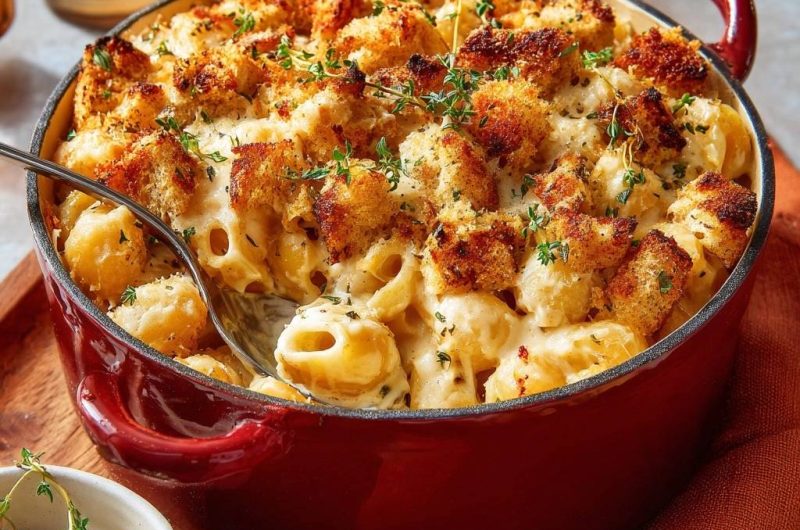
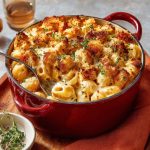
Picture this: you pull a bubbling dish from the oven, sprinkle on thyme-flecked panko, and hit the broiler. Seconds later, that topping shatters with every bite while the cavatappi below stays gooey and creamy. No more soggy disappointments. This Thyme-Topped Baked Mac and Cheese delivers crunch you can hear, all in under an hour.
So why does it work so well? Most recipes bake the topping right with the pasta, trapping steam and turning crumbs mushy. Here, you bake first to set the cheese sauce, then broil high and fast. That quick blast crisps the panko without drying out the dish below. You’ll get that perfect contrast every time.
The real secret lies in buttered panko tossed with fresh thyme. It forms just-right clumps that brown evenly under the broiler. Plus, this serves 6-8 with 30 minutes prep and 25 minutes bake. It’s your weeknight hero or gathering star. Oh man, that first forkful melts in your mouth.
Why Thyme-Topped Baked Mac and Cheese Excels
Crisp Topping vs Soggy Failures
Traditional baked mac often ends up with mushy breadcrumbs because low oven heat steams them soft. This recipe fixes that. You bake the pasta at 375°F first, then broil the panko topping separately on high.
That separation keeps the cheese sauce moist while the broiler rapidly dehydrates the crumbs for shatterproof crunch. You’ll hear it crackle, and fresh thyme releases an earthy aroma that cuts the richness. In addition, the butter in the panko browns fast without burning the pasta underneath.
Cavatappi Shape Advantages
Cavatappi’s tight spirals trap cheese sauce better than straight elbow macaroni. Those ridges hold onto the creamy béchamel, so every bite bursts with flavor. Elbow pasta lets sauce slide off too easily.
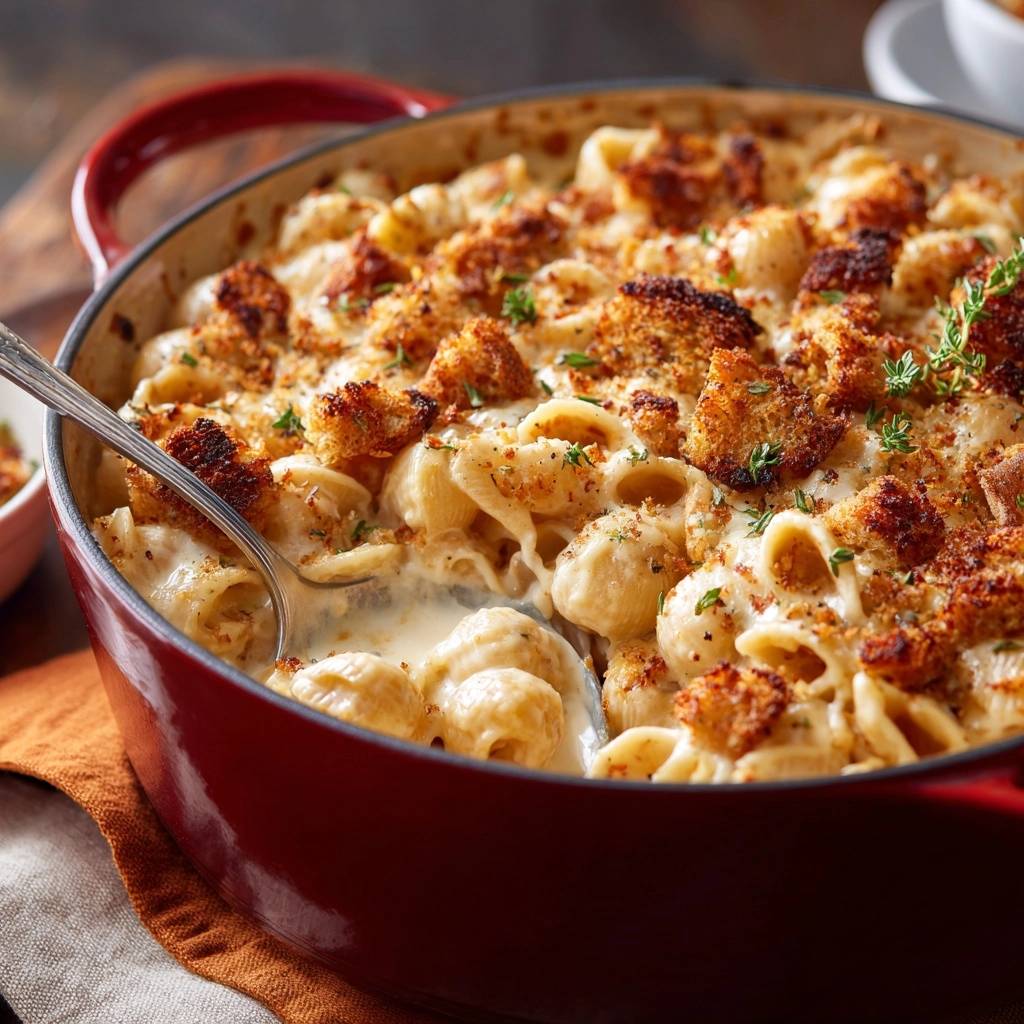
Therefore, you get gooey centers that stay saucy even after baking. Visually, the corkscrew shape creates little sauce pockets. It’s why this pasta elevates the whole dish.
Key Ingredients for Thyme-Topped Baked Mac and Cheese
Cheese and Milk Base Breakdown
Sharp cheddar brings tang and melts smoothly into 4 cups of stretchy bliss. Shred it fresh from a block; pre-shredded has starch coatings that clump. Whole milk creates a velvety sauce, unlike skim which stays thin.
Mustard powder adds umami depth without vinegar’s bite, just 1 teaspoon does the trick. In addition, it balances the richness so the sauce coats perfectly. Source quality cheese for the best pull-apart texture.
Panko, Butter, Thyme Trio
Panko beats regular breadcrumbs for lightness and crunch; its jagged flakes absorb butter without compacting. Unsalted butter keeps flavors pure, 1 tablespoon tossed with 1 cup panko and 2 tablespoons fresh thyme.
That ratio forms flavorful clumps that broil golden. Fresh thyme’s earthy punch elevates cheese, way better than dried. A little extra for garnish adds fresh green pops.
Pasta, Flour, Seasonings Essentials
One pound cavatappi cooks to al dente in 7 minutes; it firms up during baking. All-purpose flour builds a stable roux with butter. Salt and pepper season simply, 1 teaspoon and 1/2 teaspoon.
Stick to unsalted butter throughout to control taste. Fresh thyme outperforms dried by releasing oils under heat. Therefore, grab it fresh for aroma.
Science of Perfect Baked Mac and Cheese Crunch
Roux Formation and Thickening
Butter and flour cook 1 minute to cook out raw taste; starch granules swell and bind milk proteins. Whisk constantly over medium heat. Slowly add 4 cups whole milk to avoid lumps.
If you love the creamy, cheesy sauce in this baked mac, you’ll find the same rich, gooey appeal in these cheesy beef stuffed peppers.
The sauce thickens in 5-7 minutes as proteins denature for smoothness. It naps on a spoon when ready. This béchamel sets up Maillard browning later.
Broiling for Shatterproof Panko
Broil on high dehydrates panko fast, creating crisp without sogginess from low bake steam. Thyme oils volatilize for heady scent. Butter browns edges golden in 2-3 minutes.
Heat transfers directly to the top, sparing pasta below. Watch closely; it goes from perfect to burnt quick. That’s the physics of crunch.
Equipment Choices for Thyme-Topped Baked Mac
Cast Iron Pot Benefits
A 3-quart cast iron pot retains heat evenly for bubbly edges. It transitions seamlessly to broil without cracking. Grease it well to release clean slices.
Unlike glass, it won’t shatter under high broiler. Therefore, invest in cast iron for mac mastery.
Saucepan and Broiler Must-Haves
Use a heavy-bottom saucepan to prevent roux scorching. A good whisk ensures lump-free sauce. Position your oven rack near the top for broil.
Most ovens have broil elements up high. Check yours for even crisping.
Step-by-Step Thyme-Topped Baked Mac and Cheese
Prep Oven and Pasta Phase
Preheat to 375°F. Boil cavatappi in well-salted water; taste at 7 minutes for al dente bite. It should have a firm center.
Drain but don’t rinse; starch helps sauce cling. Set aside. Pro tip: salt pasta water like the sea for flavor base.
Greasing the Baking Vessel
Butter or spray your 3-quart pot generously. This prevents sticking and eases serving. Wipe excess for clean edges.
Build Creamy Cheese Sauce
Melt 3 tablespoons butter over medium. Whisk in 1/4 cup flour for 1 minute; it’ll smell nutty. Gradually pour in milk, whisking to prevent lumps.
Cook 5-7 minutes until thick and bubbling; it coats a spoon. Off heat, stir in 4 cups cheddar, mustard powder, salt, pepper until smooth. The sauce turns glossy orange.
Fold and Initial Bake
Gently fold pasta into sauce; don’t break noodles. Transfer to pot. Bake uncovered 15 minutes until edges bubble.
That same roasted, smoky edge would complement the heat in this jalapeno popper stuffed meatloaf beautifully.
Middle rack ensures even heat. Bubbles mean sauce sets perfectly.
Crisp Thyme Panko Topping
Melt 1 tablespoon butter. Toss with panko and thyme until clumpy and coated. Sprinkle evenly post-bake.
Crank to high broil. Watch every 30 seconds; it’ll golden in 2-3 minutes. Rack 4-6 inches from heat prevents burning.
Rest and Garnish Finish
Rest 5 minutes; sauce thickens. Scatter extra thyme for color and scent. Serve hot for peak crunch.
That rest prevents runny slices. Dig in quick before topping softens.
Avoiding Mistakes in Baked Mac and Cheese
Overcooking Pasta Pitfalls
Boil just to al dente; overcooked pasta turns mushy in the oven. Test by biting one piece. Set a timer at 6 minutes.
Rinsing washes away starch needed for sauce grip. Drain and go.
Roux and Broil Errors
Whisk roux nonstop to dodge lumps; add milk slow at first. For broil, keep oven door cracked if it runs hot. Check every 30 seconds.
Uneven broil? Rotate the pot. No door ajar myths; just vigilance.
Make-Ahead Guide for Thyme-Topped Mac
Assembly and Freezing Steps
Assemble unbaked up to 2 days ahead; cover and fridge. Or par-bake 15 minutes, cool, wrap in foil, freeze up to 2 months. Thaw overnight, then broil fresh.
Portion into singles for easy meals. Label with dates.
Reheating for Crisp Revival
Oven at 350°F covered 20 minutes beats microwave mush. Splash milk on top, recrisp under broil 2 minutes. Avoid nuking; it sogs the panko.
That milk hack restores creaminess.
What to Serve Alongside
A rich, creamy mac and cheese topped with thyme calls for sides that balance its texture and earthy herbs. These two recipes add variety to the table without competing with the main dish.
- For a cool, tangy contrast, try the Loaded Creamy Potato Salad — the mustard and pickle notes cut through the cheese sauce nicely.
- If you want something warm and sharable, the Spinach Artichoke Pull-Apart Bread picks up on the same creamy, baked comfort while adding
Flavor Twists on Thyme-Topped Baked Mac
Cheese Blend Variations
Swap half cheddar for Gruyere’s nutty melt or smoked Gouda for depth. Blend keeps tang. For vegan, cashew cream with nutritional yeast mimics it well.
Test small batches first.
Herb and Add-In Swaps
Rosemary replaces thyme for piney notes. Stir in broccoli florets or peas pre-bake. Add cayenne pinch for heat.
Keep add-ins small to avoid sogginess.
Pairing Sides with Thyme-Topped Mac and Cheese
Simple Green Vegetable Matches
Roast broccoli at 425°F with oil; its char cuts cheese richness. Brussels sprouts halved and crisped work too. Roast while pasta boils for synergy.
Salad and Protein Complements
Apple-fennel slaw echoes the crunch. Pair with grilled chicken breasts or turkey sausage. Acids brighten the plate.
Thyme-Topped Baked Mac Troubleshooting
Sauce Separation Fixes
Grainy cheese? Stir off heat low. Thin sauce needs extra roux next time or cornstarch slurry now. Whisk vigorously.
Topping Softness Solutions
Soggy after rest? Broil longer next time. Store uncovered briefly or recrisp under broiler. Avoid plastic wrap immediately.
Baking Unevenness Tips
Rotate pot midway if hot spots show. Use right-size dish; too big dries edges. Middle rack helps.
Common Questions on Thyme-Topped Baked Mac
Can I Use Different Pasta?
Yes, rigatoni or rotini trap sauce like cavatappi. Skip long strands like spaghetti; they tangle. Cook all to al dente.
Gluten-Free Thyme-Topped Mac?
Swap GF pasta, 1:1 flour blend like rice or almond, and GF panko. Sauce may thicken slower; cook roux longer. Tastes just as good.
How to Scale for Crowds?
Double for 9×13 pans; bake 20 minutes before broil. Freeze extra unbaked batches. Broil times stay same.
Storage and Leftover Life?
Fridge airtight up to 4 days; freezes 2 months in portions. Thaw overnight, oven reheat at 350°F covered then broil top. Keeps texture best.
Why Broil for Crisp Top?
High broil dries panko fast without steaming like baking. Gets golden Maillard in 2-3 minutes. Precision timing locks crunch.
Baked Mac and Cheese
Course: Main CourseCuisine: AmericanDifficulty: mediumYields6
servingsPrep Time20
minutesCook Time30
minutesCalories650
kcalTotal Time50
MinutesTired of baked mac and cheese where the topping turns mushy? This creamy cavatappi bake nails the perfect contrast: gooey cheese below, shatteringly crisp thyme breadcrumbs above. The secret? Buttered panko crumbs baked on high heat after the pasta sets, locking in crunch without drying the dish.
Ingredients
1 pound cavatappi pasta
4 tablespoons unsalted butter, divided
1/4 cup all-purpose flour
4 cups whole milk
4 cups shredded sharp cheddar cheese
1 teaspoon mustard powder
1 teaspoon salt
1/2 teaspoon black pepper
1 cup panko breadcrumbs
2 tablespoons fresh thyme leaves, plus extra for garnish
Directions
- Preheat oven to 375 degrees F. Grease a 3-quart cast iron pot or baking dish.
- Cook cavatappi in salted boiling water until just al dente, about 7 minutes. Drain and set aside.
- In a large saucepan over medium heat, melt 3 tablespoons butter. Whisk in flour and cook 1 minute to form roux. Slowly whisk in milk. Cook, stirring constantly, until thickened, 5 to 7 minutes.
- Remove from heat. Stir in cheddar, mustard powder, salt, and pepper until smooth. Fold in cooked pasta.
- Transfer to prepared pot. Bake uncovered 15 minutes until bubbly.
- Meanwhile, melt remaining 1 tablespoon butter. Toss with panko and thyme in a bowl until evenly coated and clumpy.
- Remove pot from oven. Sprinkle buttered panko evenly over top. Increase oven to broil on high. Broil 2 to 3 minutes, watching closely, until golden and crisp. (This high-heat flash crisps the crumbs fast without sogginess or burning the pasta below.)
- Let rest 5 minutes. Garnish with extra thyme. Serve hot for maximum crunch.
Notes
- Watch closely under the broiler to prevent burning. Use a cast iron pot for even heating and great presentation. Let rest for maximum crunch.