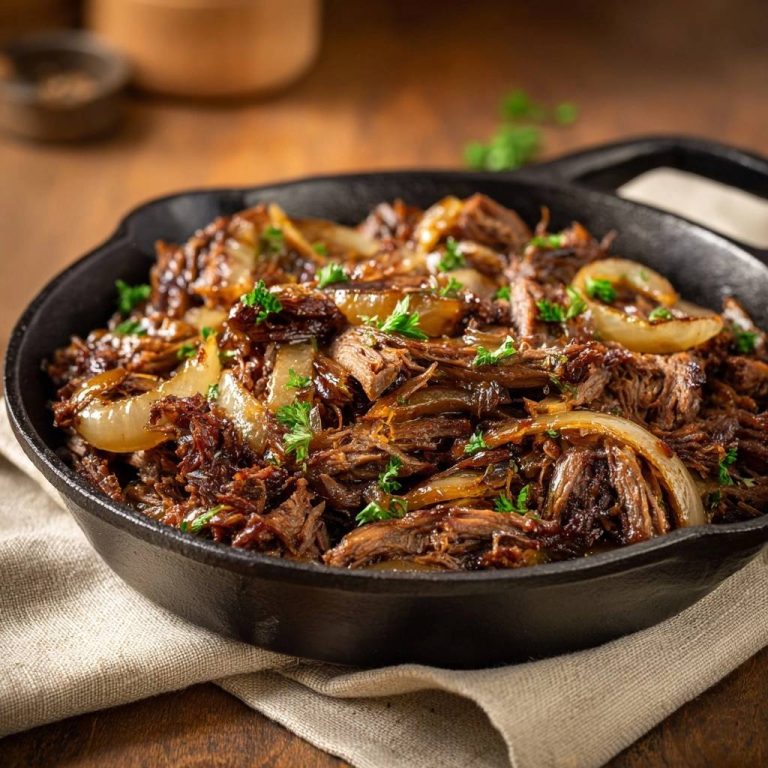
Hearty Beef & Bean Chili: Rich Flavor, Zero Fuss

For years, I chased that elusive, rich chili flavor without the all-day simmer, often ending up with a bowl that just fell flat. But through countless kitchen experiments, I cracked the code to building profound depth in a fraction of the time, transforming my homemade Hearty Beef & Bean Chili from good to truly unforgettable. This recipe isn’t just about ingredients; it’s about a specific sequence that guarantees a deeply satisfying, warming bowl perfect for any occasion.
Beyond Basic: What Makes This Chili Unforgettable?
The Secret to Layers of Deep Flavor
This recipe masterfully builds flavor through strategic cooking techniques like deep beef browning and blooming spices. These steps create a robust foundation that usually takes hours to achieve, making every spoonful rich and complex.
Quick Comfort Without Compromise
You don’t need to babysit this chili all day to enjoy an incredibly satisfying meal. We’ve optimized the process to deliver deep, developed flavors in about an hour of simmering, perfect for busy weeknights or impromptu gatherings.
Why It’s Your New Go-To Bowl of Warmth
With its straightforward steps and consistently delicious results, this Hearty Beef & Bean Chili is designed to be a reliable crowd-pleaser. It’s comforting, hearty, and effortlessly brings warmth and joy to your table, becoming an instant family favorite.
The Building Blocks: What You’ll Need for Amazing Chili
Meats & Beans: The Heart of the Dish
Lean ground beef forms the rich, savory base, while red kidney beans add essential texture and a satisfying earthiness. Opt for good quality beef for the best flavor foundation.
Aromatic Base & Veggies: Onion, Garlic, and Corn
Chopped yellow onion provides a subtle sweetness that mellows as it cooks, complementing the pungent depth of minced garlic. Sweet corn bursts with vibrant flavor and adds a delightful textural contrast to the hearty chili.

The Spice Rack Essentials: Flavor Powerhouses
Chili powder brings classic warmth and a foundational chili taste, while ground cumin adds earthy, smoky notes. Dried oregano contributes a subtle herbaceousness, rounding out the complex spice profile.
Liquid Foundation: Tomatoes & Broth
Undrained diced tomatoes contribute acidity and a chunky texture, providing the body for the chili. Beef broth ensures a rich, liquid base that allows all the flavors to meld and deepen beautifully during simmering.
Finishing Touches: Garnishes That Pop
A blend of shredded cheddar and Monterey Jack cheese offers creamy, savory notes when melted on top. Fresh cilantro brightens the dish with a zesty, herbaceous finish, perfectly complemented by a squeeze of fresh lime and crispy tortilla chips for dipping.
Kitchen Companions: Tools for Perfect Chili
Your Trusted Pot: Dutch Oven or Large Skillet
A heavy-bottomed Dutch oven or large pot is indispensable for this chili. Its even heat distribution ensures thorough browning of the beef and consistent simmering, crucial for optimal flavor development.
Prep & Stir Essentials
You’ll need a sturdy cutting board and a sharp knife for prepping the onion and garlic. A robust wooden spoon or spatula is perfect for breaking apart the beef and stirring, while a ladle makes serving your delicious chili effortless.
Crafting Your Chili Masterpiece: A Step-by-Step Guide
- Step 1: Deeply Brown the Beef.
Heat 1 tablespoon of olive oil in a large pot or Dutch oven over medium-high heat. Add 1.5 pounds of lean ground beef and cook, breaking it apart with a spoon, until it is deeply browned and caramelized on all sides.
This browning process is absolutely crucial for developing profound flavor depth in your chili, transforming it from good to truly unforgettable. Drain off any excess fat from the pot, leaving behind those delicious browned bits.
- Step 2: Soften the Aromatics.
Add the chopped large yellow onion to the pot with the browned beef. Cook over medium heat, stirring occasionally, until the onion softens and becomes translucent, about 5 to 7 minutes.
This gentle cooking allows the onions to develop a subtle sweetness, laying another essential layer of flavor into the base of your Hearty Beef & Bean Chili.
- Step 3: Bloom the Spices.
Stir in the 3 cloves of minced garlic, 2 tablespoons of chili powder, 1 tablespoon of ground cumin, and 1 teaspoon of dried oregano. Cook for just 1 minute more, stirring constantly, until the spices become incredibly fragrant.
This critical step, known as “blooming” the spices, gently toasts them in the hot oil, unlocking their full flavor potential and adding remarkable depth and warmth to the chili, making a noticeable difference in taste.
- Step 4: Combine and Simmer.
Pour in the 1 (28 ounce) can of undrained diced tomatoes, 1 (15 ounce) can of rinsed and drained red kidney beans, 1 (15 ounce) can of drained sweet corn, and 2 cups of beef broth. Stir everything together until well combined.
Bring the chili to a gentle simmer, then reduce the heat to low, cover the pot, and let it gently simmer for at least 30 minutes, or up to an hour.
This low and slow simmering time is essential for allowing all the incredible flavors to meld and deepen, creating a truly harmonious and rich chili that tastes like it cooked all day.
- Step 5: Season and Serve.
Season the chili with salt and black pepper to taste, adjusting as needed until the flavors sing. Ladle the hot chili into individual bowls.
Top generously with a blend of shredded cheddar and Monterey Jack cheese and a sprinkle of fresh chopped cilantro. Serve immediately with fresh lime wedges on the side and a generous portion of crispy tortilla chips for dipping.
Elevate Your Bowl: Chef’s Secrets for Next-Level Chili
The Power of the Sear: Maximizing Beef Flavor
Do not underestimate the importance of truly browning your ground beef until it’s deeply caramelized. This process creates a rich, umami-packed foundation, known as the Maillard reaction, which is non-negotiable for a savory, flavorful chili.
Blooming Spices: Don’t Skip This Flavor Booster
Toasting your dried spices for just a minute in hot oil before adding liquids intensifies their flavors and aromas dramatically. This “blooming” technique awakens their essential oils, resulting in a more complex and fragrant dish.
The Art of Simmering: Patience Pays Off
While this recipe is designed for quicker results, allowing your chili to gently simmer for the full 30-60 minutes significantly deepens and melds the flavors. A longer, low simmer helps all the ingredients become fully acquainted, creating a truly harmonious taste.
Balancing Flavors: Salt, Pepper, and Acidity
Seasoning throughout the cooking process is key. Always taste and adjust salt and pepper before serving. A final squeeze of fresh lime juice at the end can brighten the entire dish, cutting through the richness and making the flavors pop.
Customizing Your Chili’s Heat
If you prefer more kick, consider adding a pinch of cayenne pepper or a chopped jalapeño (seeds removed for less heat) alongside the aromatics. For a smoky heat, a dash of chipotle powder works wonders. To reduce heat, simply stick to the recipe’s chili powder measurement.
Complete the Experience: Serving Suggestions & Pairings
Classic Toppings & Creative Additions
Beyond cheese and cilantro, elevate your chili with a dollop of sour cream or Greek yogurt for creaminess. Sliced avocado, chopped green onions, a dash of your favorite hot sauce, or even crispy fried onions can add extra layers of flavor and texture to your Hearty Beef & Bean Chili.
Delicious Sides to Serve Alongside
No chili is complete without a side! Warm, fluffy cornbread is a traditional favorite for soaking up all that delicious broth. For a lighter option, a simple green salad with a vinaigrette provides a fresh contrast, or consider a vibrant side like skillet street-style corn.
For a heartier take on comfort food, try this slow-simmered beef and potato stew alongside your chili.
Beverage Pairings for a Perfect Meal
A crisp sparkling water beautifully complements the robust flavors of this beef and bean chili. For non-alcoholic options, iced tea or sparkling water with a lemon wedge are refreshing choices. If you enjoy grape juice, a medium-bodied sparkling grape juice can also stand up to the chili’s richness.
For a perfect pairing, try our Mastering Hearty Beef and Corn Chili.
Plan Ahead: Storing and Enjoying Leftover Chili
Refrigeration Guidelines
Allow your chili to cool completely before transferring it to an airtight container. It can be safely stored in the refrigerator for up to 3-4 days, making it perfect for meal prepping and enjoying throughout the week.
What to Serve Alongside
This chili is thick, beefy, and just spicy enough to call for something to soak up every last drop. A warm, soft roll or a flaky, cheesy biscuit makes the bowl feel complete.
- For tearing and dunking, these Soft Buttery Garlic Herb Dinner Rolls bring a gentle garlic-herb note that pairs well with the chili’s smoky heat.
- If you prefer a sharper, richer side, those Garlic Herb Cheddar Biscuits use a cold-grate method for a light, layered crumb that stands up to a hearty spoonful of beans and beef.
1 tablespoon olive oil
1.5 pounds lean ground beef
1 large yellow onion, chopped
3 cloves garlic, minced
2 tablespoons chili powder
1 tablespoon ground cumin
1 teaspoon dried oregano
1 (28 ounce) can diced tomatoes, undrained
1 (15 ounce) can red kidney beans, rinsed and drained
1 (15 ounce) can sweet corn, drained
2 cups beef broth
Salt to taste
Black pepper to taste
Shredded cheddar and Monterey jack cheese blend, for topping
Fresh cilantro, chopped, for topping
Lime wedges, for serving
Tortilla chips, for serving
- Heat olive oil in a large pot or Dutch oven over medium-high heat. Add the ground beef and cook, breaking it apart with a spoon, until it is deeply browned and caramelized. This browning is crucial for flavor depth. Drain off any excess fat from the pot. Cook until no pink remains and it reaches 160°F (71°C).
- Add the chopped onion to the pot with the browned beef. Cook over medium heat, stirring occasionally, until the onion softens and becomes translucent, about 5 to 7 minutes. This gentle cooking develops sweetness.
- Stir in the minced garlic, chili powder, ground cumin, and dried oregano. Cook for just 1 minute more, stirring constantly, until the spices are fragrant. This step, called blooming the spices, unlocks their full flavor potential and adds incredible depth.
- Pour in the undrained diced tomatoes, rinsed kidney beans, drained corn, and beef broth. Stir everything together. Bring the chili to a simmer, then reduce the heat to low, cover, and let it gently simmer for at least 30 minutes, or up to an hour, allowing the flavors to meld and deepen.
- Season the chili with salt and black pepper to taste. Ladle the hot chili into bowls. Top generously with shredded cheese and fresh cilantro. Serve immediately with fresh lime wedges and a side of crispy tortilla chips.
Freezing for Future Meals
This Hearty Beef & Bean Chili freezes exceptionally well! Portion it into freezer-safe containers or heavy-duty freezer bags once cooled. It will maintain its quality for up to 3 months, ready for a quick and comforting meal whenever you need it.
Reheating Tips for Optimal Taste
Thaw frozen chili in the refrigerator overnight. Reheat gently on the stovetop over medium-low heat, stirring occasionally, until warmed through. Add a splash of broth or water if it seems too thick, ensuring it retains its creamy texture and rich flavor.
Creative Ways to Use Leftovers
Transform leftover chili into new and exciting meals! Spoon it over hot dogs for classic chili dogs, mix it with macaroni for a quick chili mac, or use it as a hearty topping for baked potatoes or loaded fiesta potatoes. It also makes a fantastic filling for burritos or quesadillas.
Common Chili Questions: Quick Fixes & Solutions
Why is My Chili Bland?
Bland chili often results from inadequate seasoning or rushing the initial steps. Ensure you’re generously salting the beef during browning and tasting as you go. Crucially, don’t skip blooming your spices; this step unleashes their full flavor impact.
My Chili is Too Soupy or Too Thick!
If your chili is too soupy, simply simmer it uncovered for a bit longer to allow some liquid to evaporate and thicken naturally. If it’s too thick, stir in a little extra beef broth or water until it reaches your desired consistency.
The Spices Don’t “Pop”!
This usually points back to not “blooming” the spices in hot oil. The brief toasting step is vital for unlocking their aromatic compounds. If your chili lacks vibrant spice flavor, a quick re-bloom of a small amount of spices in a separate pan, then adding to the pot, can help.
Your Hearty Beef & Bean Chili FAQs Answered
Can I use ground turkey or chicken instead of beef?
Absolutely! Ground turkey or chicken can be used as a leaner alternative, though the flavor profile will be slightly different. Consider adding a bit of smoked paprika or an extra dash of cumin to compensate for the beef’s inherent richness.
What if I don’t have all the beans listed?
No problem! Black beans or pinto beans are excellent substitutes for red kidney beans, offering similar texture and earthy flavors. You can also omit the corn if preferred, though it does add a pleasant sweetness and texture to the chili.
Can I make this recipe in a slow cooker or Instant Pot?
Yes, with slight modifications. You’ll still want to brown the beef and bloom the spices on the stovetop first to build maximum flavor. Then, transfer all ingredients to your slow cooker and cook on low for 4-6 hours, or to an Instant Pot and pressure cook for about 20 minutes with a natural release.
How long does homemade chili last?
Homemade Hearty Beef & Bean Chili typically lasts 3-4 days when stored properly in an airtight container in the refrigerator. It often tastes even better the next day as the flavors continue to meld!
Is this chili suitable for freezing?
Yes, this chili is highly suitable for freezing! It freezes beautifully for up to 3 months without compromising flavor or texture. Just be sure to cool it completely before freezing and reheat gently.
Ready to Create Your Own Chili Masterpiece?
There you have it-your definitive guide to crafting an incredibly flavorful and truly Hearty Beef & Bean Chili that skips the all-day simmer without sacrificing an ounce of taste. This recipe promises a deeply satisfying, comforting bowl that will quickly become a cherished favorite.
Don’t just take my word for it; dive into your kitchen and experience the magic for yourself! I’d love to hear about your culinary adventures and how you make this amazing chili your own. Happy cooking!

Beef and Bean Chili
Course: Soups-StewsCuisine: AmericanDifficulty: easy6
servings15
minutes45
minutes450
kcal60
minutesThis unforgettable chili recipe takes your comfort food to the next level with layers of rich, complex flavors. Learn the crucial steps to achieve deep browning and bloomed spices for an absolutely delicious bowl every time.
Ingredients
Directions
Notes
- Browning the beef and blooming the spices are key steps for maximum flavor depth.